9
Hardware Installation
Warnings
:
•
Network cards are sensitive to static electricity. To protect the card, avoid touching its electrical
components and always touch the metal chassis of your computer before handling the card.
1.
Switch off the computer, unplug the power cord, and remove the computer’s cover.
2.
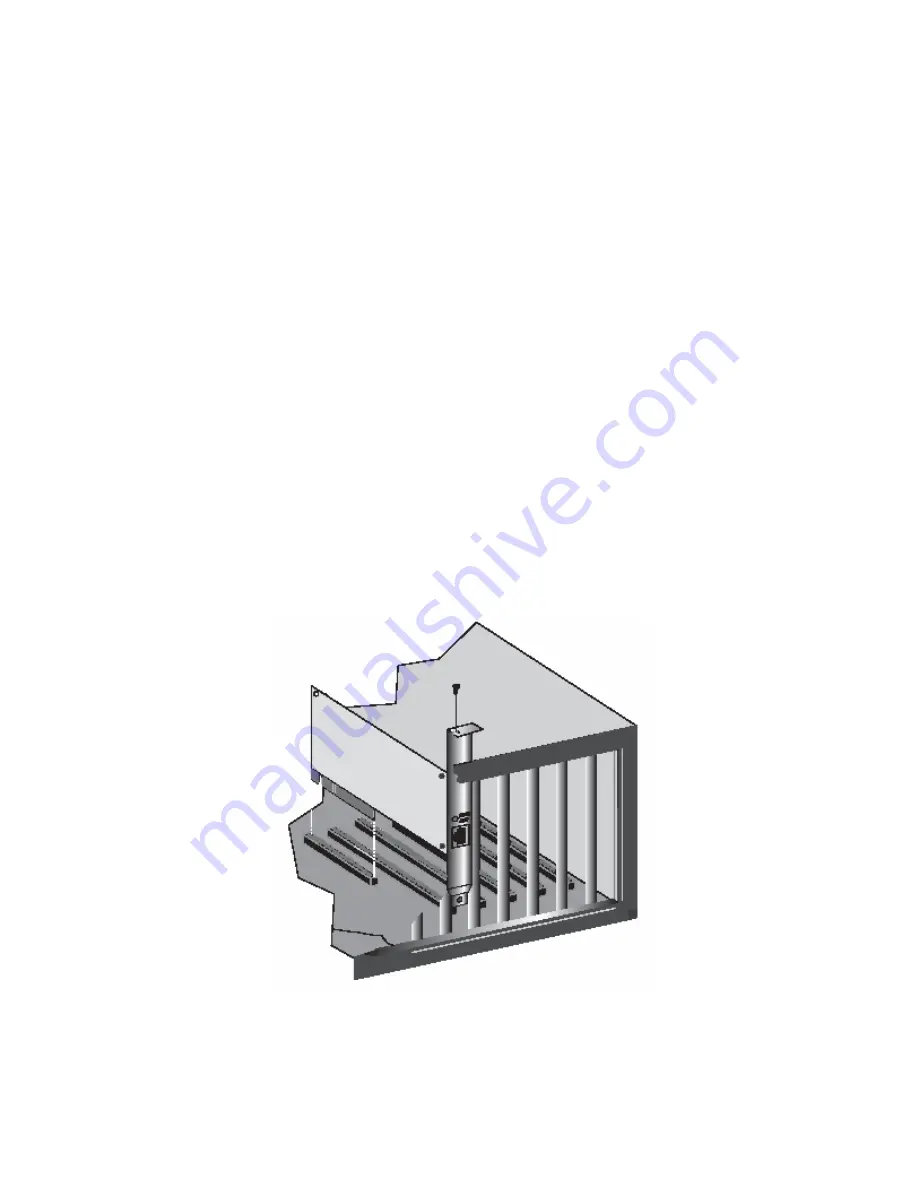
Select an unused PCI bus-master slot and remove its protective bracket.
3.
Carefully insert the card and press until all the edge connectors are firmly seated inside
the slot. Then screw the card’s bracket securely into the PC’s chassis.
4.
Connect the EZ PCI Card 10/100 directly to a 10BASE-T or 100BASE-TX hub or switch
using UTP cable (Category 3, 4 or 5 for 10BASE-T; Category 5 for 100BASE-TX). The
maximum allowable length of UTP cable connections is 100 meters (328 ft). When
inserting an RJ-45 plug, be sure the tab on the plug clicks into position to ensure that it is
properly seated.
5.
Replace the computer’s cover and power it on. The EZ PCI Card 10/100 should be
automatically configured by the host computer’s BIOS. However, if you have an older
computer, you may have to manually configure the computer’s BIOS settings. See
“Troubleshooting” on page 10.
6.
The driver & Documentation that accompanies the EZ Card 10/100 contains all the
network operating system drivers supported by this card. Please read the
“RELEASE.TXT” file on the CD for a list of all drivers. Refer to this guide for
instructions on installing drivers. Any new or updated drivers can be downloaded from
SMC’s Web site (see the back cover of this guide).


