C H A P T E R 2
Installing your SMART Audio system
10
|
1012080 Rev A1
Installing the room module
Install the room module mounting plate on the ceiling or on a ceiling tile, and then attach the
room module and the cable cover to the mounting plate.
WARNING
Take appropriate safety precautions when working at ceiling height, and use a sturdy
ladder to reduce the risk of personal injury.
Installing the room module mounting plate
Install the room module mounting plate on the ceiling or on a ceiling tile.
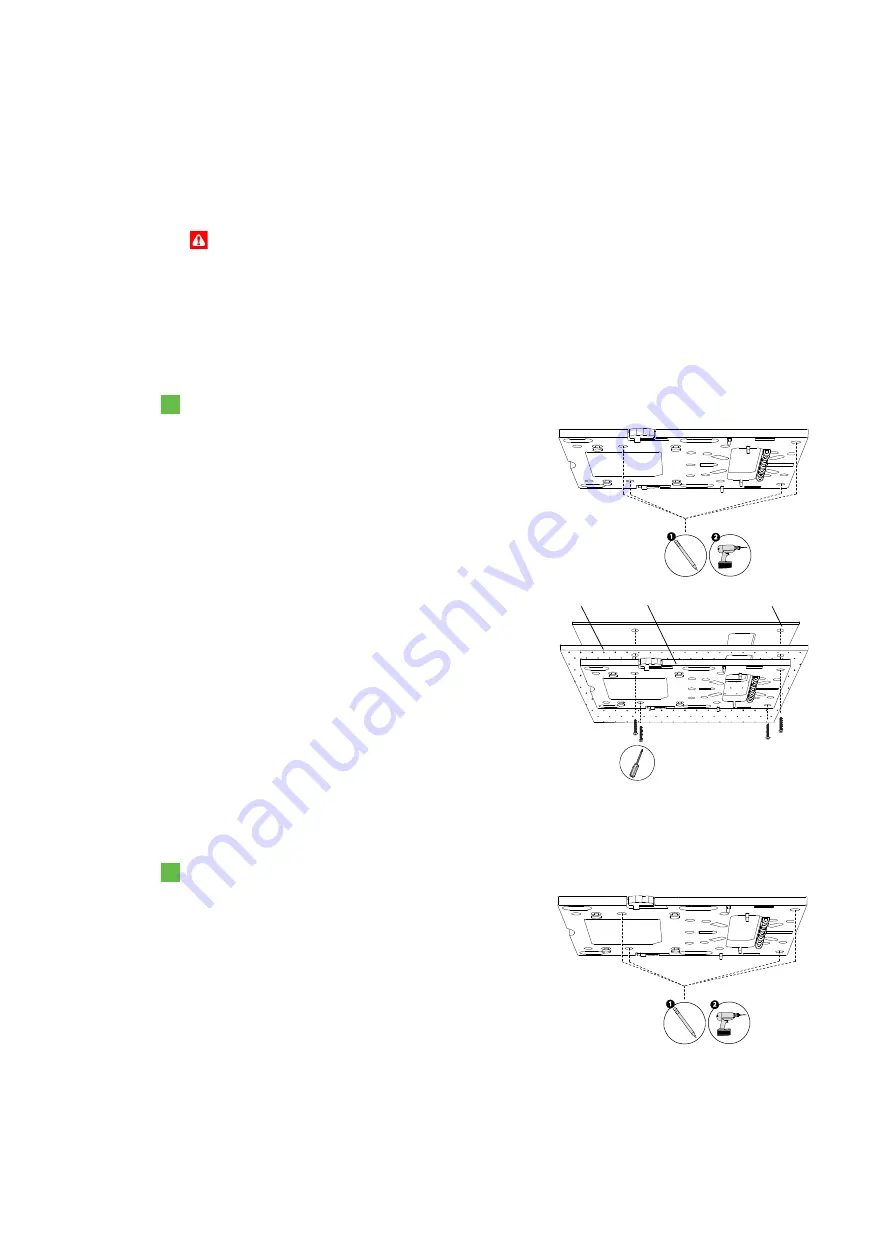
To install the mounting plate on a ceiling tile
1.
Using the room module tile bridge as a template,
mark the screw holes and the cable hole on the
ceiling tile you previously removed for the room
module.
2.
Drill the screw holes at the marks.
3.
Cut out the traced cable hole with a drywall saw.
4.
Place the ceiling tile on the mounting plate, and
then place the tile bridge on the ceiling tile,
ensuring that you align the tile bridge with the
mounting plate.
5.
Screw the included screws through the holes in
the mounting plate, the ceiling tile and the tile
bridge.
6.
Replace the ceiling tile, passing the wires and
cables through the cable hole.
To install the mounting plate directly on the ceiling
1.
Place the room module mounting plate against
the ceiling where you plan to install it, and then
mark the screw holes with a pencil.
2.
Lower the mounting plate from the ceiling, and
then drill holes at the marks.
Tile bridge
Ceiling tile
Mounting plate
Summary of Contents for Adio 340
Page 1: ...SMART Audio 340 Classroom amplification system Installation guide...
Page 4: ...ii 1012080 Rev A1...
Page 22: ...CHAPTER 2 Installing your SMART Audio system 18 1012080 Rev A1...
Page 26: ......
Page 27: ......
Page 28: ...SMART Technologies smarttech com support smarttech com contactsupport 1012080 Rev A1...


