9
|
1012080 Rev A1
C H A P T E R 2
Installing your SMART Audio system
Installing wall speakers
For each of the four speakers, install the wall speaker bracket on the wall, and then attach the
speaker to the bracket.
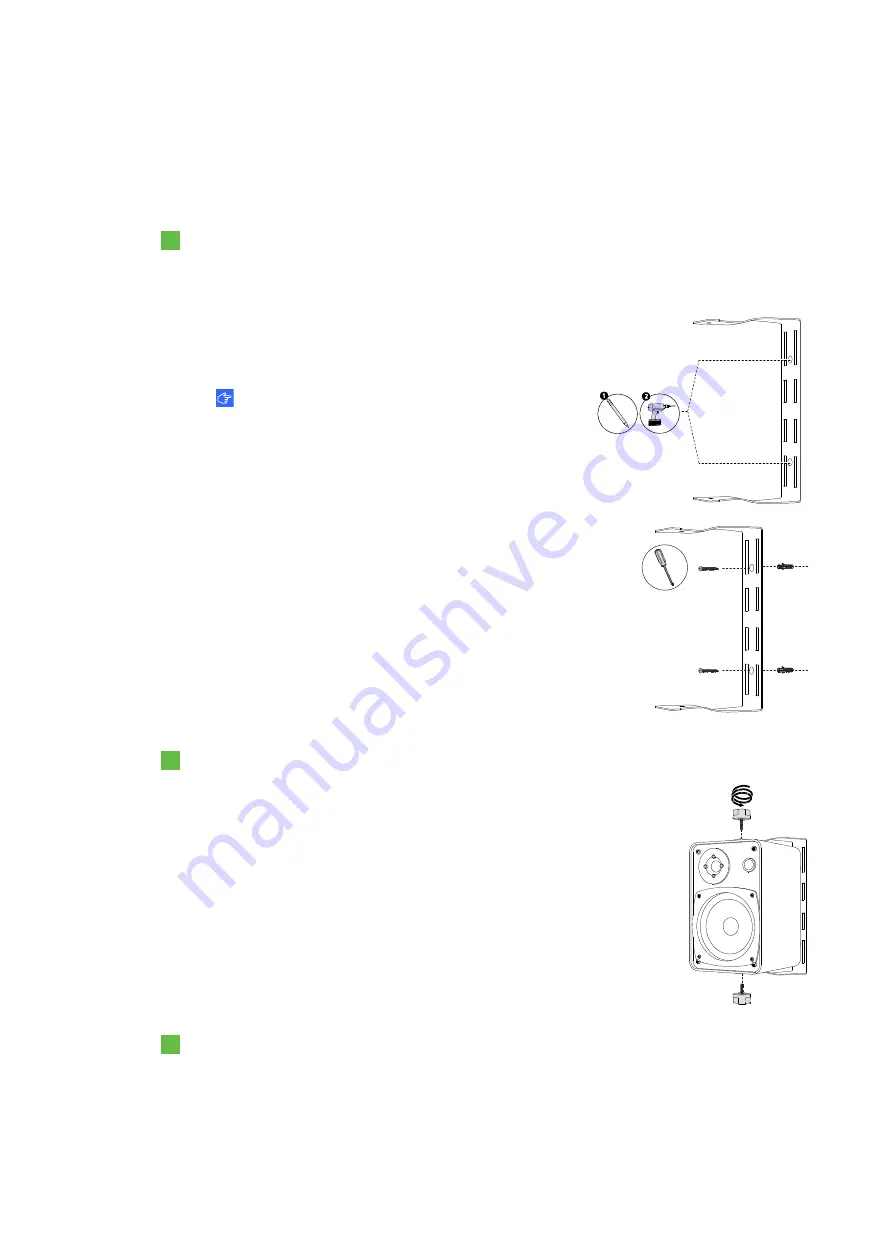
To install the wall bracket on the wall
1.
Loosen the top and bottom knobs that secure the bracket to the wall speaker, and then
remove the bracket from the speaker.
2.
Place the wall bracket against the wall where you
plan to install it, and then mark the screw holes with
a pencil.
IMPORTANT
To prevent audio feedback, install the speakers
5' (1.5 m) from the floor.
3.
Move the bracket away from the wall, and then drill
holes at the marks.
4.
Secure the bracket to the wall with the included
screws and drywall anchors.
To secure the wall speaker to the bracket
Place the wall speaker in the bracket, and then attach and
tighten the knobs to secure the speaker to the bracket.
To connect the speaker wires
Connect the positive speaker wire to the red connector on the speaker and connect the
negative speaker wire to the black connector on the speaker.
Summary of Contents for Adio 340
Page 1: ...SMART Audio 340 Classroom amplification system Installation guide...
Page 4: ...ii 1012080 Rev A1...
Page 22: ...CHAPTER 2 Installing your SMART Audio system 18 1012080 Rev A1...
Page 26: ......
Page 27: ......
Page 28: ...SMART Technologies smarttech com support smarttech com contactsupport 1012080 Rev A1...


