22
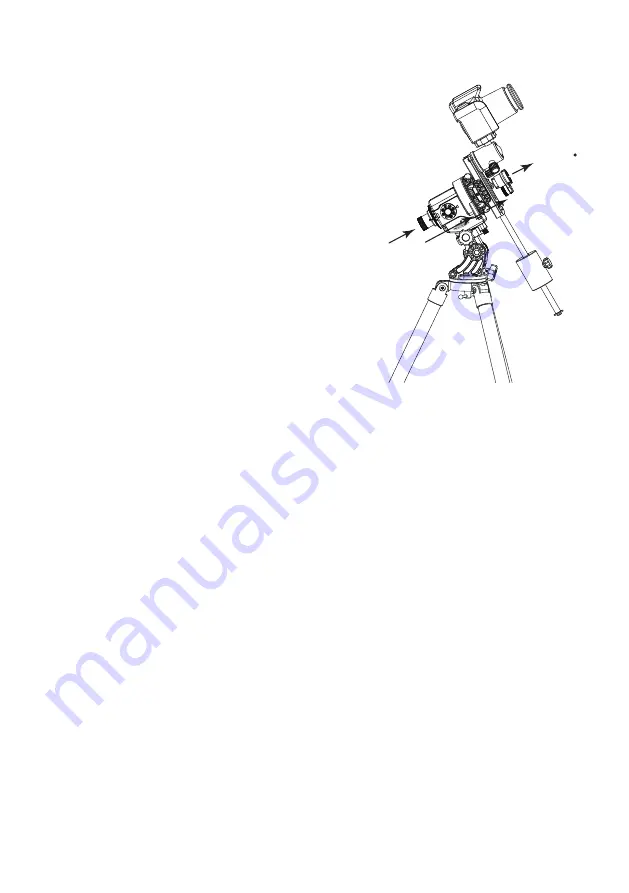
1. Set up your tripod and ensure it is stable.
2. Attach the
Equatorial Wedge
directly to your tripod via
the 3/8-inch threaded mounting hole.
3. Once the wedge is securely attached align the tripod
so that the
Altitude Adjustment Knob
is facing north.
4. Now, level your tripod using the built-in
Bubble
Level
. A leveled
Equatorial Wedge
is not a requirement
for astrophotography, but it makes subsequent
adjustments easier to make.
5. Once leveled, rotate the
Altitude Adjustment Knob
until the
Altitude Indicator
points at your latitude on the
Altitude Scale
. (The altitude of Polaris above the horizon
at your location matches your latitude). If you don’t know
your latitude you can look it up in the
Star Adventurer
mini Console
under
Settings-> Location
.
6. Attach
Mounting Assembly
, Camera, Ball Head and
Counterweight
. Loose
Clutch Knob
then adjust the
position of counterweight until it's balanced. Then Fasten
the
Clutch Knob
and remove
Polar Scope Cap
.
7. Attach
Polar Scope Illuminator
to the dove tail of
Mounting Assembly
. Adjust the
position to align it to the
Polar Scope
. This will help make the reticule pattern in the
Polar
Scope
eyepiece more visible in dark conditions. Adjust the intensity of the illuminator by
turning the dial. Make it bright enough to see the reticule pattern, but not so bright as to wash
out your view of Polaris
8. Loose
Clutch Knob
and rotate
Mounting Platform
so that In view of
Polar Scope
the
“0” label on the reticule pattern is at the12 o’clock position (i.e., at the top). When positioned
correctly 3 will be seen at the right, 6 and the bottom and 9 to the left. Then fasten
Clutch
Knob
.
9. Now, adjust
Altitude
and
Azimuth Adjustment Knobs
on the wedge so that you can see
Polaris in the field of view of the
Quick Polaris Finder
.
10. Now you should be able to see Polaris in field of view of
Polar Scope
. If not, adjust
Altitude
and
Azimuth Adjustment Knobs
until Polaris in the field of view. It can be
anywhere in the field of view at this point. You will adjust to its exact location in a moment.
11. Go to
Using the Polar Clock Utility for Polar Alignment in the Northern Hemisphere
to finish the Polar alignment procedure
12. After complete the polar alignment. Connect the SNAP camera control cable between
Star Adventurer 2i
and your camera. Point your camera at your subject, then proceed to set
up
Star Adventurer 2i
via the Star Adventurer mini Console or 6 preprogrammed function
modes.
13. You can monitor the accuracy of polar alignment during taking the astro-photos. Adjust it
if needed.
While using the optional Equatorial Wedge attached
to your tripod with Mounting Assembly:
Polaris


