SKY-WATCHER DOBSONIAN SYNSCAN Instruction Manual Download Page 13

13

11

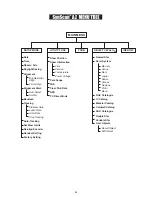
AUTOTRACKING OPERATION

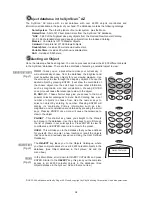
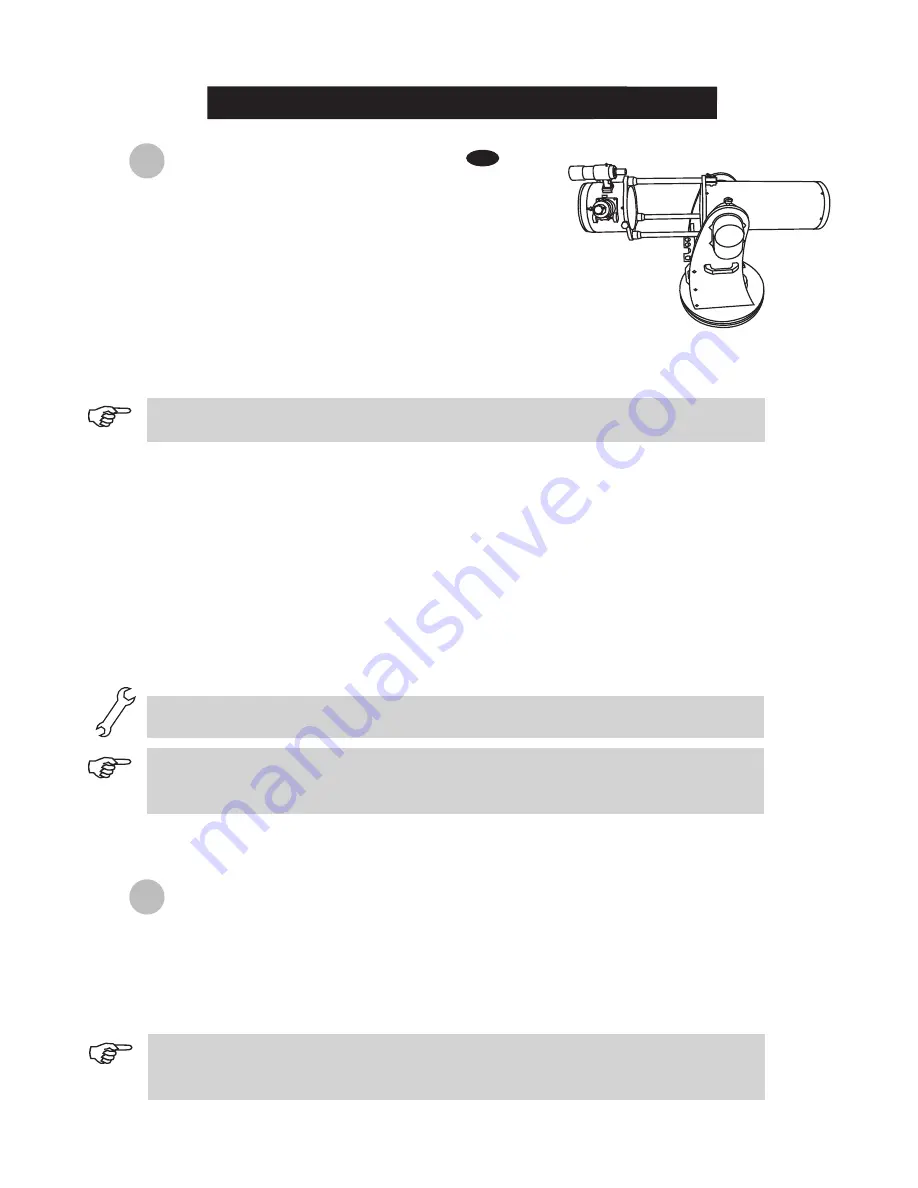
Make  sure  that  the  telescope  is  set  on  a  level 

ground. Point the telescope to the North.

Locate the altitude scale on the inside of the left side 

board.  Lower  the  telescope  tube  in  altitude  until  it 

reads 0. (Fig.h).

1.

2.

3.

4.

5.

6.

7.

8.

NORTH

Fig.h

The hand control's red light will become dimmer and the backlight of the key pads will turn off 

if idle for 30 seconds. Pressing any key turns it back on.

The accuracy of the coordinate readings is dependent on the correctness of the setup. For best 

result, make sure that the telescope is leveled and pointed to the North in the initial position. The 

data entered into the hand control must be as accurate as possible. 

Enter  the  telescope's  current  latitudinal  and  longitudinal  coordinates  using  the  numeric  keypad.  First 

enter the longitudinal coordinate, followed by the latitudinal coordinate. Use the scroll keys to choose 

between  W  or  E,  and  N  or  S.  Pressing  the  left  or  right  directional  keys  will  move  the  cursor  to  the 

previous or next number. Press 

ENTER

 to confirm. The format you enter should look like this: 123 04’ W  

49 09’N.

Enter your current time zone in hours and minutes (see Appendix C), using the scroll keys and numeric 

key pad (+ for East, - for West). Press 

ENTER

 to confirm. The format you enter should look like this if 

you are in Pacific Standard Time (PST): -08:00.

Enter the date in the following format mm/dd/yyyy using the numeric keypad. Press 

ENTER

 to confirm.

Enter your current local time using the 24 hr time mode (e.g. 2:00PM=14:00). Press 

ENTER

 to view the 

time you just entered. If it is incorrect, press 

ESC

 to go back to the previous screen. If correct, press 

ENTER

  again  to  confirm. After  entering  the  current  time,  the  SynScan

TM

 AZ  will  prompt  "DAYLIGHT 

SAVING?". Use the scroll keys to make the selection and press 

ENTER

 to confirm. After setting the 

daylight saving, SynScan

TM 

 will display "Begin alignment?". Press "2" to bypass the alignment procedure.
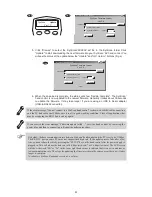
9. Press 

SETUP

 and then use the scroll keys to browse to the “Auto Tracking >”  sub-menu. Press 

ENTER

 to enter the Auto-tracking mode.

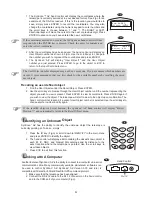
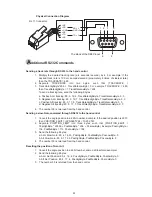
Connect the hand control to the mount with the provided cable. Plug 

the DC 12 volt power into the outlet of the mount. Turn on the power.

The initial screen displayed on the hand control is the Version Screen. 

Press 

ENTER

  to  proceed.  The  hand  control  will  display  a  warning 

concerning pointing the telescope at the sun without proper equipment. 

If you have read the message already, pressing

 ENTER

 will bypass the 

message and skip to the next step.

I

nitial Setup

If a mistake was entered into the 

SynScan

TM

 AZ hand control, press the 

ESC

 key to go back to the 

previous menu, and press 

ENTER

 to start again.

When the power is on, you may choose to adjust the telescope electronically by using the hand 

control  or  manually  by  pushing  the  tube.  The  telescope  will  calculate  the  coordinates 

accordingly and display the information correctly on the hand control. 

The telescope is now ready to point to any object and start tracking at the sidereal rate. The hand control 

will  display  the  coordinates  of  the  direction  the  telescope  is  pointed.  Press  the  scroll  keys  to  switch 

between the following three coordinate formats: Celestial, Terrestrial, and Telescope mount coordinates. 

You may press ESC to exit from the Autotracking mode at any time during tracking to browse or choose 

other functions provided by the SynScan

TM

 AZ hand control. To return to the Autotracking mode, choose 

“Auto-Tracking” under SETUP menu and press ENTER.  

A

utomatic tracking

Summary of Contents for DOBSONIAN SYNSCAN

Page 1: ...INSTRUCTION MANUAL DOBSONIAN SYNSCAN 8 10 12 14 16 180610V6 3 08 ESC SETUP ENTER 1 2 3 4 5 6 7 8 9 0 TO UR UTILITY RATE M IC NGC PLA NET USER OBJECT ID 240412V1...

Page 2: ...ork to allow room for all parts to be unpacked While every effort has been made to ensure that the information contained in this instruction manual is accurate and complete no liability can be accepte...

Page 3: ...ew M5x60 Large washer for M5 screw Hex socket flat head screw 7x50 Hex socket head cap screw M8x25 Optical tube locking screw Allen Wrenches 2mm 4mm 6mm Phillips screw driver Fastening bolts and washe...

Page 4: ...ide panel Reinforce board Hex socket flat head screw 7x50 Round base assembly the bottom side Foot 12 Locate the hand control holder Using the two screws provided attach the holder to the latitude mot...

Page 5: ...x60 Large washer for M5 screw Hex socket head cap screw M5x60 Large washer for M5 screw Left side panel assembly Hex socket head cap screw M5x60 Large washer for M5 screw Left side panel assembly Hex...

Page 6: ...screw 7X50 Reinforce board Left side panel assembly When using GoTo and tracking function please tighten the handwheel Front panel L eft side panel Mount setup Locate the hand control holder Using the...

Page 7: ...rear end ring attached to the lower section of the optical tube Simply unthread and remove the eight Phillips head screws that connect the end ring to the tube Figure 1 and then pull the end ring off...

Page 8: ...threaded holes in the edge of the end ring with the holes in the end of the tube Then lower the entire assembly onto the tube Be careful to avoid finger pinching during this step There may be a bulge...

Page 9: ...s of the tube to the mounting platforms on the inner side of the side boards Lower the telescope tube and carefully place it on the base Tighten the locking screw to secure the tube in place Loosen th...

Page 10: ...er can now be turned in and out to focus When focus is reached lock it in position with the locking ring Fig b Choose a distant object that is at least 500 yards away and point the main telescope at i...

Page 11: ...object or even tour the skies at the touch of a button The user friendly menu system allows automatic slewing to over 42 900 objects Even an inexperienced astronomer can master its variety of feature...

Page 12: ...eft and right directional keys can also be used to move the text cursor when entering data to the hand control Dual Purpose keys Scroll Keys Fig g 1 These keys range from the middle to the bottom of t...

Page 13: ...R again to confirm After entering the current time the SynScanTM AZ will prompt DAYLIGHT SAVING Use the scroll keys to make the selection and press ENTER to confirm After setting the daylight saving S...

Page 14: ...m Enter your current local time using the 24 hr time mode e g 2 00PM 14 00 Press ENTER to view the time you just entered If it is incorrect press ESC to go back to the previous screen If correct press...

Page 15: ...al divisions in azimuth angle from the north northeast east southeast to northwest etc Select the region where the chosen star is located and press ENTER Each division covers 90 degree span in azimuth...

Page 16: ...r the object in the field of the eyepiece and press ENTER to confirm If both alignment stars are properly aligned Alignment Successful will display on the LCD Otherwise the warning Alignment Failed wi...

Page 17: ...ar region in the sky The SynScan hand control provides a short cut to quickly activate the PAE function After exiting from the object catalog instead of using the Utility menu press and hold down the...

Page 18: ...g has a set number of objects to choose from Use the numeric keys to select an object by entering its number Pressing ENTER will display its coordinate Primary information such as size magnitude and c...

Page 19: ...n the hand control in both Celsius and Fahrenheit Power Voltage This displays the power voltage detected from hand control in Volts HOME position This is the position where both Ax1 and Ax2 reads 0 If...

Page 20: ...next digit First set the value for R A Press ENTER to proceed to Dec Tracking Handset Setting This submenu allows adjustments of the brightness of the LCD backlit the darkness of the LCD lettering th...

Page 21: ...croll keys to browse through the User Object number until the number representing the object you wish to view is present Press ENTER to view its coordinate Press ENTER again if you wish to view the ob...

Page 22: ...ve Create a folder for all SynScanTM AZ related files on your computer and name it SynScan Visit the Firmware Download Support Page of the Sky Watcher website at http www SkywatcherTelescope net Downl...

Page 23: ...he hand control by removing the power plug and then re connecting it Repeat the update procedure By default the data communication rate between SynScanTM hand control and the PC is set to be 115kbps T...

Page 24: ...ow Information Park Scope PAE Clear PAE Data GPS PC Direct Mode Sidereal Rate Lunar Rate Solar Rate Stop Tracking Auto Select Sort By Time Version Temperature Power Voltage UTILITY FUNC IDENTIFY Named...

Page 25: ...e 7 600X Rate 8 800X Rate 9 1000X Sidereal Lunar Solar Dual Axes Tracking Brightest Star Alignment Two Star Alignment 25 user defined objects Complete M NGC and IC catalog partial SAO catalogues total...

Page 26: ...mmand conflicts with slew limits there will be no action Goto Ra Dec R34B 12CE Scope must be aligned If command conflicts with slew limits there will be no action Get Azm Alt Z 12AB 4000 10 characters...

Page 27: ...yte TrackRateLowByte 0 0 d Negative Alt tracking 80 3 17 7 TrackRateHighByte TrackRateLowByte 0 0 The number 35 is returned from the hand control 4 Sending a slow Goto command through RS232 to the han...

Page 28: ...28 III...

Page 29: ...FILTER FOR VIEWING THE SUN WHEN OBSERVING THE SUN PLACE A DUST CAP OVER YOUR FINDERSCOPE TO PROTECT IT FROM EXPOSURE NEVER USE AN EYEPIECE TYPE SOLAR FILTER AND NEVER USE YOUR TELESCOPE TO PROJECT SUN...

Reviews: