


Siqura HSD620PRH/621PRH
Page 12
4.4
Establishing a Network Connection
To open communication with the Siqura HSD620PRH and HSD621PRH from a host PC and
change the unit's network settings, perform the following steps.
Step 1:
Set the PC's network adapter to the unit's factory default subnet and connect
the two devices.
Step 2:
Access the unit from a web browser or other tool installed on the PC.
Step 3:
Set the unit's IP address and subnet mask to the subnet it will be used in and
reboot the unit.
To address the unit from the same PC again, configure the PC's network adapter once more to
assign the PC to the same subnet as the unit.
Step 1: Setting the host PC to the factory default subnet of the unit
To configure the network adapter on the host PC
1. In the Control Panel, open
Network Connections
.
2. Right-click the connection to be configured, and select
Properties
.
3. In the items list, select
Internet Protocol (TCP/IP)
.
4. Click
Properties
.
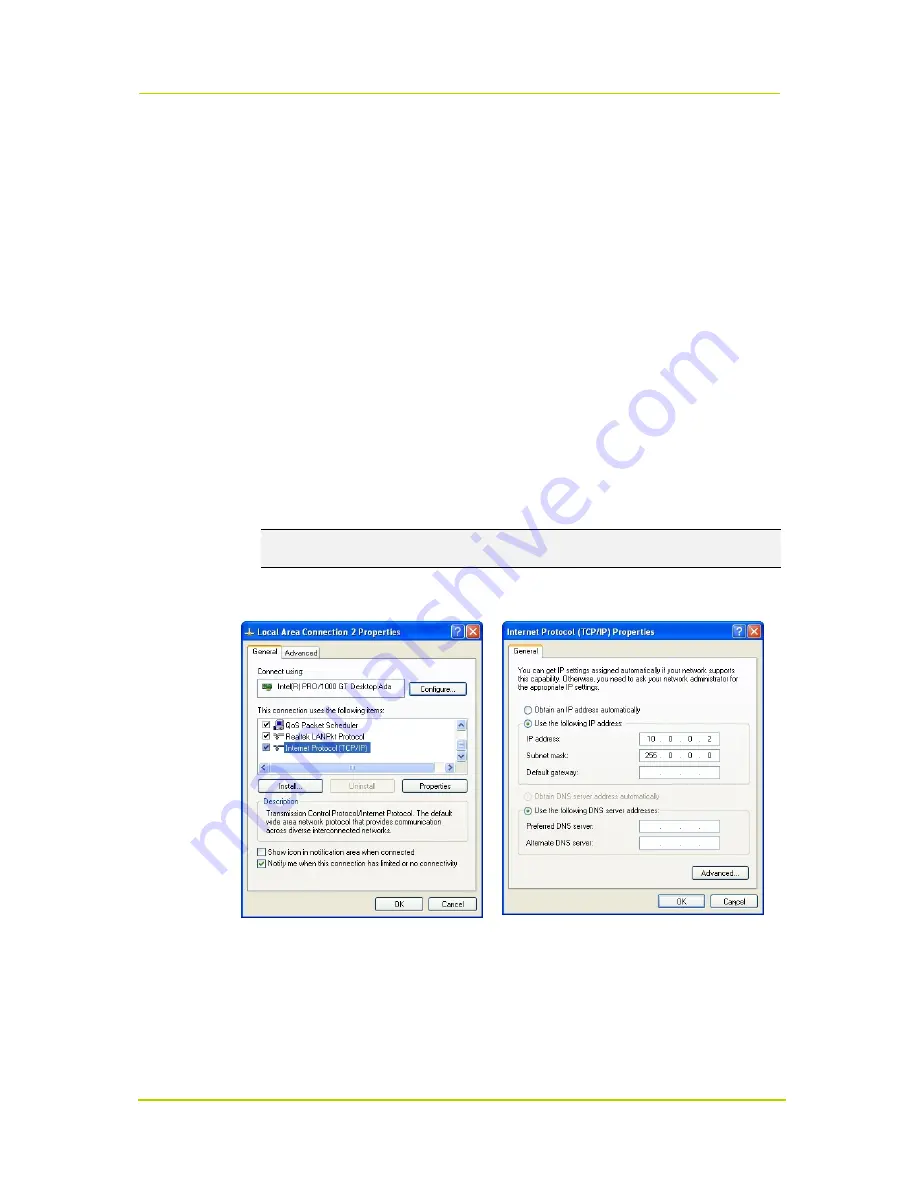
5. In the Internet Protocol (TCP/IP) Properties dialog, click
Use the following IP address
.
6. Enter an IP address that will assign your PC to the same subnet as the unit (i.e., within the
10.x.x.x range). Use 255.0.0.0 as a subnet mask.
Important:
To prevent conflicts, be sure to choose a unique IP address. No two devices on a
network can have the same IP address.
7. To apply the new settings, click
OK
, and then click
Close
.
Opening IP settings on the host PC
Changing host PC IP settings to the factory-default
settings of the unit
At this point, connect your PC to the Siqura HSD620PRH and HSD621PRH. You can connect them
directly using a crossover cable, or connect both to a switch.
Summary of Contents for HSD620PRH
Page 1: ...Siqura HSD620PRH 621PRH Pressurized IP PTZ Camera with Day Night WDR Installation Manual P R H...
Page 4: ......
Page 10: ......
Page 20: ...Siqura HSD620PRH 621PRH Page 16 Cable connection in a mini wall mount...
Page 32: ......
Page 38: ......
Page 42: ......