background image

4

5

Caution: 

When placing bottom bobbin, make sure the device is in 

LOCK

/OFF position.

When the thread in the bottom bobbin is used up or you want to 

change color of thread, take out the bobbin from the bobbin case.

1.  Pull the Bobbin Case Cover to the left and take it off.
2.   Pick up the used Bobbin from the Bobbin Case and 

take it out.

3.   When inserting a new threaded bobbin, make sure thread 

winds in a clockwise direction as marked on bobbin  

case and then place in the compartment with about  

4 inches long thread left out pulled towards the front 

of the machine.

Cut off 

here

A

B

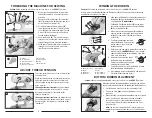
THREADING THE MACHINE FOR SEWING

Caution: 

When threading machine, make sure the device is in 

LOCK/

OFF position.

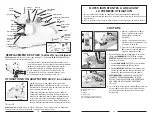
1.   Make sure the upper bobbin or spool with 

thread 

(A)

 unwinds in a counter-clockwise 

direction.

2.   Then pull the thread through Thread Guide 1 

(B)

. Slip the thread in between the two discs 

of the Thread Tension Dial 

(C)

.

3.   Pull thread through Thread Guide 2 

(D)


(from the back to the front), Thread Take-Up 

Lever 

(E)

 (from the front to the back), Thread 

Guide 3 

(F)

 (from the front to the back) and 

Thread Guide 4 

(G)

 (down).

4.   Raise the Needle 

(H

). Pass needle threader 

through eye of needle, from right to left. Pass 

thread through the eye of needle threader. 

5.   Pull Needle Threader 

(I

) with inserted thread 

through the eye of the needle, from left to 

right. Remove needle threader.

ADJUST THREAD TENSION

Test stitch performance on a scrap of material you 

are going to use.
When the thread tension is properly adjusted, the 

upper and lower thread tensions are equal and 

strong enough to lock both threads in the center 

of the material.

If the upper tension is too tight,

 the upper thread 

lies straight along the surface of fabric, correct 

by turning tension dial, as illustrated in 

(A)

(Counter-clockwise)

If the upper tension is too loose,

 the bottom thread 

lies straight along the bottom of the fabric, correct 

by adjusting the tension dial, as illustrated in 

(B)

(Clockwise)

A.

 Bobbin

B.

 Thread Guide 1

C.

 Thread Tension Dial

D.

 Thread Guide 2

E.

 Thread Take-up Lever

F.

 Thread Guide 3

G

. Thread Guide 4

H.

 Needle

I.

 Needle Threader

C

A

B

D

E

C

F

G

H

E

B

C

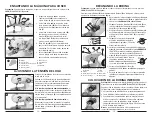
A.

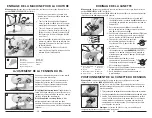
 Bobbin Case Cover

B.

 Bobbin

C.

 Bobbin Case

D.

 Bobbin Pin

E.

 Bobbin Hole

F.

 Spool

G.

 Thread Guide 1

H.

 Thread Guide 5

A

B

D

E

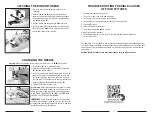
BOTTOM BOBBIN PLACEMENT

WINDING THE BOBBIN

Caution: 

When winding the bobbin, make sure the device is in 

LOCK

/OFF position. 

Always remove the Bobbin 

(B)

 from the Bobbin Case 

(C)

 on the machine and unthread the 

needle before winding a new bobbin.

1.   Slide  open the Bobbin Case Cover 

(A)

 and take out 

the Bobbin 

(B)

 from the Bobbin Case 

(C)

 or obtain 

an empty 

Class 15 metal bobbin

.

2   Put Bobbin Pin 

(D)

 into the Hole 

(E)

 on the top of 

the sewing machine and place an empty Bobbin 

(B)

 on the Bobbin Pin 

(D)

.

3.   Make sure the thread from Spool 

(F)

 unwinds in 

counter-clockwise direction, then route thread 

through Thread Guide 1 

(G)

 and then Thread 

Guide 5 

(H

). 

4.   Put the thread through the small 

hole of the Bobbin from the inside 

pulling about 3 inches of thread 

through the hole.

5.   Hold the thread end tightly. Unlock the machine by 

moving switch to 

HANDHELD

 mode, press button 

under handle and hold to start winding. Stop after 

a few coils are wound.

6.   Cut the thread end on the top of 

the Bobbin close to the Bobbin. 

Continue winding until the desired 

amount of thread is wound.

7.   Cut the thread 4 inches from the Bobbin. Remove 

the wound Bobbin from Bobbin Pin.

8.   After winding, return the Bobbin Pin and the Spool 

Pin to the Handle Storage Recess.

Note: 

The tension of bottom thread is controlled by the 

magnetized compartment and does not need adjustment.

H

B

D

F

G

I

Summary of Contents for Stitch Quick+

Page 1: ... when making any adjustments in the needle area such as threading needle changing needle threading bobbin or changing presser foot etc 6 Do not allow to be used as a toy Close attention is necessary when this appliance is used by or near children 7 Use this appliance only for its intended use as described in this manual Use only attachments recommended by the manufacturer as contained in this manu...

Page 2: ...t Insert 4AA batteries into the battery compartment on the back of the machine Put batteries in following the correct polarities marked on the machine or following the diagram Replace all 4AA batteries as a simultaneous set as shown Do not mix old and new batteries Do not mix alkaline standard carbon zinc or rechargeable ni cad ni mh etc batteries TO USE AC DC ADAPTER not included Make sure the de...

Page 3: ... of fabric correct by turning tension dial as illustrated in A Counter clockwise If the upper tension is too loose the bottom thread lies straight along the bottom of the fabric correct by adjusting the tension dial as illustrated in B Clockwise A Bobbin B Thread Guide 1 C Thread Tension Dial D Thread Guide 2 E Thread Take up Lever F Thread Guide 3 G Thread Guide 4 H Needle I Needle Threader C A B...

Page 4: ... move Handwheel toward the front of the machine to check if there are stitches and then operate machine by power ONLY WHEN THE NEEDLE IS IN RIGHT POSITION AND THERE ARE STITCHES BEING FORMED IMPORTANT Safely store and dispose of used machine needles pins and other sharp objects in a container to prevent them from becoming loose in the trash and then place the container in the garbage TROUBLESHOOTI...

Page 5: ...a como ensartar la aguja cambiar la aguja ensartar la bobina o cambiar el pie prensatelas etc 6 No permita que sea usada como juguete Debe poner mucha atención cuando este aparato esté siendo usado por niños o cerca de ellos 7 Utilice este aparato sólo para el propósito para el cual fue diseñado conforme se describe en este manual Use sólo los accesorios recomendados por el fabricante como se desc...

Page 6: ...ijo cerca del material de prueba COSIENDO 1 Levante el pie prensatelas A y levante la aguja girando la manivela B hacia la parte frontal de la máquina 2 Asegúrese de que ambos extremos de los hilos son jalados 6 pulgadas 10 cm hacia atrás por detrás de la aguja C 3 Coloque la tela bajo el pie prensatelas D y baje la aguja Luego baje el pie prensatelas A 4 Desbloquee la máquina moviendo el interrup...

Page 7: ... clase 15 vacía 2 Coloque el perno de la bobina D en el orificio E en la parte superior de la máquina y coloque la bobina vacía B en el perno para bobinas D 3 Asegúrese de que el hilo del Carrete F se desenrolle en sentido contrario a las manecillas entonces dirija el hilo a través de la Guía del hilo 1 G y la Guía del hilo 5 H 4 Coloque el hilo a través del pequeño orificio de la bobina desde den...

Page 8: ...manivela hacia el frente de la máquina para verificar si hay puntadas y luego ponga a funcionar la máquina con el motor ÚNICAMENTE CUANDO LA AGUJA ESTÉ EN SU POSICIÓN CORRECTA Y CUANDO SE ESTÉN FORMANDO PUNTADAS IMPORTANTE Almacene con seguridad y deseche las agujas para máquina usadas alfileres y otros objetos puntiagudos en un contenedor para evitar que estén sueltos en la basura y luego coloque...

Page 9: ...tour de l aiguille comme l enfilage de l aiguille le changement d aiguille l enfilage de la canette ou le changement du pied presseur etc 6 Ne doit pas être utilisé comme un jouet Une attention particulière est nécessaire lorsque cet appareil est utilisé près ou par des enfants 7 N utiliser cet appareil que dans le cadre de son usage prévu comme décrit dans ce manuel N utiliser que les accessoires...

Page 10: ...per le fil près du matériel de test COUTURE 1 Soulever le pied presseur A et relever l aiguille en tournant la molette B sur le devant de la machine 2 Veiller à ce que les deux fils soient tirés d environ 15 cm 6 pouces vers l arrière de l aiguille C 3 Placer le tissu sous le pied presseur D et abaisser l aiguille Abaisser ensuite le pied presseur A 4 Déverrouiller la machine en déplaçant le sélec...

Page 11: ...re une canette de métal vide de catégorie 15 2 Poser l axe de canette D dans le trou E sur le dessus de la machine à coudre et placer la canette vide B sur l axe de canette D 3 Veuillez vous assurer que le fil de la bobine F déroule dans le sens anti horaire et de le passer ensuite à travers le guide fil 1 G et ensuite le guide fil 5 H 4 Faire passer le fil à travers le petit trou de la canette à ...

Page 12: ...s l avant de la machine afin de vérifier s il y a formation de points et continuer à coudre au moyen d alimentation électrique UNIQUEMENT UNE FOIS QUE L AIGUILLE EST DANS LA BONNE POSITION ET QU IL Y A FORMATION DE POINTS IMPORTANT Veuillez ranger et jeter les les aiguilles usagées épingles et autres objets pointus dans un contenant afin que celles ci ne soient pas dispersées à travers les déchets...

Page 13: ......

Reviews: