background image

78

Managing SimpleShare

Disk Pool 

R

ESIZING


A

 P

OOL

1

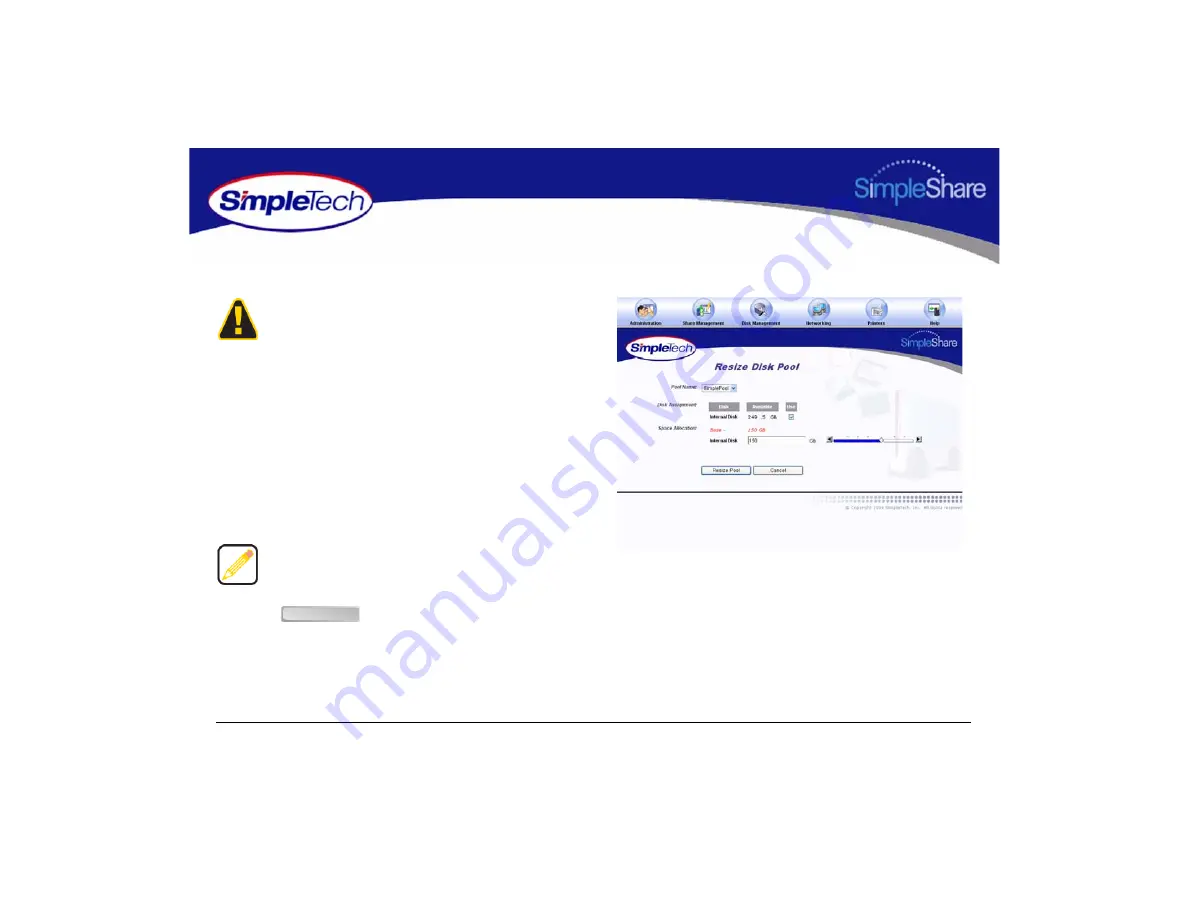
In the 

Disk Management 

menu, click 

Resize Pool

.

2

From the 

Pool Name

 list, choose the disk pool you want 

to resize.

3

In 

Space Allocation

, enter the desired size (in 

gigabytes) of the pool being resized. The pool size can 

be set by entering the capacity in the text box or using 

the slider control.

4

Click .

SimpleTech recommends that you backup all your data 

before resizing pools. Loss of power or other failures during 

the resize operation could result in data loss. You must also 

delete all shares on disk pools to be resized.

Pools cannot be reduced in capacity to a size less than the 

storage space consumed by the shares currently in the pool.

Resize Pool

R i

P

l

Summary of Contents for SimpleShare

Page 1: ...SIMPLESHARE USER S GUIDE ...

Page 2: ... contain technical data controlled by the U S Export Administration Regulations and may be subject to the approval of the U S Department of Commerce prior to export Any export directly or indirectly in contravention of the U S Export Administration Regulation is prohibited Trademark Information SimpleTech DirectPath and SimpleTech are trademarks of SimpleTech Inc No right license or interest to su...

Page 3: ...TECHNICAL OR TYPOGRAPHICAL ERRORS OR OMMISSIONS CONTAINED HEREIN IN NO EVENT SHALL SIMPLETECH BE LIABLE FOR ANY INCIDENTAL CONSEQUENTIAL SPECIAL OR EXEMPLARY DAMAGES WHETHER BASED ON TORT CONTRACT OR OTHERWISE ARISING OUT OF OR IN CONNECTION WITH THIS GUIDE OR ANY OTHER INFORMATION CONTAINED HEREIN OR THE USE THEREOF Contents herein are current as of the date of publication No patent liability is ...

Page 4: ...k has instant access to extra storage UNPACK AND INSPECT YOUR SHIPMENT Upon receipt of the equipment Unpack and inspect the contents for signs of damage If the equipment has been damaged in transit immediately report the extent of damage to the transportation company and to SimpleTech Order replacement equipment if necessary Check the packing list to ensure complete and accurate shipment of each l...

Page 5: ...ase contact your SimpleShare reseller or retailer for replacements SimpleShare Office Storage Server 12 Volt DC Power Adapter Vertical Stands 2 CAT5e Ethernet Cable NASFinder Quick Setup CD SimpleShare Quick Installation Guide printed SimpleShare User s Guide on NASFinder Quick Setup CD NASFinder User s Guide on NASFinder Quick Setup CD Warranty Card ...

Page 6: ...server allows addition of a network printer Windows Domain and Workgroup configuration options Supports access to shared folders by group or individual users Expandable storage Acts as a stand alone DHCP server for your network RTC to keep the time during power off Auto sync with the Internet time server during bootup SMART for monitoring disk drive health REGISTERING SIMPLESHARE To register your ...

Page 7: ...adme and PDF files See SimpleShare Documentation for details SIMPLESHARE DOCUMENTATION SimpleShare Quick Installation Guide The guide provides general instructions on installing and setting up your SimpleShare Office Storage Server SimpleShare User s Guide Describes your SimpleShare Office Storage Server along with instructions on how to use SimpleShare Administrator to configure and manage the se...

Page 8: ...Streaming Media Kit in the HP ProLiant DL380 G3 server This guide also provides information on evaluating SimpleShare Office Storage Server performance Using This Guide The following conventions are used in this manual Currier type indicates screen text Buttons and keys you press are indicated by small icons such as or Items you select are in bold Create Share Enter ...

Page 9: ...following icons highlight these instructions as follows WARNING This icon indicates the existence of a hazard that could result in serious bodily injury or death if the safety instruction is not observed CAUTION This icon indicates the existence of a hazard that could result in equipment or property damage or equipment failure if the safety instruction is not observed NOTE This icon identifies inf...

Page 10: ...quency energy and if not installed and used in accordance with the users manual may cause harmful interference to radio communications Operation of this equipment in a residential area is likely to cause harmful interference in which case the user will be required to correct the interference at his own expense EU Declaration of Conformity The SimpleShare Office Storage Server carries the CE Mark i...

Page 11: ...are 1 System Requirements and Recommendations 1 Requirements 1 Recommendations 1 Installing SimpleShare Server 2 Setting Up SimpleShare for the First Time 3 Expanding SimpleShare s Capabilities 10 Connecting a USB Printer 10 Connecting a USB Drive 11 Accessing Shares 12 Accessing SimpleShare From Windows 13 Accessing SimpleShare From Mac OS X 16 ...

Page 12: ...TP Server 25 Upgrading SimpleShare Firmware 27 Setting Up Email Alert Notification 28 Setting Up Popup Alert Notification 29 Adding SimpleShare to an Existing Workgroup 30 Adding SimpleShare to an Existing Domain 31 Restoring Factory Setting 32 Restarting SimpleShare 33 Setting File System Support on SimpleShare 34 Creating a Share 35 Deleting a Share 37 Renaming a Share 38 Enabling Security on an...

Page 13: ...g Foreign Disk for SimpleShare 54 Claiming a Foreign Disk as FAT32 56 Claiming a Blank Disk for SimpleShare 58 Claiming a Blank Disk as FAT32 60 Checking Foreign Disk File System Integrity 62 Creating a Basic Pool 64 Creating a Mirror Pool 67 Creating a Striped Pool 71 Deleting Wiping a Pool 75 Renaming a Pool 77 Resizing a Pool 78 Adding a Mirror to an Existing Pool 80 Removing a Mirror or Spare ...

Page 14: ...up 95 Static IP Network Setup 97 Enabling the Print Server 98 Disabling the Print Server 100 Installing Printer Drivers on Windows Computers 101 Specifications 103 Product Support 104 SimpleTech Technical Support 104 Worldwide Headquarters 104 Certification and Warranty 105 FCC Compliance 105 Limited Warranty 106 Modifications 106 GPL Statement 106 ...

Page 15: ... or later 256 MB RAM Web browser Internet Explorer 5 0 or above Safari Linux Nautilus and Netscape 6 2 x or above Available network connection 10Base T or 100Base T RECOMMENDATIONS DHCP server Network router or switch A DHCP server is not required However SimpleTech strongly recommends using a DHCP server to assign IP addresses to the devices on your network Otherwise depending on how your network...

Page 16: ...cal outlet surge protector or UPS uninterruptable power supply 3 Momentarily press the Power push button to power on SimpleShare Only use the AC power adapter that came with SimpleShare Using any power adapter other than the one provided by SimpleTech may damage SimpleShare and voids your warranty SimpleTech assumes no liability for damage resulting from improper use The only way to shut off power...

Page 17: ...tance In such cases you can use NASFinder to locate your SimpleShare and perform basic configuration tasks like renaming your SimpleShare changing its administration username and password and mapping the shared folders on SimpleShare to your computer 1 Insert the NASFinder Quick Setup CD in the CD ROM drive on your computer Depending on how your computer is configured NASFinder may launch automati...

Page 18: ...4 Installing SimpleShare 2 On the Welcome to NASFinder page click to start the SimpleShare Discovery and search your network for connected SimpleShare servers Next ...

Page 19: ...ndicates NASFinder has detected and is able to communicate with SimpleShare from your computer Unavailable This icon indicates NASFinder has detected but cannot communicate with SimpleShare from your computer Typically this occurs when SimpleShare and the computer accessing SimpleShare are configured on different network segments or subnets If SimpleShare is unable to talk to your computer review ...

Page 20: ...username admin and password simple If you want the system to remember your password select Remember my password then click to continue You are now ready to complete SimpleShare basic setup In the future you will be able to access SimpleShare by typing http simpleshare_name in the address box of your Web browser where simpleshare_name is the network name of your SimpleShare server OK ...

Page 21: ... description of the data SimpleShare will store or where SimpleShare will be located If there s only one SimpleShare on your network you can use its default name SimpleShare The SimpleShare name can be up to 15 characters in length containing any combination of alphanumeric A Z and 1 9 characters You may also use the dash character Spaces and special characters are not allowed If you share SimpleS...

Page 22: ...equired to access SimpleShare configuration data 7 Enter a new username and password for accessing SimpleShare If you are logging onto SimpleShare for the first time enter the default username admin and password simple In Confirm Password re enter the new password to verify that it was entered correctly 8 Click to continue Next ...

Page 23: ...to Local Drive list next to the share you want to map For each share you don t want mapped to your computer choose None 10 Click after making your selection s 11 On the Setup Complete page click to exit NASFinder If you need to perform more advanced configuration tasks such as creating additional shares click to run SimpleShare Administrator The Map to Local Drive list only displays letters availa...

Page 24: ...and power on the printer according to the instructions provided by the manufacturer 3 In the Administration menu click Basic 4 Click to restart SimpleShare and apply your changes 5 In the confirmation dialog click 6 Run SimpleShare Administrator to setup print server services on SimpleShare See Enabling the Print Server on page 98 If you are setting up SimpleShare for the first time complete the b...

Page 25: ...end of the cable to one of the USB ports on SimpleShare 2 Connect AC power and power on the disk drive according to the instructions provided by the manufacturer 3 Run SimpleShare Administrator to setup the new disk on SimpleShare If you are setting up SimpleShare for the first time complete the basic setup before running SimpleShare Administrator ...

Page 26: ...accessing SimpleShare data Windows and Macintosh computers If you are operating in a Linux or Unix environment refer to documentation for your specific operating system for instruction on accessing and mounting network shares SimpleTech highly recommends that you back up files the files on SimpleShare SimpleTech is not responsible for any data loss nor will SimpleTech perform any recovery on loss ...

Page 27: ...impleShare If you want the system to remember your password in the future select Remember my password 3 Click to continue You will be logged onto SimpleShare as a guest user To access the shared folders you must type backslash character when entering SimpleShare s name If your computer is unable to locate SimpleShare logon dialog does not appear check the connections make sure SimpleShare is in Re...

Page 28: ...rs available on SimpleShare You are now ready to save files to or retrieve files from SimpleShare To make it easier to access SimpleShare shared folders in the future you can assign a drive letter to a share allowing you to access the folder using My Computer To map a shared folder continue to Step 4 on page 15 ...

Page 29: ... SimpleShare server and share_name is the name of the shared folder you want to map to your computer You can also use the button to find the share 7 If you want your computer to reconnect to the shared folder every time you log on select Reconnect at logon 8 After making your selections click to map the share to the drive letter Mapped shares are available only when SimpleShare is available You ca...

Page 30: ...r SimpleShare from the servers listed in the left pane If Workgroup names are listed check the Workgroup in which your SimpleShare is a member If you can t locate your SimpleShare enter its URL in the Address box where the URL consists of the protocol smb and the network name or IP address of your SimpleShare 3 After selecting your SimpleShare click Connect ...

Page 31: ...ialog enter your SimpleShare administration username and password If you are logging onto SimpleShare for the first time enter the default username admin and password simple 6 If you want the system to remember your authentication information select Add to Keychain 7 After making your selections click A desktop icon for the mapped share appears on your desktop OK OK ...

Page 32: ...structions on managing your SimpleShare Office Storage Server The procedures provided in this section are divided into the following Administration Share Management Basic Disk Management Foreign and Blank Disk Management Disk Pool Management Network Management Printer Management ...

Page 33: ...are_name where simpleshare_name is the network name of your SimpleShare server and then press the key 2 In the login dialog box enter the administration username and password for accessing SimpleShare If you want the system to remember your password in the future select Password my password Click to log onto the SimpleShare Administrator Enter OK ...

Page 34: ...e Name enter the network name you want assigned to the SimpleShare then Click The SimpleShare name can be up to 15 characters in length containing any combination of alphanumeric A Z and 1 9 characters including the dash character Spaces and special characters are not allowed If you share SimpleShare with MS DOS computers do not use more than eight characters in the SimpleShare name The TCP IP net...

Page 35: ... the Username and Password text boxes empty 1 In the Administration menu click Basic 2 Enter a new administration username and or password for SimpleShare In Confirm Password re enter the new password to verify that it was entered correctly 3 Click The username and password are case sensitive Administration Security treats the username ADMIN differently from admin Usernames and passwords should be...

Page 36: ...22 Managing SimpleShare Administration SETTING THE DATE AND TIME MANUALLY 1 In the Administration menu click Basic 2 Click the Set Time Manually hyperlink ...

Page 37: ... list and select the appropriate clock mode AM PM or 24 Hour and then click 5 On the Apply screen click 6 On the Administration Basic page select the region country and city in which SimpleShare is located 7 Click You may need to adjust the time setting in the future to accommodate daylight savings time Apply Continue Apply ...

Page 38: ...tion menu click Basic 2 Click Set SimpleTech NAS Time To Match 3 On the Apply screen click 4 On the Administration Basic page select the region country and city in which SimpleShare is located 5 Click You may need to adjust the time setting in the future to accommodate daylight savings time Continue Apply ...

Page 39: ...er on the Internet Specifying an NTP server and clicking the button will not cause the date and time on SimpleShare to change immediately By default the SimpleShare is configured to access the following NTP public time servers Location IP Address Service Area Access Policy United States Naval Observatory Washington DC 192 5 41 40 192 5 41 41 NSFNET Italy Europe Open Access Open Access Fukuoka Univ...

Page 40: ... In the two remaining text boxes enter the IP addresses of your first and second alternate NTP servers 3 Select the region country and city in which SimpleShare is located 4 Click You can specify the IP addresses of up to three NTP servers SimpleShare connects to the first available server in the list You may need to adjust the time setting in the future to accommodate daylight savings time Apply ...

Page 41: ... and hold the Reset button located on the rear panel for 5 seconds to initialize SimpleShare with the new firmware Download the new firmware version from the SimpleShare website at www simpletech com support or contact SimpleTech For contact information see SimpleTech Technical Support on page 104 The upgrade process take several minutes to complete Do not turn SimpleShare off while the upgrade is...

Page 42: ...in Error Handling SMTP Number 5 In Error Handling E Mail Recipients enter the email address of users to receive email alert notifications You can specify up to five recipients 6 To verify that email alert notification is working properly click then confirm that the email recipients received the test alert notice 7 Click Before setting up E mail Alert Notification on SimpleShare make sure your netw...

Page 43: ...or Handling Pop Up Machines enter the network name of each computer to receive alert notification popup messages You can specify up to five computers 4 To confirm that popup alert notification is working properly click then verify that the selected computers received the test alert popup message 5 Click Before setting up Popup Alert Notification on SimpleShare make sure the message popup service h...

Page 44: ... are making SimpleShare a member 3 Select the share access method to be enabled on SimpleShare To provide share access to all users in a Workgroup select Password Based Share Access To limit share access to selected users in a Workgroup select User Based Share Access then from the Pool Name list choose the disk pool to which access is being granted 4 After making your selections click 5 In the con...

Page 45: ...he username and password you use to log onto Windows as the administrator or a member of the administrator s group then click 5 In the Administration menu click Basic 6 Click to restart SimpleShare and apply your changes You must be logged on Windows as an administrator or a member of the Administrator s group in order to join a domain and complete this procedure If your computer is connected to a...

Page 46: ...ing SimpleShare Administration RESTORING FACTORY SETTING 1 In the Administration menu click Basic 2 Click 3 In the confirmation dialog click to continue 4 On the Apply screen click Restore Defaults OK Continue ...

Page 47: ...33 Managing SimpleShare Administration RESTARTING SIMPLESHARE 1 In the Administration menu click Basic 2 Click Reboot ...

Page 48: ...ocate the shared folder you want to setup and then select file system s supported on the share To enable CIFS support on SimpleShare for Windows and Mac computers select Enabled from the Windows Access CIFS list To enable NFS support on SimpleShare for Unix Linux computers select Enabled from the Unix Linux Access NFS list 3 Click Apply ...

Page 49: ...nt to create 3 Choose the disk pool in which the new share will reside from the Create in Pool list 4 Select file system s supported on the share To enable CIFS support on the share for Windows and Mac computers select CIFS Access To enable NFS support on the share for Unix Linux computers select NFS Access If the desired file system not available checkbox is gray support for the protocol is not e...

Page 50: ...n Share Password enter a password for accessing the share 7 In Confirm Password re enter the password to confirm it was entered correctly 8 Click Passwords can be up to eight characters long and may contain any combination of alphanumeric characters A Z and 1 9 and special characters such as and Spaces are not allowed Create Share ...

Page 51: ...leShare Share DELETING A SHARE 1 In the Share Management menu click Basic 2 In Disk Pool Mappings click next to the share you want to delete 3 In the warning dialog click 4 In the verification dialog click Delete OK OK ...

Page 52: ...re Share RENAMING A SHARE 1 In the Share Management menu click Basic 2 Click Rename Share 3 Select the share you want to rename from the Old Share Name list 4 Enter the new share name in New Share Name 5 Click Rename Share ...

Page 53: ... click Share Access 2 From the Share Name list choose the share you want to modify 3 Select Enable Share Authentication 4 In New Password enter the password required to access the selected share 5 In Confirm Password re enter the password to confirm it was entered correctly 6 Click 7 In the confirmation dialog click Passwords can be up to eight characters long and may contain any combination of al...

Page 54: ...ING SECURITY ON AN EXISTING SHARE 1 In the Share Management menu click Share Access 2 From the Share Name list choose the share you want to modify 3 Deselect Enable Share Authentication 4 Click 5 In the confirmation dialog click Apply OK ...

Page 55: ... pools must exist on the drive SimpleShare s internal disk drive is configured at the factory with a single disk pool named SimplePool which is allocated the full capacity of the drive SimpleShare s advanced disk management features provide Foreign disk support Mirror pools Striped pools Spanning SimpleShare s multi disk functions can be configured using any combination of internal and external US...

Page 56: ...ck 4 Select the disk you want to rename from the Old Disk Name list 5 In New Disk Name enter the new name of the disk 6 Click 7 In the confirmation dialog click The Show Disk Details checkbox is located at the bottom of the Disk Management page It may be necessary to use the scroll bar to see the checkbox Rename Disk Rename Disk OK ...

Page 57: ...l Erase depending on the type of erase process you want to perform 7 In the confirmation dialog click An erased or wiped disk appears in SimpleShare Administrator as a Blank Disk Deleting shares and disk pools erases all data within them so make complete backups prior to deleting shares or disk pools Before you can delete a disk pool you must first delete all shares allocated within the pool Quick...

Page 58: ...inutes to complete However portions of the data may be recoverable using data recovery tools If you are concerned about erased data becoming available to others perform a full erase Keep in mind that a full erase takes several days to complete If the data on SimpleShare is encrypted it may not be necessary to perform a full erase Since the data is encrypted any data recovered will be encrypted To ...

Page 59: ... this disk 6 Click or depending on the type of erase process you want to perform 7 In the confirmation dialog click Quick Erase performs a simple erase of the primary file system structures but does not erase all locations on the disk that contained user data Full Erase performs multiple erasure passes on the entire disk Quick Erase Full Erase OK ...

Page 60: ...menu click Disk Power Management 2 Choose Specify Timeout to enable automatic power management 3 Enter the time out period in the Minutes and Seconds text boxes The time out period can range from 0 zero minutes and 0 seconds up to 21 minutes and 15 seconds Seconds can only be set in increments of 5 Seconds values not in increments of 5 five are rounded to the closest multiple of 5 4 Click 5 In the...

Page 61: ...for signs of impending failure Health is information is reported to SimpleShare and can be viewed on the Health Report page 1 In the Disk Management menu click Basic 2 Select Show Disk Details 3 In Available Disks click the Full Health Details hyperlink to the right of SimpleShare s internal disk drive The Show Disk Details checkbox is located at the bottom of the Disk Management page It may be ne...

Page 62: ...48 Managing SimpleShare Basic Disk 4 Click to the Disk Management Basic page Continue ...

Page 63: ...ation of the disk drive attempting to detect failures or potential failures These self tests do not modify or destroy user data 1 In the Disk Management menu click Basic 2 Select Show Disk Details 3 In Available Disks click the Full Health Details hyperlink to the right of SimpleShare s internal disk drive The Show Disk Details checkbox is located at the bottom of the Disk Management page It may b...

Page 64: ...k 8 Click to return to the Disk Management Basic page Run Short Test performs a quick check to verify that the drive is fully operational Run Long Test performs a comprehensive test of the disk drive If Notify Test Results is selected when the self test completes a yellow banner containing the test results appears across the top of the SimpleShare Administrator page you are on Clicking the hyperli...

Page 65: ...lert notification to appear across the top of the SimpleShare Administrator window indicating that the disk was removed unexpectedly 1 In the Disk Management menu click Basic 2 Click below the external drive you want to remove 3 In the dialog that appears indicating that the disk can now be safely removed click S f l R Safely Remove Disk OK ...

Page 66: ...dable by that computer The shares created by SimpleShare for foreign disks are referred to as Foreign Shares An unformatted drive connected to SimpleShare are recognized as Blank Disk Before a Blank disk can be made available to network users it has to be formatted or claimed by SimpleShare SimpleShare s foreign disk support function makes it easy to attach a USB disk formatted with FAT or NTFS an...

Page 67: ...53 Managing SimpleShare Foreign and VIEWING FOREIGN DISK INFORMATION 1 In the Disk Management menu click Foreign Disk 2 To view detailed disk information select Show Foreign Disk Details ...

Page 68: ...ndows or Mac OS computers and any data that existed on the drive is destroyed 1 In the Disk Management menu click Basic 2 Select Show Disk Details 3 Click the button located to the right of the Foreign disk you want to claim Claiming a disk destroys the data on the disk If you have important data on the drive create a backup The Show Disk Details checkbox is located at the bottom of the Disk Manag...

Page 69: ...rything on this disk 7 Click 8 In the confirmation dialog click Claim as FAT32 Disk is intended for disks that may be attached to Windows or Mac OS computers in addition to SimpleShare To enable all SimpleShare capabilities make sure Claim as FAT32 Disk checkbox is not selected Foreign and Blank Disk Management on page 52 provides detailed information on the limitations of using FAT32 disks Claim ...

Page 70: ...ive on Windows or Mac computers as well as SimpleShare Foreign and Blank Disk Management on page 52 provides detailed information on the limitations of using FAT32 disks 1 In the Disk Management menu click Basic 2 Select Show Disk Details Click the button located to the right of the Foreign disk you want to claim The Show Disk Details checkbox is located at the bottom of the Disk Management page I...

Page 71: ...t NFS Access 6 To enable authentication password security on the new share select Enable Share Authentication In Share Password enter a password for accessing the share In Confirm Password re enter the password to confirm it was entered correctly 7 In Safety Confirmation type Yes destroy everything on this disk 8 Click 9 In the confirmation dialog click Passwords can be up to eight characters long...

Page 72: ...leShare claims a disk it is no longer readable by Windows or Mac OS computers and any data that existed on the drive is destroyed 1 In the Disk Management menu click Basic 2 Select Show Disk Details 3 Click the button located to the right of the Blank disk you want to claim The Show Disk Details checkbox is located at the bottom of the Disk Management page It may be necessary to use the scroll bar...

Page 73: ... the confirmation dialog click Claim as FAT32 Disk is intended for disks that may be attached to Windows or Mac OS computers in addition to SimpleShare To enable all SimpleShare capabilities make sure Claim as FAT32 Disk checkbox is not selected Foreign and Blank Disk Management on page 52 provides detailed information on the limitations of using FAT32 disks Claim OK ...

Page 74: ...ve on Windows or Mac computers as well as SimpleShare Foreign and Blank Disk Management on page 52 provides detailed information on the limitations of using FAT32 disks 1 In the Disk Management menu click Basic 2 Select Show Disk Details 3 Click the button located to the right of the Blank disk you want to claim The Show Disk Details checkbox is located at the bottom of the Disk Management page It...

Page 75: ...re for Unix Linux computers select NFS Access 7 To enable authentication password security on the new share select Enable Share Authentication In Share Password enter a password for accessing the share In Confirm Password re enter the password to confirm it was entered correctly 8 Click 9 In the confirmation dialog click Passwords can be up to eight characters long and may contain any combination ...

Page 76: ...gement menu click Foreign Disks 2 In Disk Partition Mappings click the button of the disk you want to repair SimpleShare displays the results of the file system integrity check The Check and Repair option is only available for foreign disks formatted with the FAT file system S f l R Check and Repair ...

Page 77: ...63 Managing SimpleShare Foreign and 3 After reviewing the results of the integrity check click to return to the Foreign Disk Management Basic page Continue ...

Page 78: ...ating share s within the new pools This procedure is for creating a basic unencrypted pool If you want to create an encrypted pool see Creating an Encrypted Pool on page 85 1 In the Disk Management menu click Create New Pool 2 In New Pool Name enter a descriptive name for the pool 3 To allocate all available disk space on SimpleShare to the new pool in Pool Mapping Preference select Auto Configura...

Page 79: ... allows you to specify which disk drives are to be used by the pool being created To create a pool that only occupies a portion of a single disk make sure to only select the Use checkbox for the drive you want to use If multiple disks are connected to SimpleShare by default the Space Allocation selects all available drives This results in all available space on each drive being allocated to the ne...

Page 80: ...Pool Result page click to view information on the new disk pool or click to create a share in the new pool To avoid losing data do not reset or power off the SimpleShare server or click any browser menus or buttons while the disk pool is being created OK Continue to Disk Management Create Share ...

Page 81: ...e original file Whenever a file in the Base is saved the file is updated in the mirror 1 In the Disk Management menu click Create New Pool 2 In New Pool Name enter a descriptive name for mirror pool 3 Selected Mirroring Auto Configuration automatically designates the drive with the least amount of available space as the Base and the drive with the greater amount of available space as the Mirror To...

Page 82: ...Auto Configuration then do one of the following to set the capacity of the pool To set the size of the Mirror equal to the amount of available space on the Base select Maximize Size then continue to Step 8 on page 69 To specify the capacity of the Base and Mirror deselect Maximize Size and enter the desired capacity in gigabytes in Allocate continue to Step 8 on page 69 ...

Page 83: ...store the Base pool and the drive to store the Mirror pool 7 In Space Allocation enter the size in gigabytes of the Base pool The pool size can be set by entering the capacity in the text box or using the slider control 8 Click When entering the size of the Base and Mirror manually you must enter the same value for each disk Create Pool ...

Page 84: ... Result page click to view information on the disk poll you just created or click to create a share in the pool To avoid losing data do not reset or power off the SimpleShare server or click any browser menus or buttons while the disk pool is being created OK Continue to Disk Management Create Share ...

Page 85: ...n fact should a single drive that is part of a striped pool fail all data in the pool is lost even though the remaining disk s are functional 1 On the Disk Management menu click Create New Pool 2 In New Pool Name enter a descriptive name for the pool 3 Select Striping 4 If three disks are connected to SimpleShare in Number of Stripes enter the number of disks to be included in the striped pool At ...

Page 86: ... the largest pool possible based on the amount of available disk space on each disk select Maximize Size then continue to Step 7 on page 73 To specify the size of stripe to be placed on each disk deselect Maximize Size and enter the desired capacity in gigabytes in Allocate then continue to Step 7 on page 73 To configure the Mirror pool automatically continue to Step 4 To configure the pool manual...

Page 87: ...the capacity of the each stripe in the pool In Disk Assignment select the disk to contain Stripe 0 Stripe 1 and Stripe 3 if three drives are connected to SimpleShare In Space Allocation enter the size in gigabytes of the stripe to be created on each disk The stripe size can be set by entering the capacity in the text box or using the slider control 7 Click Create Pool ...

Page 88: ... SimpleShare server or click any browser menus or buttons while the disk pool is being created If SimpleShare displays a pop up indicating that all columns should add up to the same disk space space allocation for each disk is not set properly Make sure only a single checkbox in each Stripe n column is selected and that the total space allocated for all disks in a stripe is the same for each strip...

Page 89: ... Disk Pool Mappings click the button to the right of the pool you want to delete Before you can delete a disk pool you must remove all shares residing within the pool Deleting a Share Erasing a disk pool destroys all data saved to the pool We recommend that you back up your data before proceeding Delete ...

Page 90: ...ending on the type of erase process you want to perform Quick Erase erases data from the disk pool However data can be recovered using special data recovery utilities Full Erase overwrites the entire disk pool with random data making data recovery impossible OK Quick Erase Full Erase ...

Page 91: ...t the pool to be renamed from the Old Pool Name list 3 Enter the new descriptive name in New Pool Name 4 Click 5 In the confirmation dialog click The Rename Pool button is located at the bottom of the Disk Management page It may be necessary to use the scroll bar to see the button Rename Pool Rename Pool OK ...

Page 92: ...ool size can be set by entering the capacity in the text box or using the slider control 4 Click SimpleTech recommends that you backup all your data before resizing pools Loss of power or other failures during the resize operation could result in data loss You must also delete all shares on disk pools to be resized Pools cannot be reduced in capacity to a size less than the storage space consumed ...

Page 93: ... 5 In the confirmation dialog click the 6 On the Resize Pool Result page click To avoid losing data do not reset or power off the SimpleShare server or click any browser menus or buttons while the disk pool is being created OK Continue ...

Page 94: ...of mirrors to be created 4 In Disk Assignment select the checkbox for the drive s on which the mirror will be stored The number of disks you select must equal the number of pools specified in Number of Additional Mirrors see Step 3 above 5 Click Pools can only be mirror to a separate physical disk Therefore the number of mirrors you can create of a pool depends on the number of disks connected to ...

Page 95: ... In the confirmation dialog click 7 On the Add Mirrors Spares Result page click To avoid losing data do not reset or power off the SimpleShare server or click any browser menus or buttons while the disk pool is being created OK Continue ...

Page 96: ...are and apply your changes 1 In the Disk Management menu click Basic to check the rebuild status of the new mirror pool To add a mirror to an existing pool SimpleShare must rebuild the disk array which takes an extensive amount of time For example adding a 150 GB mirror may take approximately 4 hour to create ...

Page 97: ...ool 4 Click Make sure the checkboxes for disks that are to remain part of the mirror pool are not selected For example to remove all mirrors and keep the Base pool select all existing mirrors except the Base Available Mirrors Spares list the mirrors spares associated with the mirror pool The Base represents the original pool from which the mirror was created Mirror1 Mirror2 and so forth represent ...

Page 98: ...84 Managing SimpleShare Disk Pool 5 On the Remove Mirrors Spares Result page click Continue ...

Page 99: ...ame for the encrypted pool 3 Select Encrypt Pool 4 In Encryption Password enter the password to be used to encrypt data in the pool In Confirm Password re enter the password to verify it was entered correctly 5 To allocate all available disk space on SimpleShare to the new pool in Pool Mapping Preference select Auto Configuration then continue to Step 7 on page 86 Passwords should be at least eigh...

Page 100: ...lows you to specify which disk drives are to be used by the pool being created To create a pool that only occupies a portion of a single disk make sure to only select the Use checkbox for the drive you want to use If multiple disks are connected to SimpleShare by default the Space Allocation selects all available drives This results in all available space on each drive being allocated to the new p...

Page 101: ...Pool Result page click to view information on the new disk pool or click to create a share in the pool To avoid losing data do not reset or power off the SimpleShare server or click any browser menus or buttons while the disk pool is being created OK Continue to Disk Management Create Share ...

Page 102: ...leShare Disk Pool CHANGING THE ENCRYPTION PASSWORD 1 In the Disk Management menu click Basic 2 In Disk Pool Mappings click the button next to the pool whose encryption password you want to change S f Change Encryption ...

Page 103: ...n of alphanumeric characters A Z and 1 9 and special characters such as and Spaces are not allowed If you did not select the Enable Pool Encryption the status for the pool as reported in the Disk Management Basic page will become Decrypting until the data stored in the pool has been converted into un encrypted data fully If you left the Enable Pool Encryption checkbox selected and changed the pass...

Page 104: ...SimpleShare Disk Pool DISABLING POOL ENCRYPTION 1 In the Disk Management menu click Basic 2 In Disk Pool Mappings click the button next to the pool whose encryption password you want to change S f Change Encryption ...

Page 105: ... pool you want to modify 4 In Encrypt Pool make sure Enable Pool Encryption is selected 5 In New Password delete the encryption password making sure the text box is empty In Confirm Password delete the encryption password making sure the text box is empty 6 Click Change Encryption ...

Page 106: ...se events the pools and any shares within the pools will not be visible over the network 1 In the Disk Management menu click Basic 2 In Disk Pool Mappings click the button next to the encrypted pool you want to mount The Status column under the Disk Pool Mappings controls shows Unavailable for any encrypted pool that has not been unlocked by entering the encryption password as described below S f ...

Page 107: ...s and list which pools had an incorrect password supplied If multiple encrypted pools were listed in the Encrypted Pool Names controls only those that had passwords will be listed in the error notification Encrypted pools that valid passwords were supplied for will be unlocked SimpleShare will return to the Encrypted Pool Authentication page with the Encrypted Pool Names controls updated to reflec...

Page 108: ...s and other devices on the network this is the easiest way to manage IP addressing 1 Click the Networking menu 2 From the LAN Protocol list choose DHCP Client 3 To enable SimpleShare auto configuration select Enabled from the LAN IP Autoconfiguration list 4 Click LAN IP Autoconfiguration makes it possible for SimpleShare to configure itself on your IP network automatically when a DHCP server is no...

Page 109: ...mic Host Configuration Protocol DHCP is a TCP IP service protocol thatoffers dynamic leased configuration of host IP addresses and distributes other configuration parameters to eligible network clients DHCP provides safe reliable and simple TCP IP network configuration prevents address conflicts and helps conserve the use of client IP addresses on the network DHCP uses a client server model where ...

Page 110: ...re the IP address you specify is on the same LAN segment as the computer running SimpleShare Administrator 4 Set the following IP addresses as necessary to configure SimpleShare on your local network LAN Domain Name LAN DNS Servers preferred server and up to two alternates LAN WINS Servers preferred server and up to two alternates 5 Click 6 On Apply screen click Apply Continue ...

Page 111: ...address To set the IP address for SimpleShare statically complete the following steps 1 Click the Networking menu 2 From the LAN Protocol list choose Static 3 From the LAN IP Autoconfiguration list choose Disabled 4 Set the following IP network addresses as necessary to configure SimpleShare on your local network LAN IP Address LAN Subnet Mask LAN Default Gateway LAN Domain Name LAN DNS Servers pr...

Page 112: ...eShare ENABLING THE PRINT SERVER 1 Make sure your USB printer is connected to SimpleShare and powered On For instructions on installing a printer see Connecting a USB Printer on page 10 2 Click the Printers menu The Printers page displays the name manufacturer model and serial number if available of the printer connected to SimpleShare 3 From the Printer Pool Name list choose the disk pool that wi...

Page 113: ...99 Managing SimpleShare Printer 5 In the confirmation dialog click 6 In the Administration menu click Basic 7 Click to restart SimpleShare and apply your changes OK Reboot ...

Page 114: ...SimpleShare Printer DISABLING THE PRINT SERVER 1 Click the Printers menu 2 Select No Printer Pool from the Printer Pool Name list 3 Click 4 In the warning dialog click 5 In the confirmation dialog click Apply OK OK ...

Page 115: ...S COMPUTERS 1 In the Address line of your browser enter SimpleShare name to open the SimpleShare root directory where SimpleShare name is the network name of your SimpleShare server 2 Right click on the printer icon and then click Connect to start the Add Printer Wizard ...

Page 116: ...s XP the Connect to Printer dialog appears Click to start the Add Printer Wizard 4 Select the manufacturer and model of your printer from those listed or if you have the printer installation disk click and follow the onscreen instructions 5 Click OK Have Disk OK ...

Page 117: ... and printers Internal Storage 1 IDE disk drive conforming to ATA 6 up to 133MB s 160 and 250 Gigabyte disk sizes available depending on model Operating Temperature 41 to 95 F 5 to 35 C Humidity relative 20 to 80 non condensing Power External Power Adapter 100 240V 50 60Hz AC input 12V DC 3A output Power Consumption 36W maximum Dimensions Length 8 06 in 204 72 mm Width 1 62 in 41 15 mm Height 5 13...

Page 118: ...ough our Web site by email or by phone Technical Support Phone Line 1 800 945 3444 or 949 476 1180 Technical Support Email Address support simpletech com Online Chat with Technical Support www simpletech com support When contacting SimpleTech for technical assistance please be prepared to provide the name model serial number and software version of your SimpleShare WORLDWIDE HEADQUARTERS SimpleTec...

Page 119: ...no guarantee that interference will not occur in a particular installation If this equipment does cause harmful interference to radio or television reception which can be determined by turning the equipment off and on the user is encouraged to try to correct the interference by one or more of the following measures Reorient or relocate the receiving antenna Increase the distance between the affect...

Page 120: ... to repair Product or replacement Product may be provided by SimpleTech on an exchange basis and will be either new or refurbished to be functionally equivalent to new SIMPLETECH DISCLAIMS ALL OTHER WARRANTIES EITHER EXPRESSED OR IMPLIED INCLUDING BUT NOT LIMITED TO IMPLIED WARRANTIES OF MERCHANTABILITY AND FITNESS FOR A PARTICULAR PURPOSE WITH RESPECT TO ITS PRODUCTS AND ANY ACCOMPANYING WRITTEN ...

Reviews: