background image

SLE 280 A2

GB

MT

 49


Notes on the Declaration of Conformity

In terms of compliance with fundamental specifications and 
other relevant regulations, this appliance complies with the 
Low Voltage Directive 2014/35/EU, the Electromagnetic 
Compatibility Directive 2014/30/EU and the Ecodesign 
Directive 2009/125/EC.

The complete Declaration of Conformity, in its original form,  
is available with the importer.

Kompernass Handels GmbH warranty

Dear Customer,

This appliance has a 3-year warranty valid from the date of purchase. If this product 
has any faults, you, the buyer, have certain statutory rights. Your statutory rights 
are not restricted in any way by the warranty described below.

Warranty conditions

The validity period of the warranty starts from the date of purchase. Please keep 
your original receipt in a safe place. This document will be required as proof of 
purchase.

If any material or production fault occurs within three years of the date of purchase 
of the product, we will either repair or replace the product for you at our discretion. 
This warranty service is dependent on you presenting the defective appliance 
and the proof of purchase (receipt) and a short written description of the fault 
and its time of occurrence.

If the defect is covered by the warranty, your product will either be repaired or 
replaced by us. The repair or replacement of a product does not signify the begin-
ning of a new warranty period.

Warranty period and statutory claims for defects

The warranty period is not prolonged by repairs effected under the warranty. 
This also applies to replaced and repaired components. Any damage and defects 
present at the time of purchase must be reported immediately after unpacking. 
Repairs carried out after expiry of the warranty period shall be subject to a fee.

Scope of the warranty

This appliance has been manufactured in accordance with strict quality guidelines 
and inspected meticulously prior to delivery.

The warranty covers material faults or production faults. The warranty does not 
extend to product parts subject to normal wear and tear or fragile parts such as 
switches, batteries, baking moulds or parts made of glass.

Summary of Contents for SLE 280 A2

Page 1: ...IAN 285248 DEUMIDIFICATORE SLE 280 A2 DEHUMIDIFIER Operating instructions DEUMIDIFICATORE Istruzioni per l uso LUFTENTFEUCHTER Bedienungsanleitung ...

Page 2: ... pagina con le immagini e prendere confidenza con le diverse funzioni dell apparecchio Before reading unfold the page containing the illustrations and familiarise yourself with all functions of the device Klappen Sie vor dem Lesen die Seite mit den Abbildungen aus und machen Sie sich anschließend mit allen Funktionen des Gerätes vertraut ...

Page 3: ......

Page 4: ...legamento elettrico 10 Indicazioni sulla messa in esercizio 10 Sbrinamento automatico 10 Comandi e funzionamento 11 Accensione spegnimento dell apparecchio 11 Sportello per la fuoriuscita dell aria 11 Indicatori di stato 12 Selezione programmi 13 Timer 14 Serbatoio dell acqua 15 Svuotamento tramite tubo 16 Pulizia 18 Pulizia e sostituzione del filtro 19 Protezione dal surriscaldamento 20 Conservazi...

Page 5: ...ativi al collegamento e all uso corrispondono alle ultime informazioni disponibili al momento dell invio in stampa fornite in buona fede tenendo conto delle nostre attuali esperienze e conoscenze I dati le illustrazioni e le descrizioni contenute nel presente manuale di istruzioni non costituiscono una base valida per alcun tipo di rivendicazione Il produttore declina ogni responsabilità per i dan...

Page 6: ...NZA Un avvertenza contrassegnata da questo livello di pericolo indica una situazione potenzialmente pericolosa Qualora non fosse possibile evitarla tale situazione può causare lesioni Seguire le indicazioni di questa avvertenza per evitare lesioni personali ATTENZIONE Un avvertenza contrassegnata da questo livello di pericolo indica la possibilità di danni materiali Qualora non fosse possibile evi...

Page 7: ... struttura elettrica e meccanica sussiste il pericolo di folgorazione Pericolo di folgorazione a causa dell umidità PERICOLO Non collocare l apparecchio in acqua pozze o pozzan ghere Non azionare mai l apparecchio nelle vicinanze di una vasca da bagno una doccia un lavandino pieno o simili L apparecchio il cavo e la spina non devono essere immersi in acqua o altri liquidi Proteggere l apparecchio ...

Page 8: ...pparecchio non è indicato per l asciugatura di mate riale isolante In caso di rottura di tubazioni con con seguente inumidimento di materiale isolante rivolgersi esclusivamente a un tecnico specializzato Non esporre mai l apparecchio a temperature di 0 C o inferiori L acqua rimasta nei condotti potrebbe ghiac ciarsi e danneggiare il sistema Non utilizzare l apparecchio in ambienti polverosi o inte...

Page 9: ...uiti sull uso sicuro dell appa recchio e qualora ne abbiano compreso i pericoli associati I bambini non devono giocare con l apparecchio La pulizia e la manutenzione a cura dell utente non devono essere ese guite da bambini a meno che non siano sorvegliati Far eseguire le riparazioni solo da aziende specializzate o dall assistenza ai clienti Le riparazioni effettuate in modo non conforme possono ca...

Page 10: ...evono avere una distanza di almeno 20 cm da pareti o altri oggetti mentre dal fronte retro e dal lato superiore dell apparecchio deve esserci uno spazio libero minimo di 50 cm in modo da garantire una buona circolazione dell aria Azionare l apparecchio solo in ambienti con temperatura compresa fra 5 C e 35 C Utilizzare l apparecchio solo in ambienti con dimensioni massime di 20 m Pulire i filtri de...

Page 11: ...zioni INDICAZIONE Controllare la completezza e l integrità della fornitura In caso di fornitura incompleta o in presenza di danni da trasporto o da im ballaggio inadeguato rivolgersi alla hotline di assistenza vedere capitolo Assistenza Rimuovere tutto il materiale di imballaggio e i fissaggi di trasporto dall appa recchio Rimuovere la pellicola dal tastierino dei comandi Smaltimento dell imballagg...

Page 12: ...ll acqua 8 Griglia per l ingresso dell aria rimovibile 9 Filtro in plastica 10 Filtro a carbone 11 Avvolgimento cavo 12 Cavo di rete 13 Raccordo per scarico 14 Apertura di uscita 15 Graffa di fissaggio 16 Programmi LED 17 Display 18 LED TIMER 19 LED SERBATOIO DELL ACQUA PIENO TANK FULL 20 LED FUNZIONAMENTO OPERATION 21 Tasto STAND BY 22 Tasto TIMER 23 Tasti freccia SU GIÙ UP DOWN 24 Tasto PROGRAMMA ...

Page 13: ...nte l apparecchio dalla rete in caso di emergenza Assicurarsi che il cavo di rete sia integro e non posarlo su superfici bollenti e o bordi acuminati in quanto potrebbe danneggiarsi Assicurarsi che durante il funzionamento il cavo di rete non venga teso o piegato Indicazioni sulla messa in esercizio In caso i luoghi di soggiorno fossero interessati per lungo tempo da forte umidità relativa dell ari...

Page 14: ...tempo impostato 1 24 ore Se nel programma UMIDITÀ DELL ARIA TARGET TARGET HUMIDITY è stato impostato il valore per l umidità relativa dell aria l apparecchio si spegne non appena viene raggiunto il valore Se il valore viene superato l apparecchio si riaccende L apparecchio si spegne quando il serbatoio dell acqua 5 è pieno o viene rimosso In caso di posizionamento errato o se era stato rimosso il ...

Page 15: ...empo di spegnimento PULIZIA ARIA AIR CLEAN ASCIUGATURA BIANCHERIA DRY CLOTHES UMIDITÀ DELL ARIA TARGET TARGET HUMIDITY AUTOMATICO AUTOMATIC 16 Programma selezionato FUNZIONAMENTO OPERATION 20 L apparecchio è acceso Indicatori display Indicazione Significato HIGH MID LOW HIGH MID LOW HIGH MID LOW Questa indicazione è sempre presente durante il funzionamento Essa indica l intervallo di umidità dell a...

Page 16: ...ventola INDICAZIONE I valori rF della funzione automatica non sono identici ai valori ALTO MEDIO BASSO nel display 17 Selezionare questo programma per una deumidificazione continua al piacevole tasso di umidità relativa dell aria del 55 UMIDITÀ DELL ARIA TARGET TARGET HUMIDITY Nel programma UMIDITÀ DELL ARIA TARGET TARGET HUMIDITY si può sele zionare l umidità relativa dell aria in passi del 5 fra ...

Page 17: ...nato con tutti i 4 programmi Si possono selezionare 24 tempi di spegnimento da 1 a 24 ore Alla scadenza del tempo impostato l apparecchio viene spento permanentemente e il timer si ferma Premere il tasto TIMER 22 durante il funzionamento Il LED TIMER 18 lampeggia Con i tasti freccia 23 selezionare un tempo di spegnimento da 1 a 24 ore Il tempo selezionato lampeggia per 3 secondi nel display 17 e v...

Page 18: ...l LED SERBATOIO DELL ACQUA PIENO TANK FULL 19 comincia a lampeggiare L apparecchio si spegne dopo qualche secondo Per circa 20 secondi risuona un segnale di allarme Il LED SERBATOIO DELL ACQUA PIENO TANK FULL 19 lampeggia finché il serbatoio dell acqua 5 non viene svuotato Per svuotare il serbatoio dell acqua 5 estrarlo leggermente a sinistra e a destra e quindi trasportarlo dalla maniglia v Figura...

Page 19: ... la sua lunghezza poiché l apparecchio non dispone di una pompa per lo svuotamento Controllare regolarmente tutto il sistema di connessione in relazione alla tenuta Svitare il raccordo 13 sul retro dell apparecchio v Figura 2 Inserire il tubo flessibile accluso 25 nell apertura di uscita 14 o avvitare l adatta tore UE per tubi da giardino 26 sull apertura di uscita 14 v Figura 3 4 Con l impiego del...

Page 20: ...Fig 5 Fig 6 Reinserire il serbatoio dell acqua 5 nell apparecchio Collocare l apparecchio in modo tale che l estremità del tubo flessibile venga a trovarsi sopra uno scarico Badare che l estremità aperta del tubo flessibile si trovi sotto lo scarico dell apparecchio il tubo deve essere dun que inclinato Accendere l apparecchio e selezionare un programma Se si desidera che l acqua venga nuovamente ra...

Page 21: ... 5 dall interno è necessario rimuovere il coperchio nero A tal fine allentare la maniglia dal supporto espellendola lateralmente Nel compiere tale azione assicurarsi che i perni sulla maniglia coincidano con le scanalature sul serbatoio dell acqua 5 v Figura 7 Fig 7 Rimuovere ora il coperchio nero dal serbatoio dell acqua 5 Il montaggio avviene in sequenza inversa Al fine di evitare la formazione di...

Page 22: ...evono essere premute leggermente verso l alto per liberare la griglia Estrarre quindi la griglia di ingresso dell aria 8 verso il basso Al fine di consentire la rimozione del filtro in plastica 9 sul lato inferiore del filtro in plastica 9 si trovano due linguette di plastica che devono essere premute leggermente verso il basso per liberare il filtro Rimuovere quindi dall apparecchio il filtro in plast...

Page 23: ...aggio 15 che si trova sul cavo al cavo di rete 12 Se non si utilizza l apparecchio per lungo tempo rimuovere il serbatoio dell acqua 5 Conservare l apparecchio solo in posizione eretta e in un ambiente asciutto e privo di polvere Eliminazione dei guasti In questo capitolo sono riportate importanti informazioni per l individuazione e l eliminazione dei guasti Cause ed eliminazione dei guasti La seg...

Page 24: ...ULIZIA ARIA AIR CLEAN Con questo programma non ha luogo deumidificazione Selezionare un altro programma come ad es AUTOMATICO AUTO MATIC Acqua sul pavimento L apparecchio è stato scosso eccessivamente durante lo spostamento Nell apparecchio è presente acqua residua Si tratta di un normale processo dell apparecchio Fare attenzione a non scuotere troppo l apparecchio durante lo spostamento L aria di ...

Page 25: ... tecnici Tensione di ingresso 220 240 V 50 Hz Potenza di ingresso 280 W Corrente nominale 1 3 A Potenza max 370 W Corrente nominale max 1 7 A Portata aria 160 m h Serbatoio dell acqua 7 0 l Pressione di aspirazione 1 0 MPa Pressione di soffiaggio 2 5 MPa Potenza deumidificante 24 h 20 l a 30 C 80 di umidità rel 12 l a 27 C 60 di umidità rel Dimensioni consigliate del locale circa 20 m2 ovvero circa 4...

Page 26: ...a data dell acquisto Si prega di conservare lo scontrino di cassa originale Tale documento è necessario come prova di acquisto Qualora entro tre anni a partire dalla data dell acquisto di questo prodotto si presentasse un vizio del materiale o di fabbricazione provvederemo a nostra discrezione a riparare o a sostituire gratuitamente il prodotto Questa prestazione di garanzia ha come presupposto ch...

Page 27: ... La garanzia decade in caso di impiego improprio o manomissione uso della forza e interventi non eseguiti dalla nostra filiale di assistenza autorizzata Trattamento dei casi di garanzia Per garantire una rapida evasione della Sua richiesta La preghiamo di seguire le seguenti istruzioni Tenga a portata di mano per qualsiasi richiesta lo scontrino di cassa e il codice dell articolo per es IAN 12345 c...

Page 28: ... Malta Tel 80062230 E Mail kompernass lidl com mt IAN 285248 Importatore Badi che il seguente indirizzo non è quello del servizio di assistenza clienti Contatti innanzitutto il servizio di assistenza clienti indicato KOMPERNASS HANDELS GMBH BURGSTRASSE 21 DE 44867 BOCHUM GERMANIA www kompernass com ...

Page 29: ...SLE 280 A2 26 IT MT ...

Page 30: ...ectrical connection 36 Guidelines for operation 36 Automatic defrosting 36 Handling and operation 37 Switching the appliance on off 37 Air outlet valve 37 Operating status displays 38 Selecting programmes 39 Timer 40 Water tank 41 Tube drainage 42 Cleaning 44 Cleaning and changing the filter 45 Protection against overheating 46 Storage 46 Troubleshooting 46 Causes of malfunction and fault rectificati...

Page 31: ...d guidelines for installation and handling contained in these operating instructions are consistent with the state of the art and to the best of our knowledge have been constituted duly taking into account our experience and understanding No claims may be derived from the specifications figures and descriptions in these operating instructions The manufacturer assumes no liability for damages sustain...

Page 32: ...ity or serious personal injury WARNING A warning at this risk level indicates a potentially hazardous situation Failure to avoid this hazardous situation could result in physical injury Follow the instructions in this warning to prevent physical injury CAUTION A warning at this risk level indicates potential material damage Failure to avoid this situation could result in material damage Follow the...

Page 33: ... is changed Risk of electrocution due to moisture DANGER Do not place the appliance in water nor in water pool ing areas or in puddles The appliance may never be operated near a bath tub a shower a filled wash basin or similar structures The appliance the connection cabling and the mains plug may not be immersed in water or other fluids Protect the appliance against drops or splashes of water In the...

Page 34: ...urst insulation or lagging materials become damp consult an expert under all circumstances Never expose the appliance to temperatures of 0 C or lower Residual water in the pipes could freeze and damage the system Do not use the appliance in a dusty or chlorinated envi ronment Basic safety guidelines To ensure safe handling of the appliance follow the safety guidelines set out below Prior to use ch...

Page 35: ...st com panies or by the Customer Service department Improper repairs can pose significant risks to the user Warranty enti tlement shall also lapse This appliance should not be exposed to rain Protect the ap pliance against moisture and the ingress of fluids and objects into the casing Never immerse the appliance in water and do not place objects containing fluids such as vases on the appliance The ap...

Page 36: ... a total of 20 m Clean the air filters before they become heavily soiled While draining the tube ensure that it does not become blocked and that the open end of the tube is positioned at a lower level than the outlet aperture The end of the tube must be positioned above a drain Operate the appliance only with the integrated water tank or with the tube installed Connect the earthing pin plug only to...

Page 37: ...ee the chapter Service Remove all packaging materials and all carriage braces from the appliance Remove the film from the control panel Disposal of packaging materials The packaging protects the appliance from damage during carriage The packaging materials have been selected in accordance with environmentally congruent and disposal specific parameters and are therefore recyclable Returning the packa...

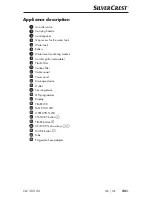
Page 38: ... Water level monitoring markers 8 Air inlet grille removable 9 Plastic filter 10 Carbon filter 11 Cable spool 12 Power cord 13 Drainage closure 14 Outlet 15 Securing brace 16 LED programmes 17 Display 18 TIMER LED 19 TANK FULL LED 20 OPERATION LED 21 STAND BY button 22 TIMER button 23 UP DOWN arrow keys 24 MODE button 25 Tube 26 EU garden hose adapter ...

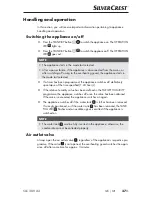
Page 39: ...rom the mains in the event of an emergency Ascertain that the power cable is undamaged and that it is not routed over hot surfaces and or sharp edges otherwise it will become damaged Ensure that the power cable is not taut or kinked Guidelines for operation Should the air in your living spaces consistently evince excess relative humidity the cause should be identified and addressed Sustained year r...

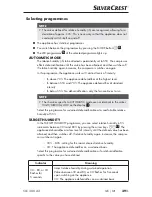
Page 40: ...tches off definitively upon lapse of the time specified 1 24 hour s If the relative humidity value has been defined in the TARGET HUMIDITY programme the appliance switches off once the value has been attained If the value is exceeded the appliance switches on again The appliance switches off if the water tank 5 is full or has been removed If wrongly positioned or if the water tank 5 has been removed the...

Page 41: ...nk is full or is not inserted TIMER 18 A switch off time has been activated AIR CLEAN DRY CLOTHES TARGET HUMIDITY AUTOMATIC 16 Selected programme OPERATION 20 The appliance is switched on Display indicators Indicator Meaning HIGH MID LOW HIGH MID LOW HIGH MID LOW This indicator is consistently visible during operation It indicates the room s humidity range LOW below 65 MEDIUM 65 to 75 HIGH over 75 ...

Page 42: ...55 No dehumidification only the fan continues to run NOTE The rh values specific to AUTOMATIC mode are not identical to the values HIGH MEDIUM LOW on the display 17 Select this programme for sustained dehumidification at a comfortable relative humidity of 55 TARGET HUMIDITY In the TARGET HUMIDITY programme you can select relative humidity in 5 increments between 30 and 80 by pressing the arrow keys 2...

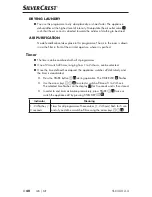
Page 43: ...all 4 programmes One of 24 switch off times ranging from 1 to 24 hours can be selected Once the time defined has elapsed the appliance switches off definitively and the timer is deactivated Press the TIMER button 22 during operation The TIMER LED 18 flashes Use the arrow keys 23 to select a switch off time of 1 to 24 hours The selected time flashes on the display 17 for 3 seconds and is then stored In or...

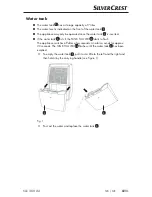
Page 44: ...nserted If the water tank 5 is full the TANK FULL LED 19 starts to flash The appliance switches off after a few seconds An alarm sounds for approx 20 seconds The TANK FULL LED 19 flashes until the water tank 5 has been emptied To empty the water tank 5 pull it out a little to the left and the right and then hold it by the carrying handle see Figure 1 Fig 1 Pour out the water and replace the water tan...

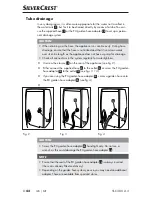
Page 45: ...in the system regularly for watertightness Unscrew the closure 13 on the rear of the appliance see fig 2 Either connect the supplied hose 25 to the outlet 14 or screw the EU garden hose adapter 26 to the outlet 14 see figs 3 4 If you are using the EU garden hose adapter 26 screw a garden hose onto the EU garden hose adapter 26 see fig 4 Fig 2 Fig 3 Fig 4 CAUTION Screw the EU garden hose adapter 26 ha...

Page 46: ...of the hose is positioned over a drain The open end of the hose must be positioned lower than the appli ance s outlet i e the hose must run downwards Switch on the appliance as usual and select a programme If you wish to drain into the water tank 5 again switch off the appliance pull off the hose 25 or unscrew the EU garden hose adapter 26 together with the garden hose Screw the closure back onto th...

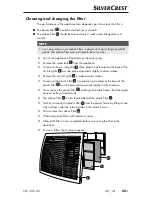
Page 47: ...placing it In order to clean the inside of the water tank 5 you must remove the black lid To do this release the carrying handle from the retainer while pressing it out sideways Ensure that the pins on the handle line up with the grooves on the water tank 5 see fig 7 Fig 7 Now remove the black lid from the water tank 5 To insert follow the reverse sequence It is recommended that the water tank 5 be...

Page 48: ...inlet grille 8 must be pressed upwards slightly to allow release Remove the air inlet grille 8 in a downwards motion To remove the plastic filter 9 two plastic lugs located at the base of the plastic filter 9 must be pressed downwards slightly to allow release Now remove the plastic filter 9 including the plastic frames from the appli ance by pulling it downwards The carbon filter 10 is also located b...

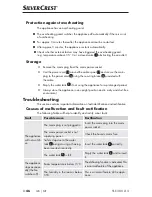
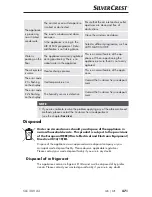
Page 49: ...store the appliance in an upright position and in a dry and dust free environment Troubleshooting This section contains important information on fault identification and rectification Causes of malfunction and fault rectification The following Table will help to identify and rectify minor faults Fault Possible cause Rectification The appliance will not switch on The mains plug is not plugged in Insert...

Page 50: ...s flashing on the display Coil temperature error Contact the Customer Service depart ment The error code E 2 is flashing on the display The humidity sensor is defective Contact the Customer Service depart ment NOTE If you are unable to resolve the problem applying any of the aforementioned methods please contact the Customer Service department see the chapter Service Disposal Under no circumstances ...

Page 51: ... 5 C to 35 C Dimensions approx 60 x 38 x 28 5 cm Weight approx 13 kg The lower the ambient temperature is and the colder the temperature outside becomes the less moisture accumulates in the air and flows from outside into the room to be dehumidified For this reason dehumidification performance steadily decreases when temperatures drop and can come to a standstill This does not mean that the appliance...

Page 52: ...will either repair or replace the product for you at our discretion This warranty service is dependent on you presenting the defective appliance and the proof of purchase receipt and a short written description of the fault and its time of occurrence If the defect is covered by the warranty your product will either be repaired or replaced by us The repair or replacement of a product does not signi...

Page 53: ...purchase You will find the item number on the type plate an engraving on the front page of the instructions bottom left or as a sticker on the rear or bottom of the appliance If functional or other defects occur please contact the service department listed either by telephone or by e mail You can return a defective product to us free of charge to the service address that will be provided to you Ens...

Page 54: ...ebeschreibung 59 Vor dem Erstgebrauch 60 Elektrischer Anschluss 60 Hinweise zum Betrieb 60 Automatische Enteisung 60 Bedienung und Betrieb 61 Gerät ein ausschalten 61 Klappe für den Luftauslass 61 Betriebszustandsanzeigen 62 Programme auswählen 63 Timer 64 Wassertank 65 Schlauchentwässerung 66 Reinigung 68 Filter reinigen und tauschen 69 Schutz vor Überhitzung 70 Lagerung 70 Fehlerbehebung 70 Fehl...

Page 55: ...Hinweise für den Anschluss und die Bedienung entsprechen dem letzten Stand bei Drucklegung und erfolgen unter Berücksichtigung unserer bisherigen Erfahrungen und Erkenntnisse nach bestem Wissen Aus den Angaben Abbildungen und Beschreibungen in dieser Bedienungsanlei tung können keine Ansprüche hergeleitet werden Der Hersteller übernimmt keine Haftung für Schäden aufgrund von Nichtbeachtung der Bed...

Page 56: ...s Todes zu vermeiden WARNUNG Ein Warnhinweis dieser Gefahrenstufe kennzeichnet eine mögliche gefährliche Situation Falls die gefährliche Situation nicht vermieden wird kann dies zu Verletzungen führen Die Anweisungen in diesem Warnhinweis befolgen um Verletzungen von Personen zu vermeiden ACHTUNG Ein Warnhinweis dieser Gefahrenstufe kennzeichnet einen möglichen Sachschaden Falls die Situation nich...

Page 57: ... der elektrische und mechanische Aufbau verändert besteht Stromschlaggefahr Gefahr von Stromschlag durch Feuchtigkeit GEFAHR Stellen Sie das Gerät nicht in Wasser auch nicht in Wasserlachen oder Pfützen Das Gerät darf niemals in der Nähe einer Badewan ne einer Dusche eines gefüllten Waschbeckens o Ä betrieben werden Das Gerät die Anschlussleitung und der Netzstecker dürfen nicht in Wasser oder and...

Page 58: ... Rohrbruch Isolierung oder Dämmmaterial feucht geworden sind fragen Sie auf jeden Fall einen Fachmann Setzen Sie das Gerät niemals Temperaturen von 0 C oder weniger aus Restwasser in den Leitungen könnte gefrieren und das System beschädigen Verwenden Sie das Gerät nicht in staubiger oder chlor haltiger Umgebung Grundlegende Sicherheitshinweise Beachten Sie für einen sicheren Umgang mit dem Gerät d...

Page 59: ...Kindern ohne Beaufsichtigung durchgeführt werden Lassen Sie Reparaturen am Gerät nur von autorisierten Fachbetrieben oder dem Kundenservice durchführen Durch unsachgemäße Reparaturen können erhebliche Gefahren für den Benutzer entstehen Zudem erlischt der Garantieanspruch Dieses Gerät darf nicht dem Regen ausgesetzt werden Schüt zen Sie das Gerät vor Feuchtigkeit und dem Eindringen von Flüssigkeit...

Page 60: ...u gewähr leisten Das Gerät darf nur in Räumen mit einer Temperatur von 5 C bis 35 C betrieben werden Verwenden Sie das Gerät nur in Räumen bis max 20 m Reinigen Sie die Luftfilter bevor sie stark verschmutzt sind Achten Sie bei der Schlauchentwässerung darauf dass der Schlauch nicht blockiert wird und das offene Ende des Schlauches tiefer als die Austrittsöffnung liegt Das Schlau chende muss über ein...

Page 61: ...den Sie sich an die Service Hotline siehe Kapitel Service Entfernen Sie sämtliches Verpackungsmaterial und alle Transportsicherun gen vom Gerät Ziehen Sie die Folie vom Bedienfeld ab Entsorgung der Verpackung Die Verpackung schützt das Gerät vor Transportschäden Die Verpackungsmate rialien sind nach umweltverträglichen und entsorgungstechnischen Gesichtspunk ten ausgewählt und deshalb recyclebar D...

Page 62: ...skontrolle 8 Gitter für Lufteinlass abnehmbar 9 Kunststofffilter 10 Kohlefilter 11 Kabelaufwicklung 12 Netzkabel 13 Verschluss für Drainage 14 Austrittsöffnung 15 Sicherungsklemme 16 LED Programme 17 Display 18 LED TIMER 19 LED WASSERTANK VOLL 20 LED BETRIEB 21 STAND BY Taste 22 TIMER Taste 23 Pfeiltasten HOCH RUNTER 24 PROGRAMM Taste 25 Schlauch 26 EU Gartenschlauch Adapter ...

Page 63: ...tz getrennt werden kann Vergewissern Sie sich dass das Netzkabel unbeschädigt ist und nicht über heiße Flächen und oder scharfe Kanten verlegt wird sonst wird es beschädigt Achten Sie darauf dass das Netzkabel nicht straff gespannt oder geknickt wird Hinweise zum Betrieb Sollten Sie in Wohnräumen dauerhaft eine zu hohe relative Luftfeuchtigkeit haben sollte die Ursache gefunden und beseitigt werden...

Page 64: ... Stunden dauerhaft aus Wurde im Programm ZIEL LUFTFEUCHTIGKEIT der Wert für die relative Luft feuchtigkeit eingestellt schaltet sich das Gerät aus sobald der Wert erreicht ist Wird der Wert überschritten schaltet sich das Gerät wieder ein Das Gerät schaltet aus wenn der Wassertank 5 voll ist oder entfernt wird Bei falschem Sitz oder wenn der Wassertank 5 entfernt wurde blinkt bei eingeschalteten G...

Page 65: ...t eingesetzt TIMER 18 Es ist eine Ausschaltzeit aktiviert LUFTREINIGUNG WÄSCHETROCKNUNG ZIEL LUFTFEUCHTIGKEIT AUTOMATIK 16 gewähltes Programm BETRIEB 20 Das Gerät ist eingeschaltet Display Anzeigen Anzeige Bedeutung HOCH MITTEL NIEDRIG HOCH MITTEL NIEDRIG HOCH MITTEL NIEDRIG Diese Anzeige ist während des Betriebs dauerhaft zu sehen Sie zeigt den Bereich der Luftfeuchtigkeit im Raum an NIEDRIG unte...

Page 66: ...ne Entfeuchtung es läuft lediglich der Lüfter HINWEIS Die rF Werte der Automatik sind nicht identisch mit den Werten HOCH MITTEL NIEDRIG im Display 17 Wählen Sie dieses Programm für die dauerhafte Entfeuchtung auf eine relative Luftfeuchtigkeit von angenehmen 55 ZIEL LUFTFEUCHTIGKEIT Im Programm ZIEL LUFTFEUCHTIGKEIT können Sie die relative Luftfeuchtigkeit in 5 Schritten zwischen 30 und 80 wählen...

Page 67: ...en Es können 24 Ausschaltzeiten von 1 bis 24 Stunden gewählt werden Nach Ablauf der eingestellten Zeit wird das Gerät dauerhaft ausgeschaltet und der Timer ist beendet Drücken Sie während des Betriebs die Taste TIMER 22 Die LED TIMER 18 blinkt Wählen Sie mit den Pfeiltasten 23 eine Ausschaltzeit von 1 bis 24 Stunden Die gewählte Zeit blinkt für 3 Sekunden im Display 17 und ist dann gespeichert Um ...

Page 68: ...er Wassertank 5 voll beginnt die LED WASSERTANK VOLL 19 zu blinken Das Gerät schaltet sich nach einigen Sekunden aus Für ca 20 Sekunden ertönt ein Alarmton Die LED WASSERTANK VOLL 19 blinkt bis der Wassertank 5 geleert ist Um den Wassertank 5 zu entleeren ziehen Sie ihn links und rechts etwas heraus und tragen ihn dann am Griff siehe Abbildung 1 Abb 1 Gießen Sie das Wasser aus und setzen den Wasser...

Page 69: ... nicht über eine Pumpe für die Entwässerung verfügt Prüfen Sie regelmäßig das gesamte Anschluss System auf Dichtigkeit Schrauben Sie den Verschluss 13 auf der Rückseite des Gerätes heraus siehe Abbildung 2 Stecken Sie entweder den mitgelieferten Schlauch 25 auf die Austrittsöff nung 14 oder schrauben Sie den EU Gartenschlauch Adapter 26 auf die Austrittsöffnung 14 siehe Abbildung 3 4 Schrauben Sie b...

Page 70: ...ng 6 Abb 5 Abb 6 Setzen Sie den Wassertank 5 wieder in das Gerät ein Stellen Sie das Gerät so auf dass das Schlauchende über einem Abfluss en det Dabei muss das offene Schlauchende unter dem Auslass am Gerät liegen Der Schlauch muss also ein Gefälle haben Schalten Sie das Gerät wie gewohnt ein und wählen Sie ein Programm Wenn Sie wieder in den Wassertank 5 entwässern wollen schalten Sie das Gerät au...

Page 71: ... Um den Wassertank 5 von innen zu reinigen müssen Sie den schwarzen Deckel entfernen Lösen Sie hierzu den Griff aus der Halterung indem Sie ihn seitlich herausdrücken Achten Sie hierbei darauf dass die Zapfen am Griff mit den Nuten am Wassertank 5 übereinstimmen siehe Abbildung 7 Abb 7 Entnehmen Sie jetzt den schwarzen Deckel aus dem Wassertank 5 Der Einbau erfolgt in umgekehrter Reihenfolge Es empfi...

Page 72: ...drei Kunststofflaschen die zum Lösen etwas nach oben gedrückt werden müssen Ziehen Sie das Gitter für den Lufteinlass 8 nach unten hin ab Um den Kunststofffilter 9 zu entnehmen befinden sich an der Unterseite des Kunststofffilters 9 zwei Kunststofflaschen die Sie zum Lösen etwas nach unten drücken müssen Entnehmen Sie jetzt den Kunststofffilter 9 samt Plastikrahmen aus dem Gerät indem Sie ihn nach unten hin ...

Page 73: ... am Netzkabel 12 Entleeren Sie den Wassertank 5 wenn Sie das Gerät längere Zeit nicht verwenden Lagern Sie das Gerät nur in einer aufrechten Position und in einer trockenen und staubfreien Umgebung Fehlerbehebung In diesem Kapitel erhalten Sie wichtige Hinweise zur Störungslokalisierung und Störungsbehebung Fehlerursachen und Behebung Die nachfolgende Tabelle hilft bei der Lokalisierung und Behebu...

Page 74: ... Türen Läuft das Gerät im Programm LUFTREINIGUNG Es findet keine Entfeuchtung statt Wählen Sie ein anderes Programm wie z B AUTOMATIK Wasser auf dem Boden Das Gerät wurde beim umstellen zu sehr geschüttelt Es befindet sich Restwasser im Gerät Dies ist ein normaler Vorgang des Gerätes Achten Sie beim Umstellen des Gerätes darauf das Gerät nicht zu sehr zu schütteln Die Austrittluft ist warm Wärmeaust...

Page 75: ...g in Verbindung Anhang Technische Daten Eingangsspannung 220 240 V 50 Hz Eingangsleistung 280 W Nennstrom 1 3 A Max Leistung 370 W Max Nennstrom 1 7 A Luftdurchsatz 160 m h Wassertank 7 0 l Ansaugdruck 1 0 MPa Ausblasdruck 2 5 MPa Entfeuchtungsleistung 24 h 20 l bei 30 C 80 r Feuchte 12 l bei 27 C 60 r Feuchte Empfohlene Raumgröße ca 20 m2 bzw ca 46 m3 bei einer Deckenhöhe von 2 3 m Kältemittel R1...

Page 76: ...tum Im Falle von Mängeln dieses Produkts stehen Ihnen gegen den Verkäufer des Produkts gesetz liche Rechte zu Diese gesetzlichen Rechte werden durch unsere im Folgenden dargestellte Garantie nicht eingeschränkt Garantiebedingungen Die Garantiefrist beginnt mit dem Kaufdatum Bitte bewahren Sie den Original Kassenbon gut auf Diese Unterlage wird als Nachweis für den Kauf benötigt Tritt innerhalb von...

Page 77: ... denen in der Bedienungsanleitung abgeraten oder vor denen gewarnt wird sind unbedingt zu vermeiden Das Produkt ist nur für den privaten und nicht für den gewerblichen Gebrauch bestimmt Bei missbräuchlicher und unsachgemäßer Behandlung Gewaltanwen dung und bei Eingriffen die nicht von unserer autorisierten Service Niederlassung vorgenommen wurden erlischt die Garantie Abwicklung im Garantiefall Um ...

Page 78: ...22 0 15 EUR Min E Mail kompernass lidl at Service Schweiz Tel 0842 665566 0 08 CHF Min Mobilfunk max 0 40 CHF Min E Mail kompernass lidl ch IAN 285248 Importeur Bitte beachten Sie dass die folgende Anschrift keine Serviceanschrift ist Kontak tieren Sie zunächst die benannte Servicestelle KOMPERNASS HANDELS GMBH BURGSTRASSE 21 DE 44867 BOCHUM DEUTSCHLAND www kompernass com ...

Page 79: ... 76 DE AT CH SLE 280 A2 ...

Page 80: ...IAN 285248 KOMPERNASS HANDELS GMBH BURGSTRASSE 21 DE 44867 BOCHUM GERMANY www kompernass com Versione delle informazioni Last Information Update Stand der Informationen 01 2017 Ident No SLE280A2 012017 3 ...

Reviews: