background image

IT

1. Panoramica

1

Coperchio dei cestelli vapore

2

Cestello vapore, piano

3

Cestello vapore, fondo

4

Guarnizione del cestello vapore fondo 
(assicurarsi che la posizione sia corretta)

5

Caraffa

6

0/I

Interruttore principale

7

Cavo di collegamento con spina

8

Presa di rete

9

Sede per la caraffa (con corona dentata)

10

Sfioratore

11

Dispositivo di bloccaggio

12

Base 

13

Ventose

14

Bilancia

15

Termostato

16

Selettore di velocità

17

START/STOP

Avvio e arresto dell'apparecchio

18

TURBO

Tasto Turbo 

19

REVERSE

Cambiamento del senso di rotazione 

20

ROSOLARE

Programma per rosolare/tostare

21

COTT. VAP.

Programma per la cottura al vapore

22

IMPAST.

Programma per impastare

23

BILANCIA/TARA

Accendere la bilancia / attivare la funzione tara

24

Selettore del tempo

25

Display

26

Guarnizione dell'inserto lame (assicurarsi che la posizione sia 
corretta)

27

Inserto lame (con ruota dentata)

28

Cestello di cottura

29

Accessorio mixer

30

Spatola

31

Guarnizione del coperchio della caraffa 
(assicurarsi che la posizione sia corretta)

32

Coperchio della caraffa

33

Misurino

non illustrato:

34

Leva di sblocco

BB&3(B,7ERRN6HLWH0RQWDJ)HEUXDU

Summary of Contents for MONSIEUR CUISINEEDITION PLUS

Page 1: ...MONSIEUR CUISINE ÉDITION PLUS SKMK 1200 A1 IAN 277740 MONSIEUR CUISINE ÉDITION PLUS Istruzioni per l uso MONSIEUR CUISINE ÉDITION PLUS Operating instructions ...

Page 2: ... Italiano 2 English 36 ID SKMK 1200 A1_16_V2 1 ...

Page 3: ...oramica Overview 11 12 33 9 4 30 27 2 32 1 28 3 6 29 13 31 5 10 26 16 7 8 VEL REVERSE TEMP TEMPO PROGR AUTO BILANCIA TARA IMPAST COTT VAP ROSOLARE REVERSE TURBO START STOP 21 22 23 25 15 24 17 18 19 20 14 ...

Page 4: ... 10 2 Inserimento e smontaggio dell inserto lame 18 10 3 Collocazione della caraffa 19 10 4 Collocazione e smontaggio dell accessorio mixer 19 10 5 Collocazione del coperchio della caraffa 20 10 6 Utilizzo del coperchio per l apertura di riempimento 20 10 7 Bollitura e cottura al vapore con il cestello di cottura 20 10 8 Utilizzo della spatola 21 11 Cottura al vapore 22 11 1 Informazioni generali ...

Page 5: ...ulizia in lavastoviglie 27 15 3 Pulizia degli accessori 28 15 4 Pulizia controllo e sostituzione delle guarnizioni 28 15 5 Decalcificazione 29 15 6 Conservazione 29 16 Guasti causa eliminazione 30 16 1 Guasti durante il funzionamento 30 16 2 Segnalazioni d errore sul display 31 17 Smaltimento 32 18 Dati tecnici 32 19 Ordinazione di accessori 32 20 Garanzia della HOYER Handel GmbH 33 ...

Page 6: ...vio e arresto dell apparecchio 18 TURBO Tasto Turbo 19 REVERSE Cambiamento del senso di rotazione 20 ROSOLARE Programma per rosolare tostare 21 COTT VAP Programma per la cottura al vapore 22 IMPAST Programma per impastare 23 BILANCIA TARA Accendere la bilancia attivare la funzione tara 24 Selettore del tempo 25 Display 26 Guarnizione dell inserto lame assicurarsi che la posizione sia corretta 27 I...

Page 7: ...a non è collocata o non è chiusa correttamente C La velocità selezionata 1 4 è adatta per l accessorio mixer D Temperatura degli alimenti nella caraffa E Indicazione del peso in grammi fino a 5 000 g F Indicazione della velocità 1 10 G Rotazione sinistrorsa impostata attiva H Simbolo della velocità I Temperatura impostata 37 C 130 C ...

Page 8: ...one REVERSE per una mescolatura delicata Deve essere sempre collo cato per rendere ermetica la caraffa 5 Eventualmente triturare pri ma gli alimenti a pezzi con un bordo di circa 3 4 cm Accessorio mixer 29 Per alimenti fluidi Montare la panna minimo 200 ml Per battere albumi minimo 2 unità Emulsionare ad es maionese Va utilizzato solo ai livelli di velocità da 1 a 4 Non usare con la funzione TURBO...

Page 9: ...ali così contrassegnati non modifi cano né il gusto né l aroma degli alimenti Questo simbolo mette in guardia dal toccare la superficie rovente Questo simbolo mette in guardia dal contatto con il vapore acqueo bollente 4 Uso conforme Il Monsieur Cuisine serve a mescolare frullare sbattere montare triturare passare emulsio nare cuocere delicatamente al vapore impa stare rosolare e pesare alimenti e...

Page 10: ...di competenza dell utente non devo no essere svolte da bambini I bambini devono essere tenuti sotto controllo per evitare che gio chino con l apparecchio Questo apparecchio può essere utilizzato da persone con facoltà fisiche sensoriali o mentali ridotte o prive di esperienza e o cono scenze a condizione che vengano sorvegliate o istruite circa l uti lizzo sicuro dell apparecchio e che abbiano com...

Page 11: ...i animali domestici e causato dagli animali domestici Gli apparecchi elettrici possono com portare pericoli per gli animali domesti ci e da lavoro Inoltre gli animali possono anche causare danni all appa recchio Come regola generale mante nere gli animali lontani dagli apparecchi elettrici PERICOLO di scossa elettrica a causa dell umidità Non usare mai l apparecchio in prossi mità di una vasca da ...

Page 12: ...otazione Tenere lontani dalle parti in rotazioni anche i capelli lunghi e l abbigliamento non aderente al corpo Unica eccezione la struttura della spato la fornita è tale che quando mescola in senso orario non può entrare in contatto con l inserto lame in funzione Non usare la spatola con l accessorio mixer PERICOLO DI INCENDIO Prima di accendere l apparecchio collo carlo su una base piana stabile...

Page 13: ...letto pensile poiché il vapore esce verso l alto e potrebbe danneggiare il mobile Per produrre il vapore usare esclusiva mente acqua potabile pulita Non far funzionare l apparecchio a vuoto poiché il motore potrebbe surri scaldarsi e subire danni Utilizzare solo gli accessori originali Non utilizzare detergenti corrosivi o abrasivi L apparecchio è dotato di piedini anti scivolo con ventose di plas...

Page 14: ...perficie re sistente all acqua 8 Bilancia La bilancia da cucina incorporata consente di pesare fino a 5 kg con precisione al grammo La bilancia 14 è facile da usare ed è pronta per l uso quando non è in corso nessuna operazione Pesatura semplice 1 L apparecchio è acceso ma non vi sono operazioni in corso 2 Premere il tasto BILANCIA TARA 23 Il tasto inizia a lampeggiare Il di splay 25 indica 0000 g...

Page 15: ...te 8 della base 12 poi inserire la spina 7 in una presa di corrente adatta La presa di corrente deve essere facilmente accessi bile in ogni momento anche dopo il col legamento 9 2 Accensione e spegni mento dell apparecchio Portare l interruttore principale 6 sul lato posteriore su I Tutti i tasti si accendono brevemente Il display 25 si accende e mostra bre vemente l indicazione di controllo Poi v...

Page 16: ... IM PAST 22 COTT VAP 21 ROSOLARE 20 è acceso e START STOP 17 lampeggia Il programma è selezionato ma non ancora avviato Premere START STOP 17 per avviare la funzione Il tasto di programma IM PAST 22 COTT VAP 21 ROSOLARE 20 è acceso e START STOP 17 lampeggia Il programma è selezionato ed avviato Per interrompere il program ma prima della conclusione premere START STOP 17 Il tasto di programma COTT ...

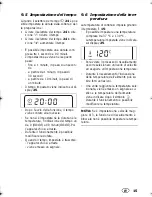
Page 17: ...hio si arresta Durante il funzionamento è possibile modificare la durata Quando il tempo impostato è trascorso l apparecchio si arresta viene emesso un segnale 9 6 Impostazione della tem peratura La temperatura di cottura si imposta girando il termostato 15 È possibile impostare una temperatura compresa tra 37 C e 130 C La temperatura impostata viene indicata sul display 25 Per avviare il processo...

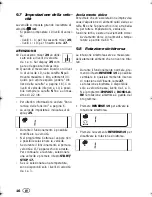
Page 18: ...il funzionamento si porta la velocità a 0 l apparecchio si arresta Per continuare a lavorare selezionare una velocità e premere il tasto START STOP 17 Se si è selezionata una temperatura sono disponibili solo i livelli di velocità da 1 a 3 Avviamento dolce Per evitare che un accelerazione improvvisa causi l espulsione di alimenti caldi dalla ca raffa 5 o che l apparecchio inizi a traballa re per t...

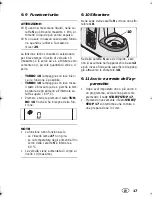
Page 19: ...affa supera i 60 C Premere e tenere premuto il tasto TUR BO 18 finché si ha bisogno della fun zione NOTE La funzione turbo funziona solo se l inserto lame 27 non gira se la temperatura degli alimenti all in terno della caraffa 5 è inferiore a 60 C La velocità viene aumentata di colpo al livello 10 massimo 9 10 Sfioratore Nella sede della caraffa 9 si trova uno sfio ratore 10 Se dalla caraffa 5 esc...

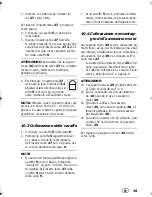
Page 20: ...iori a 10 è possibile riempire la ca raffa 5 fino a un massimo di 2 2 litri NOTA Per alcuni lavori è preferibile che il liquido presente nella caraffa 5 non sia troppo po co in modo che l apparecchio possa fun zionare correttamente Ad es quando si monta panna è meglio utilizzare 200 ml e quando si sbattono gli albumi è meglio uti lizzare almeno due 10 2 Inserimento e smontag gio dell inserto lame ...

Page 21: ...grana nel la corona dentata della sede 9 NOTE Qualora non fosse possibile spingere la caraffa 5 verso il basso bisognerà scuoterlo un poco in modo che la ruo ta dentata dell inserto lame 27 della caraffa 5 scivoli nella corona dentata della sede 9 Se la caraffa 5 non è collocata corretta mente il meccanismo di sicurezza impe disce il funzionamento dell apparecchio 10 4 Collocazione e smontag gio d...

Page 22: ...del lucchetto mentre lo si gira Se il coperchio 32 non è col locato correttamente sul di splay 25 compare il simbolo illustrato a destra 10 6 Utilizzo del coperchio per l apertura di riempi mento Il misurino 33 funge contemporaneamente da chiusura per la caraffa 5 e da strumento per misurare gli ingredienti Per chiudere la caraffa 5 inserire il mi surino 33 nel coperchio 32 con l aper tura verso i...

Page 23: ... impostato viene emesso un segnale e i tasti si spengono 11 Premere l interruttore principale 6 per spegnere l apparecchio 10 8 Utilizzo della spatola La spatola 30 serve a mescolare gli ingre dienti e a togliere il cestello di cottura 28 ATTENZIONE Non usare la spatola 30 se è inserito l accessorio mixer 29 In caso contrario la spatola 30 potrebbe incastrarsi nell accessorio mixer 29 Non usare ne...

Page 24: ...tempo preimpostato sta trascorrendo il tempo di riscaldamento di 10 minuti COTT VAP 21 acceso il tempo preimpostato viene contato alla rove scia la cottura al vapore è iniziata ed è in corso 11 2 Preparazione delle va poriere 1 Collocare la caraffa 5 nella sede 9 2 Versare 1 litro d acqua nella caraffa 5 Ciò corrisponde al secondo segno dal basso I 3 Controllare se la guarnizione 4 del ce stello v...

Page 25: ...y 25 3 Premere il tasto START STOP 17 Ini zia un tempo di riscaldamento di 10 mi nuti Durante questo intervallo il tempo indicato sul display 25 non viene contato alla rovescia il tasto COTT VAP 21 lampeggia è possibile modificare il tempo preim postato con il selettore del tempo 24 4 Dopo 10 minuti viene emesso un breve segnale Il tasto COTT VAP 21 si ac cende NOTA per avviare il programma prima ...

Page 26: ...re il programma di cottura al vapore anche con il cestello di cottura 28 Se tuttavia si apre il coper chio 32 per controllare il punto di cottura si perdono le impostazioni Per proseguire la cottura bisogna effettuare nuovamente le im postazioni 1 Versare 500 ml d acqua nella caraf fa 5 2 Introdurre gli alimenti nel cestello di cot tura 28 3 Inserire il cestello di cottura 28 nella ca raffa 5 4 Ch...

Page 27: ...china consente di lavorare un massi mo di 500 g di farina Il programma richie de solo l inserto lame 27 13 1 Informazioni generali sul programma Tempo preimpostato da 1 a 30 minuti modificabile Tempo massimo 3 minuti Temperatura preimpostata 0 C fissa Velocità preimpostata 4 fissa Rotazione destrorsa sinistrorsa viene gestita dal programma 13 2 Avvio del programma 1 Introdurre la massa dell impast...

Page 28: ...cendere l apparecchio dall interrutto re principale 6 5 Premere il tasto ROSOLARE 20 Il ta sto ROSOLARE 20 si accende e i valo ri del programma vengono indicati sul display 25 6 Premere il tasto lampeggiante START STOP 17 Il programma viene avviato Il tempo im postato viene contato alla rovescia sul display 25 Il tasto ROSOLARE 20 si accende Il programma gestisce automa ticamente la rotazione sini...

Page 29: ...vi o graffianti L appa recchio potrebbe subire dei danni NOTA Alcuni alimenti o alcune spezie ad es il curry possono causare alterazioni del colore della plastica Non si tratta di un errore dell apparecchio ed è un fenome no innocuo 15 1 Pulizia dell apparecchio base 1 Pulire l apparecchio base 12 con uno straccio umido Si può usare anche un poco di detergente 2 Quindi passarvi uno straccio pulito...

Page 30: ...vono essere sostituite con guarni zioni nuove È possibile ordinare delle guarnizioni nuove vedere Ordinazio ne di accessori a pagina 32 ATTENZIONE Se si sono rimosse le guarnizio ni 26 31 e 4 reinserirle o sostituirle con guarnizioni nuove prima di riutiliz zare l apparecchio Non è consentito utilizzare l apparecchio se le guarnizio ni 26 31 e 4 non sono collocate Inserto lame 27 1 Togliere l inse...

Page 31: ... di calcare ATTENZIONE Non utilizzare prodotti anticalcare co muni né acido acetico o essenza d ace to Servirsi del seguente metodo delicato 1 Creare una miscela composta per il 50 da aceto chiaro e per il 50 da acqua in ebollizione 2 Versare questa miscela nella caraffa 5 o collocare altri pezzi incrostati di cal care in un recipiente riempito con que sta miscela 3 lasciare agire la miscela per 3...

Page 32: ...ere Pulizia controllo e sostituzione delle guarnizioni a pagina 28 Dalla caraffa 5 è fuoriuscito del liquido che è finito sulla su perficie di appoggio attraver so lo sfioratore 10 dell apparecchio base 12 vedere Sfioratore a pagina 17 Quando si mescolano liquidi con il livello di velocità 10 o con il tasto TURBO 18 nella caraffa 5 può trovarsi massimo 1 litro altrimenti il liquido può venire espu...

Page 33: ...acchina consente di lavorare un massimo di 500 g di farina Far raffreddare completamente l ap parecchio Dopodiché sarà nuova mente pronto per l uso Il coperchio 32 o il cestello vapore fondo 3 non sono collocati correttamente sulla caraffa 5 Chiudere correttamente il coperchio 32 vedere Collocazione del coperchio del la caraffa a pagina 20 Oppure chiudere correttamente il cestello vapore 3 vedere ...

Page 34: ...raccolta per il riciclaggio degli apparecchi elettrici ed elettronici Il rici claggio contribuisce a ridurre il consumo di materie prime e l inquinamento ambientale Confezione Smaltire la confezione nel rispetto delle nor mative ambientali vigenti nel proprio paese 18 Dati tecnici Con riserva di modifiche tecniche 19 Ordinazione di accessori Sul nostro sito web si possono ottenere infor mazioni su...

Page 35: ...del periodo di garanzia sono a pagamento Entità della garanzia L apparecchio è stato prodotto con cura ba sandosi su severe direttive di qualità ed è stato controllato scrupolosamente prima del la consegna La garanzia si applica agli errori di materia le o produzione Sono escluse dalla garanzia i pezzi soggetti a normale usura e i danni a parti fragili quali interruttori batte rie lampadine o altr...

Page 36: ...quando si è presentato All indirizzo www lidl service com è possibile scaricare questo ma nuale molti altri manuali filmati sui prodotti e software Centri assistenza Assistenza Italia Tel 02 36003201 E Mail hoyer lidl it IAN 277740 Fornitore Si tenga presente che il seguente indirizzo non è un indirizzo di assistenza Rivolgersi innanzitutto ai centri assistenza ri portati sopra HOYER Handel GmbH T...

Page 37: ...35 IT ...

Page 38: ...ender jug 52 10 1 Markings inside the blender jug 52 10 2 Using and removing the blade assembly 52 10 3 Insert blender jug 53 10 4 Insert and remove the mixer attachment 53 10 5 Put on the lid of the blender jug 54 10 6 Use the lid for the filler opening 54 10 7 Cooking and steaming with the cooking pot 54 10 8 Using the spatula 55 11 Steaming 56 11 1 General programme information 56 11 2 Preparat...

Page 39: ...leaning in the dishwasher 61 15 3 Cleaning the accessories 61 15 4 Cleaning checking and replacing seals 61 15 5 Descaling 62 15 6 Storage 62 16 Malfunctions Cause Remedy 63 16 1 Malfunctions during operation 63 16 2 Error messages on the display 64 17 Disposal 65 18 Technical specifications 65 19 How to order accessories 65 20 Warranty of the HOYER Handel GmbH 66 ...

Page 40: ...6 Speed controller 17 START STOP Starting and stopping the device 18 TURBO Pulse button 19 REVERSE Changing the direction of rotation 20 ROSOLARE Browning program 21 COTT VAP Steaming program 22 IMPAST Dough kneading program 23 BILANCIA TARA Starting the scale activate tare function 24 Timer 25 Display 26 Seal for blade assembly ensure the correct position 27 Blade assembly with cog wheel 28 Cooki...

Page 41: ...der jug has not been positioned or closed correctly C Selected speed 1 4 is suited for the mixer attachment D Temperature of the food in the blender jug E Display of the weight in grams up to 5 000 g F Display of the speed 1 10 G Set to anti clockwise active H Symbol for the speed I set temperature 37 C 130 C ...

Page 42: ...on REVERSE for gentle mixing Must always be used to seal the blender jug 5 If necessary cut food first in pieces with an edge length of approx 3 4 cm Mixer attachment 29 For fluid food To whip cream at least 200 ml To whip egg white at least 2 eggs To emulsify e g mayonnaise must only be used with speed settings 1 to 4 Must not be used with func tion TURBO Cooking pot 28 To cook and stew Fill the ...

Page 43: ...Édition Plus Symbol on your device The food safe material of devices with this symbol will not change the taste or smell of food This symbol warns you against touching the hot surface This symbol warns against coming into contact with the hot water steam 4 Intended purpose Monsieur Cuisine is used to mix whisk beat stir chop mash emulsify steam stew knead brown cook and weigh food These user instr...

Page 44: ...th the device This device can be used by people with restricted physical sensory or intellectual abilities or people without adequate experience and or understanding if they are supervised or instructed on how to use this device safely and if they are aware of the resulting risks The device must be disconnected from the mains if left unattended and prior to assembly disassembly or cleaning Please ...

Page 45: ...vestock In addition animals can also cause damage to the device For this reason you should keep animals away from electrical devices at all times DANGER Risk of electric shock due to moisture The device must never be operated in the vicinity of a bathtub a shower a filled hand basin or similar The base unit the power cable and the mains plug must not be immersed in wa ter or other liquids Protect ...

Page 46: ... come into contact with the blade assembly The spatula must not be used with the mixer attachment FIRE HAZARD Before turning the device on place it on a level stable dry heat resistant sur face It is not necessary to constantly super vise during operation but just to check regularly This applies in particular when very long cooking times are set DANGER Risk of injury through burning The surfaces o...

Page 47: ...e when it is empty as this causes the motor to over heat and may result in it being dam aged Only use the original accessories Do not use any astringent or abrasive cleaning agents The device is equipped with non slip synthetic suction feet As furniture is coated with a wide array of varnishes and synthetics and is also treated with different care products it cannot be fully ruled out that some of...

Page 48: ...es allows accurate weighing to the gram up to 5 kg The scale 14 is easy to operate and ready for use unless another cycle is in operation Easy weighing 1 The device is switched on but no other cycle is in operation 2 Press the button BILANCIA TARA 23 The button lights up The display 25 shows 0000 g 3 Place the object to be weighed on the scale 14 On the display 25 the weight will be shown in grams...

Page 49: ...t the power cable 7 to the mains power socket 8 of the base unit 12 and then plug the mains plug 7 into a suit able wall socket The wall socket must con tinue to be easily accessible after the device is plugged in 9 2 Switching the device on and off Set the main switch 6 on the rear to I All buttons light up briefly The display 25 is lit and briefly shows a control display Then the con trol symbol...

Page 50: ... VAP 21 ROSOLARE 20 lights up and START STOP 17 flashes The programme is selected but not yet started Press START STOP 17 to start the function Program button IMPAST 22 COTT VAP 21 ROSOLARE 20 lights up and START STOP 17 lights up The programme is selected and started In order to abort the pro gramme early press START STOP 17 Program button COTT VAP 21 flashes and START STOP 17 lights up The progr...

Page 51: ...en the device will be stopped automatically During operation the time can be changed Once the time set has elapsed the device stops an acoustic signal is issued 9 6 Setting the temperature Turn the temperature controller 15 to set the cooking temperature The adjustable temperature ranges from 37 C to 130 C The temperature set is shown on the dis play 25 In order to start the heat up process a spee...

Page 52: ... change the speed to 0 the device will stop To con tinue working select a speed and press the button START STOP 17 If a temperature has been selected only the speed settings 1 3 are available Soft start In order to avoid that during sudden acceler ation of hot food liquid is ejected from the blender jug 5 or the device starts wobbling a soft start is provided for all settings except for the turbo ...

Page 53: ...60 C Press and keep button TURBO 18 pressed for as long as you need the function NOTES The turbo function will only work if the blade assembly 27 is not turn ing if the food temperature in the blender jug 5 is less than 60 C The speed is promptly increased to set ting 10 maximum 9 10 Overflow In the holder of the blender jug 9 there is an overflow hole 10 Should liquid escape from the blender jug ...

Page 54: ...nce otherwise liquid may be ejected For speed settings of less than 10 the blender jug 5 may only be filled up to a maximum of 2 2 litres NOTE For some applications the blender jug 5 should not contain an insufficient amount of liquid so that the device can function properly Thus for whipping cream for instance you should use at least 200 ml and when beating egg white use at least two eggs 10 2 Us...

Page 55: ...the blender jug 5 slightly down ward until the cog wheel of the blade assembly 27 locks in place in the gear ring of the holder 9 NOTES If the blender jug 5 cannot be pressed downward wobble slightly so that the cog wheel of the blade assembly 27 in the blender jug 5 will slide into the gear ring of the holder 9 Should the blender jug 5 not be posi tioned correctly a safety mechanism prevents the ...

Page 56: ...33 is used to close the lid of the blender jug 5 and to measure ingredients In order to close the blender jug 5 place the measuring beaker 33 with the opening at the bottom into the lid 32 and lock it in place by turning it clock wise CAUTION Prior to removing the measuring beak er 33 you must reduce the speed to set ting 1 2 or 3 so that no food can be ejected In order to fill in ingredients the ...

Page 57: ... 10 8 Using the spatula The spatula 30 is used to stir the ingredients and to remove the cooking pot 28 CAUTION The spatula 30 must not be used with the mixer attachment 29 in place Oth erwise the spatula 30 might be caught in the mixer attachment 29 Do not use any other kitchen utensil to stir the ingredients The utensil might get into the blades and cause damage Always stir clockwise The spatula...

Page 58: ...0 minutes is running COTT VAP 21 lights up countdown of preset time takes place The steaming is started and in operation 11 2 Preparation of the steamer inserts 1 Place the blender jug 5 into the hold er 9 2 Fill 1 litre of water into the blender jug 5 This corresponds with the second marking from the bottom I 3 Check that the seal 4 of the deep steam er basket 3 has been placed correctly 4 Put th...

Page 59: ...set time 4 After 10 minutes elapsed a short signal sounds The button COTT VAP 21 lights up NOTE in order to start the programme before the 10 minutes elapsed press the flashing but ton COTT VAP 21 once 5 After the time set elapsed a short signal sounds the buttons START STOP 17 and COTT VAP 21 go off and the dis play 25 shows all values with 0 except for the temperature 6 Press the main switch 6 t...

Page 60: ...vice or move to the next step in the recipe 11 6 Overheating protection The device has an overheating protection system As soon as there is no water left in the blender jug 5 thus causing the device to become too hot the device will automatical ly switch off In this case pull out the mains plug 7 and al low the device to cool You may then fill in water and put the device back into operation 12 Tip...

Page 61: ... 32 3 Use the main switch 6 to switch on the device 4 Press the button IMPAST 22 The but ton IMPAST 22 lights up and the pro gramme values are shown on the display 25 5 Press the flashing button START STOP 17 The programme is started The time set is counted down on the display 25 The button IMPAST 22 lights up The pro gramme controls the clockwise anti clockwise rotation automatically 6 After the ...

Page 62: ...anti clockwise rotation automatically At a fixed inter val the blade assembly 27 starts for a brief anti clockwise rotation 7 After the time set elapsed a short signal sounds the buttons START STOP 17 and ROSOLARE 20 go off and the display 25 shows all values with 0 ex cept for the temperature 8 Press the main switch 6 to switch off the device or move to the next step in the recipe 15 Cleaning and...

Page 63: ... 5 with warm wa ter and dump the water 2 Remove the blade assembly 27 see Using and removing the blade assem bly on page 52 and take the seal 26 off see Cleaning checking and re placing seals on page 61 3 Clean all accessories by hand in a sink with dishwater or in the dishwasher 4 When cleaning by hand rinse all parts with clean water 5 Allow the parts to dry completely before using them again 6 ...

Page 64: ...ishwasher or by hand Slight limescale deposits 1 Remove slight limescale deposits which cannot be removed with normal clean ing by hand or in the dishwasher with a cloth on which you put some house hold vinegar 2 Rinse with clear water Major limescale deposits CAUTION Do not use commercially available des caling agent not even glacial acetic acid or vinegar essence Use the follow ing gentle method...

Page 65: ...owing onto the surface through the over flow hole 10 of the base unit 12 see Overflow on page 51 When mixing liquids at speed 10 or with button TURBO 18 the blender jug 5 must not contain more than 1 litre since otherwise liquid may be ejected For speed settings of less than 10 the blend er jug 5 may only be filled up to a maximum of 2 2 litres Liquid escapes at the lid 32 of the blender jug 5 Sea...

Page 66: ...t been placed correctly onto the blender jug 5 Close lid 32 correctly see Put on the lid of the blender jug on page 54 Or close steamer basket 3 correctly see Preparation of the steamer inserts on page 56 HHH Temperature in the blender jug 5 is too high There is not enough food or liquid in the blender jug 5 Switch the device off and let the blender jug cool down Then add a sufficient amount of fo...

Page 67: ... electric and electronic appliances Re cycling helps to reduce the consumption of raw materials and protect the environment Packaging When disposing of the packaging make sure you comply with the environmental reg ulations applicable in your country 18 Technical specifications Subject to technical modification 19 How to order accessories On our website you can find information re garding the acces...

Page 68: ... strict quality guidelines and tested diligent ly prior to delivery The warranty applies to material or factory defects Excluded from the warranty are wear parts subject to normal wear and damages to fragile parts e g switches batteries lamps or other parts manufactured from glass This warranty expires if the product is dam aged not used as intended or not serviced For the proper operation of the ...

Page 69: ...aly Tel 02 36003201 E Mail hoyer lidl it IAN 277740 Supplier Please note that the following address is no service address First contact the afore mentioned Service Centre HOYER Handel GmbH Tasköprüstraße 3 DE 22761 Hamburg GERMANY IT ...

Page 70: ...HOYER HANDEL GMBH Tasköprüstraße 3 22761 Hamburg Germany Stato attuale delle conoscenze Status of information 05 2016 Ident Nr SKMK 1200 A1 IAN 277740 ...

Reviews: