INSTALLATION INSTRUCTIONS
3) MOUNTING TO THE WALL
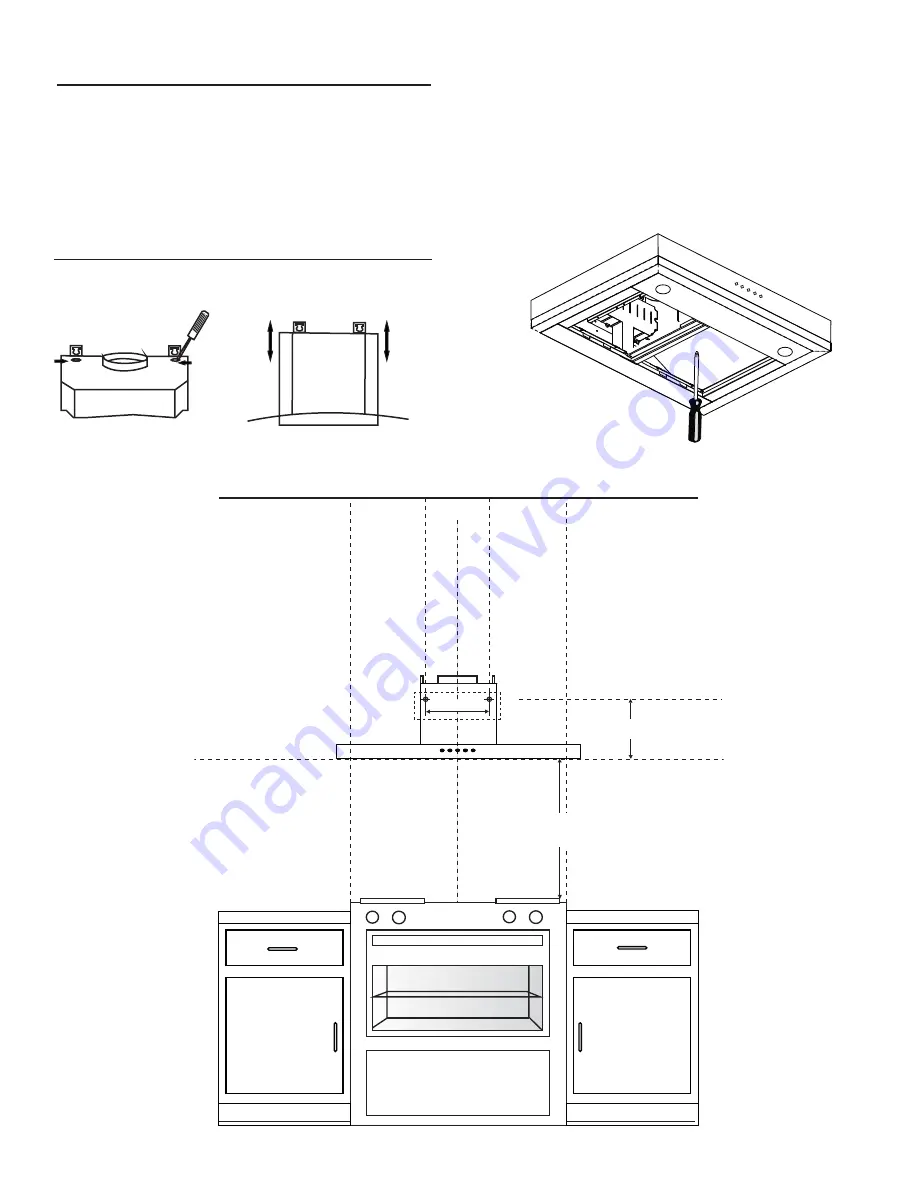
Position the range hood by hanging it onto the screws. Once it is level, tighten the screws all the way from inside the
range hood (Fig 5.) Please note: a stubby screwdriver may be required to access the screws from inside the range hood.
Once the range hood is securely fastened, the fi lters can be put back in. At this point, the range hood should match Fig. 6.
5
Please tighten the 2 screws from the inside.
FIG. 5
26” min
34” max
CEILING
9”
13-1/2”
FIG. 6
LEVELING DEVICE
When mounting hood on the wall, the level can be adjusted
by turning the two screws on the motor housing.
F & H
F & H


