MARKER 2000
Operating manual - English
22
Copyright Silca 2002
6.1.9
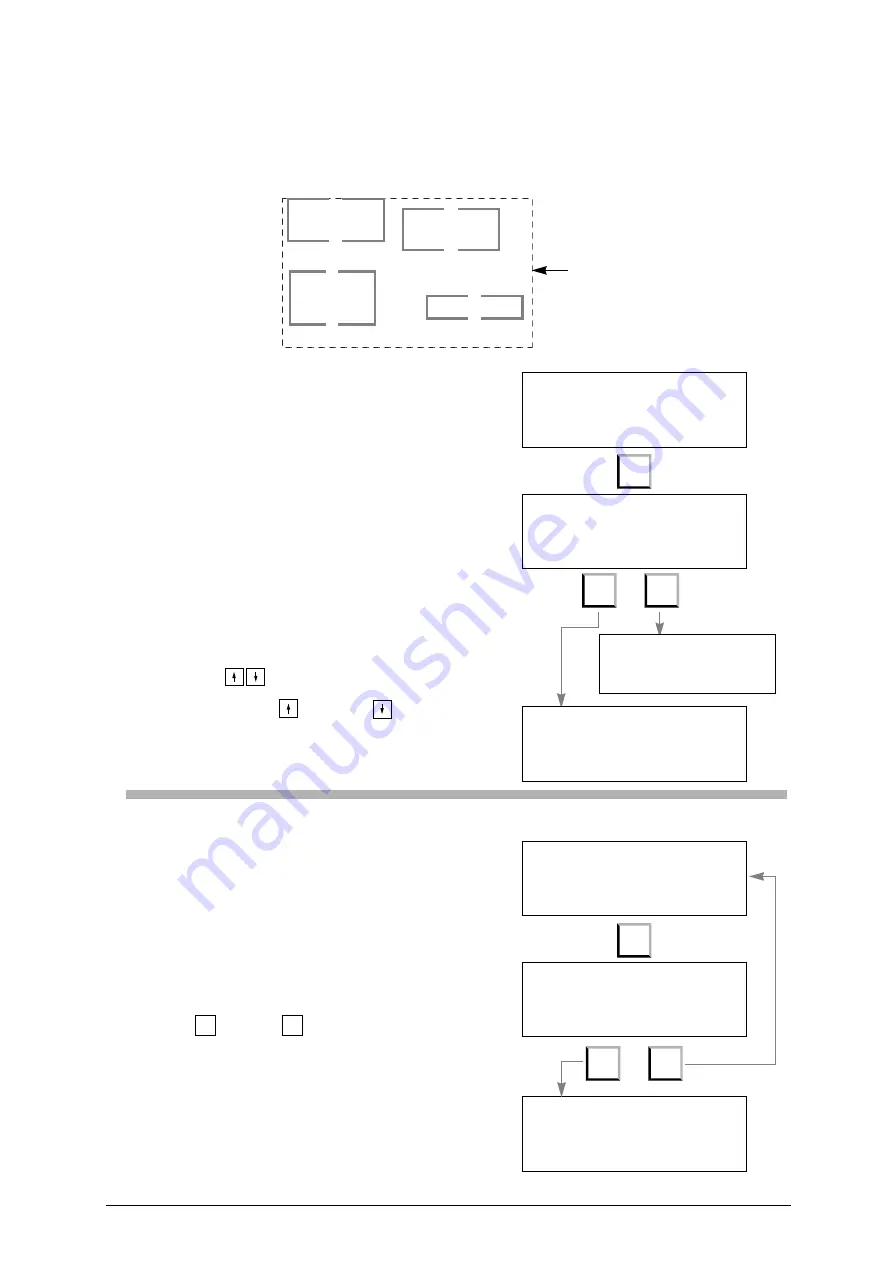
Entering a new tracking zone [F5]
A maximum of four tracking zones can be set for the same number of different markings. This means that
every ‘model’ can comprise four texts positioned independently of each other, with different formatting
parameters (fig. 23).
In this way a key can be marked in four tracking zones which are positioned separately from each other.
Fig. 23
When F5 is pressed this message appears:
If N (no) is pressed the display returns to the main
screen display:
If Y (yes) is pressed a new zone is presented for
setting:
When the new tracking zone has been entered,
move from one zone to the other with the arrow
keys
.
If a number of tracking areas have been included,
use the keys
PgUp and
PgDown to go
from one area to the other.
See ch. 6.1.3 "Tracking [F8]" to track the new area
entered.
6.1.10
Deletion of a tracking area [F6]
Select the area to be deleted and press key F6.
A new message will appear on the display: press
= Yes, or
= No.
WARNING: all texts and their parameters associated with this
zone will be deleted.
SILC
A
SILCA S.p.A.
SILCA
S I L CA S . p . A .
(glass slide 1)
(glass slide 6)
(glass slide 2)
(glass slide 2)
Example:
maximum working area
available: 35 x 50 mm
F5
Add a new
tracking zone?
( Y / N )
Y
N
Zone = 1 : 1
Clamp = C1
Slide = 3 S = 1 O = 0
Dire. = Hor
AutoF = [x]
Pcs.= 1 of 1
Zone = 2 : 2
Clamp = C1
Slide = 3 S = 1 O = 0
Dire. = Hor AutoF = [x]
Pcs.= 1 of 1
Zone = 1 : 1
Clamp = C1
Slide = 3 S = 1 O = 0
Dire. = Hor AutoF = [x]
Pcs.= 1 of 1
Delete
tracking zone ?
(Y / N)
F6
Zone =
2 : 2
Clamp = C1
Slide = 3 S = 1 O = 0
Dire. = Hor
AutoF = [x]
Pcs.= 1 of 1
Y
N
Zone =
1 : 1
Clamp = C1
Slide = 3 S = 1 O = 0
Dire. = Hor
AutoF = [x]
Pcs.= 1 of 1
Y
N


