


QUICK MENU
1. Power ON (The POWER LED lights on)
2. Note: Make sure the level is up before placing the media on the cutting plotter. Place
the media and pull the level to lower down the pinch rollers (must be sure the pinch
rollers are position above the grid drums, that is, within the white marks).
3.
It will take about 10 sec. to initialize the machine.
Then it will size the media
automatically according to the settings of the dip switch (usually the presetting is
EDGE media type).
4. Off-line condition – The cutting plotter is not ready to receive data from the computer.
Press ON/OFF LINE key, the LED above the key turns off.
5. On-line condition – The cutting plotter is ready to receive data from computer. Press
ON/OFF LINE key, the LED above the key lights.
6. Change the value settings during the cutting. Press PAUSE key, the LED above the
key flashes. Press ON/OFF LINE key to continue the cutting.
7. Terminate the cutting and clear the data in the buffer. Press ON/OFF LINE key or
PAUSE key and then press DATA CLEAR key.
Appendix C
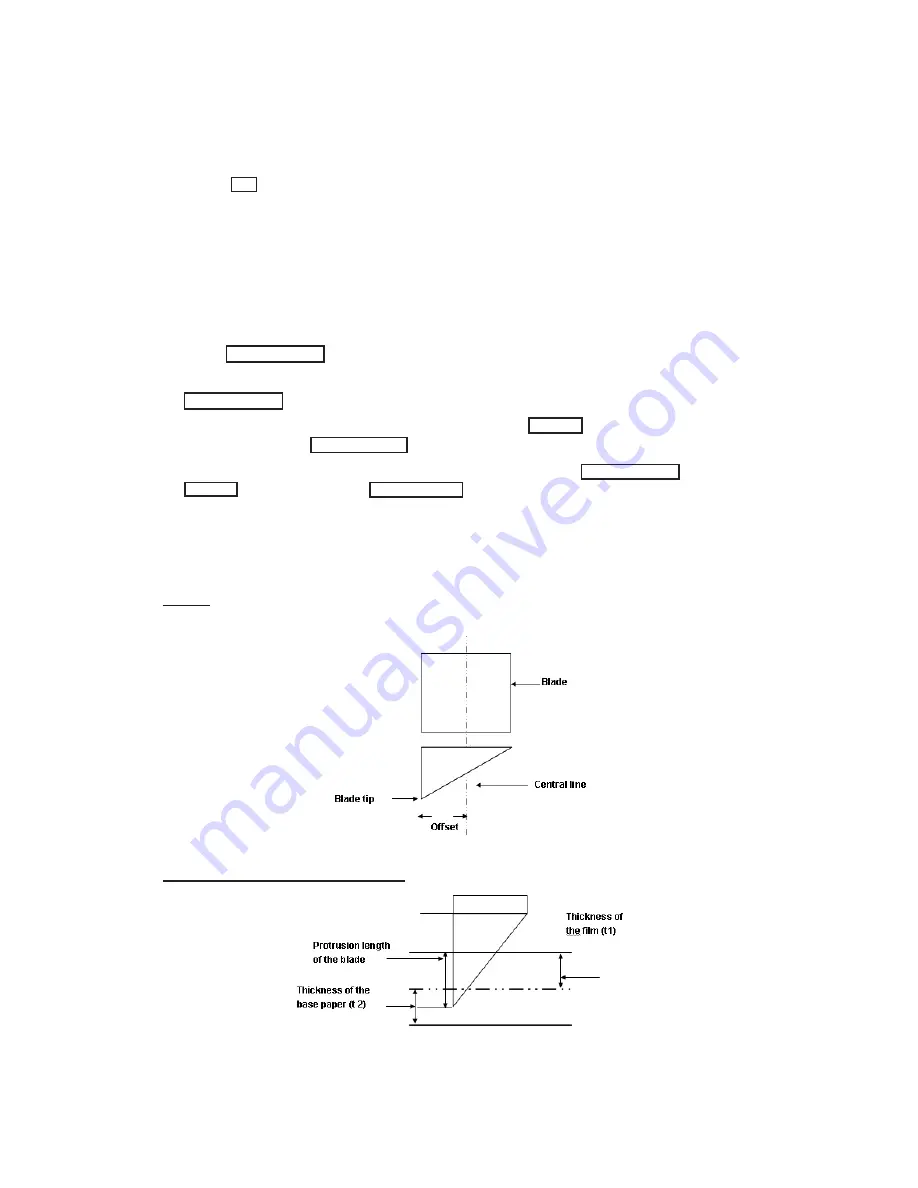
About the Blade
Offset
OFFSET is the distance that the blade tip is displaced from the center line of the blade.
Protrusion Length of the Blade
Length of protrusion = t1 + t 2/ 2, but for your convenience you may just make it about
0.3~ 0.5 mm beyond the blade holder tip.
Appendix D