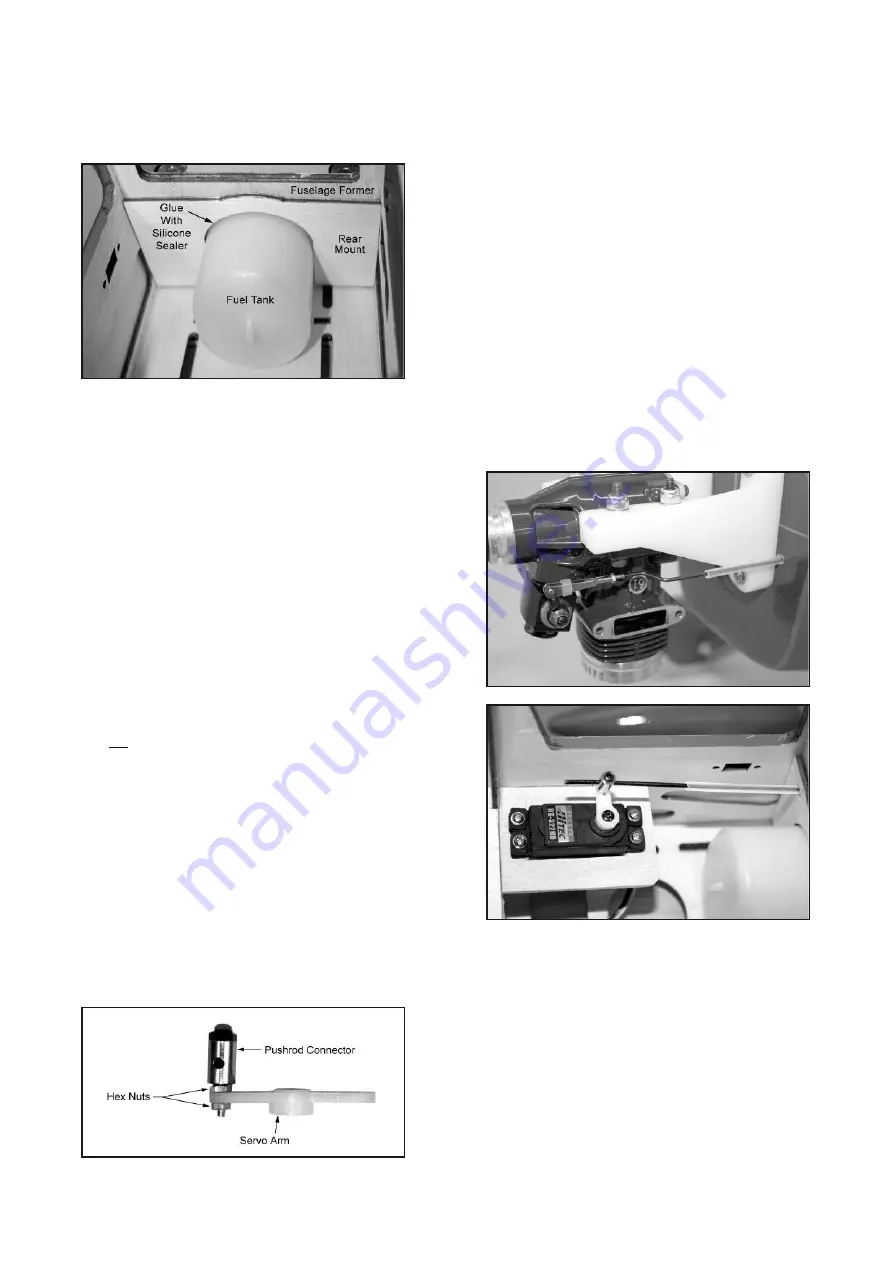
c) Now install the plywood fuel tank rear mount at the back of
the tank, right up against the back side of the front fuselage for-
mer. Glue the plywood rear mount permanently to the back of the
fuselage former.
d) Use common silicone bathtub sealer (not furnished) to glue
the fuel tank to the front and rear plywood tank mounts.
THROTTLE PUSHROD FOR 2-STROKE ENGINES
The supplied throttle pushrod assembly consists of a wire pushrod
running inside a nylon pushrod tube. On the threaded end of the
pushrod you will have an Metal RC Clevis. For a typical 2-stroke
installation we prefer to connect this end of the pushrod to the car-
buretor arm. The plain end of the pushrod wire will connect to the
throttle servo using a Metal Pushrod Connector.
Determine which side of the airplane your throttle pushrod will be
on. Then determine the exact route your pushrod will take to con-
nect to the throttle servo and the engine’s throttle arm. In most
cases you will want the pushrod to run right alongside the engine
mount and fuel tank, and then angle over to the throttle servo arm.
❑
43) The first step is to drill a 3/16" diameter hole through the
firewall for the throttle pushrod to pass through. Be careful not to
drill a hole in your fuel tank!
❑
44) Install your throttle servo in the fuselage.
a) Locate the laser-cut plywood throttle servo mount (this servo
mount is not pre-installed in the fuselage). Notice that there is a
slot in each side of the fuselage to accept the tab on the plywood
throttle servo mount. Glue the plywood mount securely into the
fuselage, on the side that suits your particular engine.
b) Mount your throttle servo in the plywood mount using the
rubber grommets, eyelets, and screws that came with the servo.
c) Install the metal pushrod connector in the throttle servo arm,
with one hex nut above the arm, and one below. You will need to
drill out the hole in the servo arm with a 5/64" dia. (or #47) drill bit
to accept the threaded portion of the pushrod connector. Tighten
the two hex nuts of the pushrod connector securely against the
top and bottom of the servo arm. If you take the set screw tem-
porarily out of the pushrod connector, you can use a small screw-
driver to go down through the connector body to hold the bolt,
which makes it much easier to tighten the hex nuts. When fin-
ished, install the throttle servo arm back onto the servo.
❑
45) Install the throttle pushrod.
a) Start by test fitting the throttle pushrod wire in the airplane,
sliding the plain end of the wire in from the front. Steer the
pushrod through the hole you drilled in the firewall; then through
the hole in the rear tank mount; and then back to the pushrod con-
nector on the servo. Slide the end of the wire into the pushrod
connector, but don’t tighten the set screw at this time.
b) Now try to connect the metal clevis at the front of the
pushrod to the carburetor arm. With a typical 2-stroke engine you
will most likely find that the clevis does not line up with the carbu-
retor arm. If that is the case simply take the pushrod back out of
the airplane and use a pliers to bend the end of the pushrod in an
offset pattern, as shown below, using two 45o bends. In our in-
stallation we needed to offset the end of the pushrod about 3/8"
in order to line up directly with the carburetor arm (see photo
below).
c) When you are ready to put the pushrod wire back in the air-
plane for the final time, first slip the nylon throttle pushrod tube
over the pushrod wire. After you get the pushrod assembly in the
airplane, adjust the location of the nylon tube so approximately 1"
of the nylon tube is sticking out in front of the firewall. Then glue
the tube to the plywood rear tank support, to keep it from moving.
Cut the rear of the plastic tube off a couple inches from the servo
arm.
d) Turn on your radio and adjust the length and travel of the
throttle pushrod. When done make sure the pushrod fittings are
secure at both ends.
THROTTLE PUSHROD FOR 4-STROKE ENGINES
4-stroke glow engines typically have their carburetor on the back
of the engine. This puts the throttle arm very close to the firewall
of the airplane, makikng the hookup of this end of the throttle
pushrod more difficult. If you are using a 4-stroke engine you
should take a look at some of the special after-market fittings that
are available for this type of installation. For instance Du-Bro®
makes a 4-stroke throttle linkage for the carb end of the pushrod,
that will work well in conjunction with the wire pushrod parts in-
cluded in this kit.
COWLING
❑
46) Openings will need to be made in the cowling to clear the
engine cylinder head and muffler, and to allow access to the nee-
dle valve, etc. Don't be tempted to quickly dive in with a knife and
14


