Introduction to STEP 7
1-4
STEP 7 Getting Started
A5E00171228-01
1.3 Basic
Procedure Using STEP 7
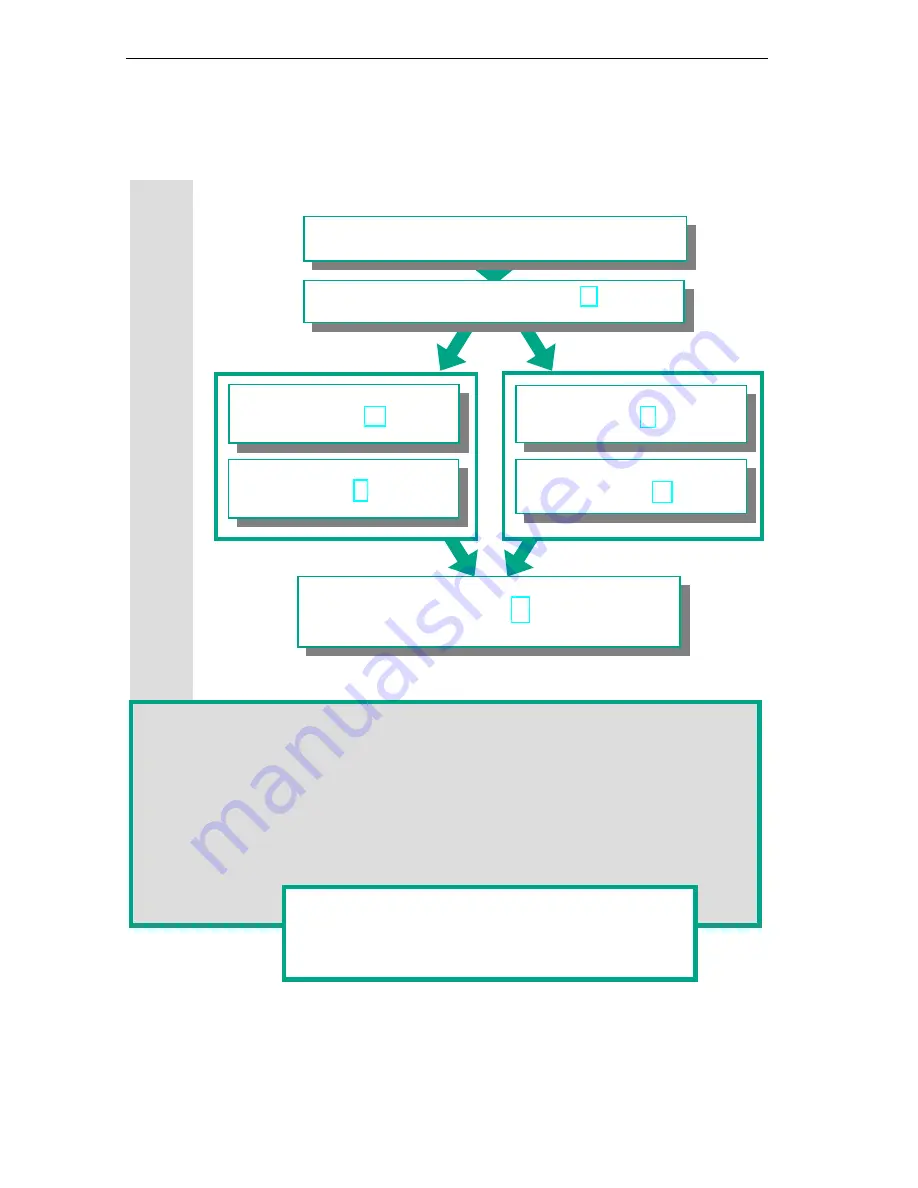
Before you create a project, you should know that STEP 7 projects can be created
in different orders.
Option 2
Option 1
If you are creating comprehensive programs with many inputs and outputs, we
recommend you configure the hardware first. The advantage of this is that STEP 7
displays the possible addresses in the Hardware Configuration Editor.
If you choose the second option, you have to determine each address yourself, depending
on your selected components and you cannot call these addresses via STEP 7.
In the hardware configuration, not only can you define addresses, but you can also change
the parameters and properties of modules. If you want to operate several CPUs, for
example, you have to match up the MPI addresses of the CPUs.
Since we are only using a small number of inputs and
outputs in the Getting Started manual, we will skip the
hardware configuration for now and start with the
programming.
Configuring the hardware
(Chapter 6)
Creating a program
(Chapters 3 to 5)
Creating a program
(Chapters 3 to 5)
Configuring the hardware
(Chapter 6)
Transferring the program to the CPU and debugging
(Chapter 7)
Designing the solution to the automation task
Creating a project (Chapter 2)
Summary of Contents for SIMATIC STEP 7 V5.2
Page 4: ...Welcome to STEP 7 STEP 7 Getting Started iv A5E00171228 01 ...
Page 12: ...Introduction to STEP 7 1 6 STEP 7 Getting Started A5E00171228 01 ...
Page 22: ...Programming with Symbols 3 4 STEP 7 Getting Started A5E00171228 01 ...
Page 76: ...Downloading and Debugging the Program 7 14 STEP 7 Getting Started A5E00171228 01 ...
Page 88: ...Programming a Shared Data Block 9 4 STEP 7 Getting Started A5E00171228 01 ...
Page 100: ...Programming a Multiple Instance 10 12 STEP 7 Getting Started A5E00171228 01 ...
Page 110: ...Appendix A STEP 7 Getting Started A 2 A5E00171228 01 ...


