Communication Ports
4.4.2 Removing a GBIC Optical Port
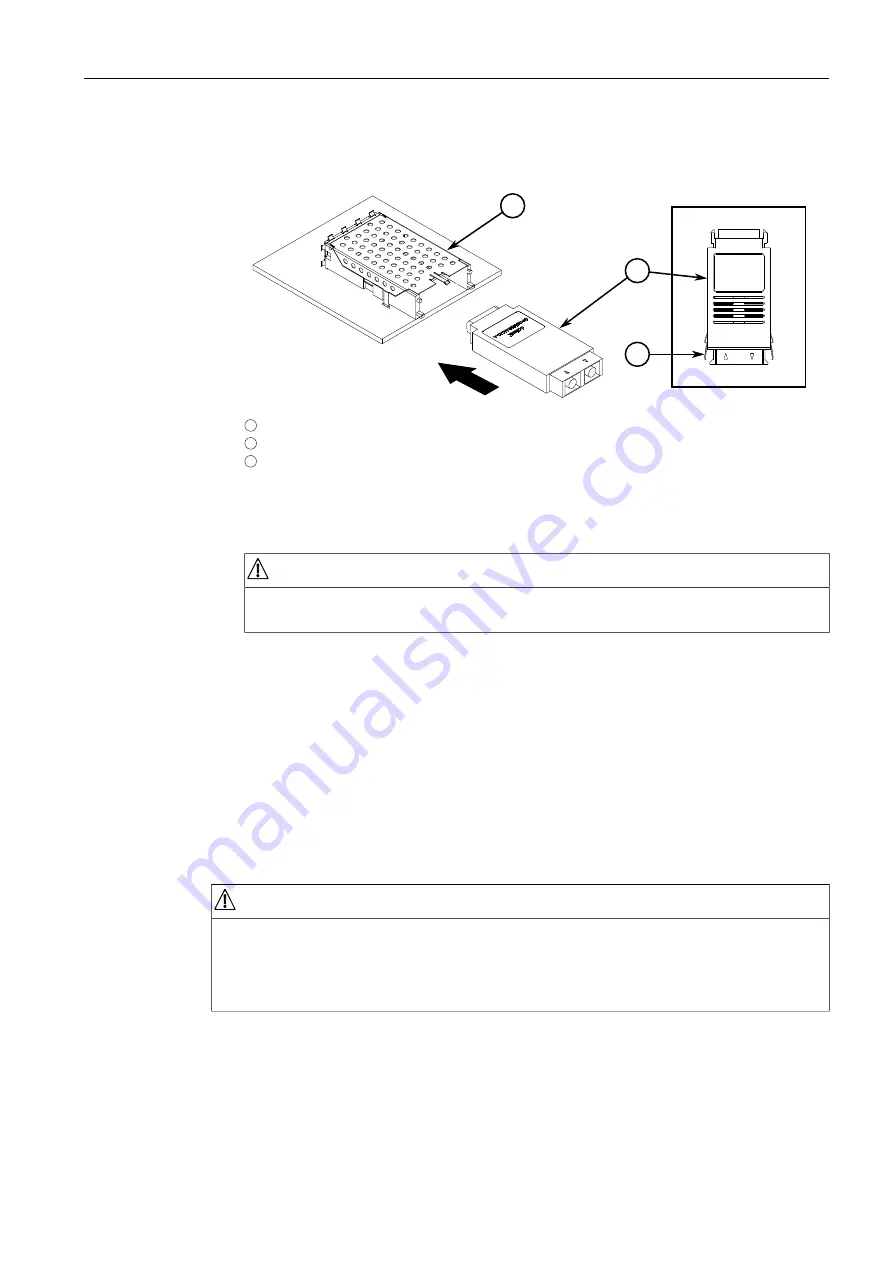
5. Squeeze the latches on either side of the port and insert the port into the socket.
2
1
3
1
GBIC Optical Port Module
2
Socket
3
Locking Latch
Figure 4.9
Installing a GBIC Optical Port
6. Release the latches and make sure the port is locked in place.
NOTICE
Only remove the dust plug when ready to connect a cable to the GBIC optical
port.
7. Remove the dust cover from the port and store for future use.
8. Remove the dust cap from the cable and immediately connect it to the port.
9. Connect the cable to a network and observe the LED associated with the port.
For more information about the LED, refer to
4.4.2
Removing a GBIC Optical Port
To remove an GBIC optical port, do the following:
NOTICE
Electrical hazard – risk of damage to equipment
Make sure all electrostatic energy is dissipated before performing installing or
removing components from the device. An electrostatic discharge (ESD) can cause
serious damage to the component once it is outside the chassis.
1. Make sure all potential electrostatic build-up has been properly discharged to
prevent an electrostatic discharge (ESD). This can be accomplished by wearing
an ESD-preventive wrist trap connected to either the chassis ground connector
or a bare metal surface on the router/switch.
28
RUGGEDCOM RSG2300F
Installation Manual, 04/2021, C79000-G8976-1347-09


