background image

37

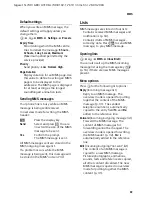
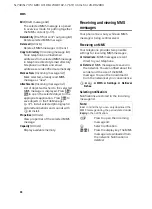
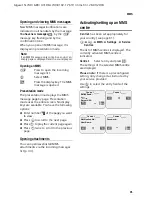
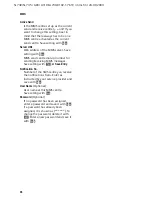
File Manager

Gigaset SL740 / GBR / A3108-L740-B102-1-7619 / resource_directory.fm / 28.09.2004

File Manager

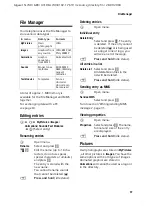
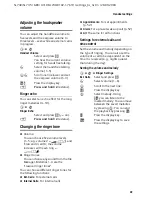
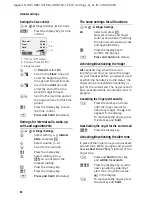
Your telephone uses the File Manager to 

store various data types:

A total of approx. 1 MB memory is 

available for the File Manager and MMS 

together. 
For exchanging data with a PC 

see page 63.

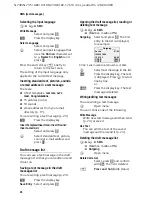
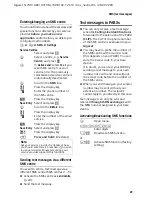
Editing entries

v


¢

Ï


¢

MyPictures 

/

Images

/

Animations

Sounds

/

Text Modules 

¢

q

(Select entry)

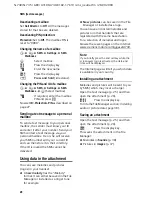
Renaming entries

v

 Open 

menu.

Rename

Select and press 

OK

.

~


OK

Edit the name (up to 16 cha-

racters, do not use spaces, 

special characters or umlauts) 

and press 

OK

.

The entry is stored with the 

new name.

You cannot rename sounds 

that cannot be deleted (

è

).

a


Press and hold 

(idle status). 

Deleting entries

v

 Open 

menu.

Individual entry

Delete Entry

Select and press 

OK

. The entry 

is deleted.  If the entry cannot 

be deleted (

è

) or is being used 

as a ringer tone or logo, you 

will see an error message.

a


Press and hold 

(idle status). 

All entries in a list

Delete List

Select and press 

OK

All deletable entries in the 

list will be deleted.

a


Press and hold 

(idle status). 

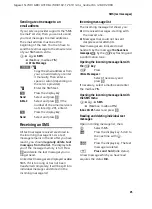
Sending entry as MMS

v

 Open 

menu.

Send as MMS

Select and press 

OK

.

Turn to section "Writing/sending MMS 

messages", page 31.

Viewing properties

v

 Open 

menu.

Properties

Select and press 

OK

. The name, 

format and size of the entry 

are displayed.

a


Press and hold 

(idle status). 

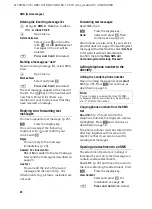
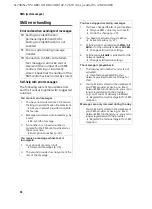
Pictures

Own photographs are stored in 

MyPictures 

, all other pictures in 

Images

. You have the 

same options with both types of images. 

Animated graphics are stored in 

Animations 

and cannot be used as a logo or 

in the directory.

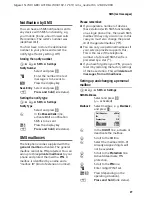
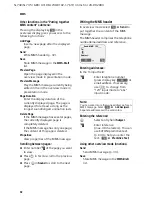
In menu


Data type


Formats


MyPictures 

 Own 

photographs

JPEG

Images

 Graphics 

from 

any source

JPEG, BMP, GIF, 

PNG, WBMP

Animations

 Graphic 

sequences 

from MMS

Animated GIF

Sounds

 Ringer 

tones, 

melodies

MIDI, MMF, 

AMR, iMelody, 

Gigaset 

melodies 

Text Modules

 Templates

Sent 

as 

Unicode/ 

Unicode can 

be received

Summary of Contents for Gigaset SL 740

Page 1: ...gaset Communications GmbH Desejamos que tenham bons momentos com o seu Gigaset DA Kære Kunde Gigaset Communications GmbH er retlig efterfølger til Sie mens Home and Office Communication Devices GmbH Co KG SHC som fra deres side videreførte Siemens AGs Gigaset forretninger Siemens AGs eller SHCs eventuelle forklaringer i betjeningsvejledningerne skal derfor forstås som Gigaset Communications GmbHs ...

Page 2: ...кви изложения направени от Siemens AG или SHC които се намират в ръководствата за потребителя следва да се разбират като изложения на Gigaset Communications GmbH Надяваме се да ползвате с удоволствие вашия Gigaset HU Tisztelt Vásárló A Siemens Home and Communication Devices GmbH Co KG SHC törvényes jogutódja a Gigaset Communications GmbH amely a Siemens AG Gigaset üzletágának utódja Ebből következ...

Page 3: ...ication mobile Haidenauplatz 1 D 81667 Munich Siemens AG 2004 All rights reserved Subject to availability Rights of modification reserved Siemens Aktiengesellschaft www siemens mobile com cyan magenta yellow black Liebreich Medienproduktion BA SL 740 qxd 13 02 2004 11 04 Uhr Seite 1 ...

Page 4: ...ed dial list 8 Socket for headset and PC interface 9 Microphone 10 Recall key Initiate enquiry call press briefly Insert a dial pause press and hold 11 Star key Ringer on off press and hold Toggle between upper lower case and digits 12 Key 1 Select network mailbox the answering machine in your network press and hold in idle status 13 Handsfree key Switch from earpiece to handsfree mode Lights up h...

Page 5: ...peed dial list 14 Email directory 17 Display available memory 18 Last number redial list 18 Opening lists with the message key 18 Making cost effective calls 21 Linking a call by call number with a phone number 21 Automatic network provider preselection 21 SMS text messages 23 Writing sending text messages 23 Receiving an SMS 25 Notification by SMS 27 SMS mailboxes 27 Using data in the attachment ...

Page 6: ...ed appointments and anniversaries 53 Restoring the handset to factory settings 53 Base station settings 53 Protection against unauthorised access 53 Emergency numbers 54 Changing the name of the base station 55 Repeater support 55 Restoring the base station to factory settings 55 Connecting the base station to a PABX 56 Dialling modes and flash times 56 Storing the access code outside line code 56...

Page 7: ...uctions The operation of medical appliances may be affected Be aware of the technical conditions within the particular environment e g doctor s practice The handset may cause an intrusive hum in hearing aids Do not install the base station in bathrooms or shower rooms The handset and base station are not watertight p 58 Drivers must not use their phones while driving without a handsfree car kit Wa...

Page 8: ...ew telephone Preparing to use the telephone The pack contains u one Gigaset SL740 base station u one handset Gigaset SL74 u one power supply unit u one data cable u one telephone cord u one rechargeable battery u one battery cover u one charger incl power supply unit u one set of operating instructions Installing the base station and charger The base station and charger are designed to be operated...

Page 9: ... 1 Insert the battery the right way round and make sure it sits properly 2 Position the battery cover at a slight angle and slide it with the two lower lugs into the case Then push the cover towards the camera until it closes with a click 2 1 Back of the base station Gigaset SL740 3 2 1 4 5 6 1 2 3 4 5 6 unassigned unassigned a b unassigned unassigned Internal phone jack connections Caution Use on...

Page 10: ...age 1 First charging and discharging of the battery The battery charging status is correctly displayed only after uninterrupted charging and discharging For the initial charge we recommend leaving the handset in the charger continuously for five hours Then remove the handset from the charger and do not recharge it until the battery is completely flat After initial charging and discharging you can ...

Page 11: ...e In the Date line enter the day month year 6 digit format s Scroll to the Time line Enter the hours mintues 4 digit format e g Q M 1 5 for 7 15 am s Scroll to the Time Mode line r Choose between 12 hour and 24 hour mode In 12 hour mode you can scroll to the Time line and then use the display key am pm to switch between am and pm Save Press the display key Operating the telephone Control key In th...

Page 12: ...n on page 1 Notes on the operating instructions The following symbols are used in these operating instructions Copy Entry Copy List Choose one of the two menu functions the slash means or Enter numbers or letters Save The current functions for the display keys are shown reverse highlighted and are offered in the bottom display line Press the display key underneath to launch the function q Press th...

Page 13: ...ey OK You will see the Audio Settings menu 2 Press the bottom of the control key repeatedly until the menu function Handset Volume is selected and confirm the selection with OK 3 Press the left decrease or right increase side of the control key to select the required volume 4 Press the display key under Save to apply the change 5 Press and hold the end call key to return to the idle status ...

Page 14: ...l as long as it is displayed on the screen Calling Line Identification When you get a call you will see the caller s number displayed on the screen if the following conditions apply u Your network provider supports CLIP CLI CLI Calling Line Identification The caller s telephone number is transmitted CLIP Calling Line Identification Presentation The caller s telephone number is displayed u You have...

Page 15: ...Press d the handsfree key Deactivate during a call c Press talk key This switches to earpiece mode If you wish to place the handset in the charger during a call you have to press the handsfree key d and hold it down as you do so Adjusting the volume while in handsfree mode d Press handsfree key again r Select volume Save Press the display key Muting You can switch the handset microphone off Your c...

Page 16: ...all Divert Select entry and press OK All Select and press OK r Select option All Calls No Answer or When Busy s Edit Scroll to the next line Press the display key Enter the destination number for call diversion Press the display key Save Entry Select and press OK s r Activate deactivate Send Press the display key Activating deactivating call waiting in external call only Call Waiting Select and pr...

Page 17: ...with the C key Size of entries Number up to 32 digits Name up to 16 Storing a telephone number in the directory s New Entry Enter number s Scroll to the Name line Enter name s Scroll to the Annivers line if you want to enter an anniversary see page 16 s Scroll to the Picture line if you want to assign a picture see page 17 Press the display key Save Entry Select and press OK a Press and hold idle ...

Page 18: ...the following functions with s Display Number You can change or add to a saved number and then dial or use other functions by pressing Edit Entry Change selected entry Delete Entry Delete selected entry VIP Entry directory only Mark directory entry as VIP Very Important Person and assign it a particular sound p 38 as ringer melody You can then tell who is calling you from the ringer tone Precondit...

Page 19: ...m the directory Open the directory with s or Directory Select an entry and press OK Storing an anniversary in the directory You can store an anniversary for every number in the telephone directory You can enter a time for the reminder call for that anniversary s s Select entry page 15 View Press the display key Edit Press the display key s Scroll to the Annivers line Edit Press the display key In ...

Page 20: ...or sending SMS messages to email addresses Storing a new email address s Open directory E Mail Directory Select and press OK New Entry Select and press OK Enter email address Press the display key Save Entry Select and press OK a Press and hold idle status During entry you can open the menu with and use the following functions Insert Insert Select and press OK Predictive Text Select and press OK t...

Page 21: ...hes The loudspeaker is activated If the party answers press the talk key c If the call is not answered ringing stops after about 30 seconds The function is cancelled after ten failed attempts or if a call is received Display Number You can change or add to a stored number in the last number redial list Then you dial it or use other functions by pressing Copy to Directory Add telephone number to th...
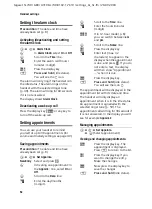
Page 22: ...Missed Calls are stored page 19 Several calls from the same number are stored u more than once when All Calls is set u once the last call when Missed Calls is set Here is an example of how the calls list appears in the display Caller list settings f Calls List 01 02 v Calls Settings Missed Calls All Calls Select and press OK The current setting is marked with a Press and hold idle status Changing ...

Page 23: ... Select entry Call Press the display key Callback begins at once The telephone number is entered in the last number redial list Deleting an entry f Calls List s Select entry Delete Press the display key a Press and hold idle status Deleting the caller list Caution All old and new entries will be deleted f Calls List v Open menu Delete Calls List Select and press OK a Press and hold idle status ...

Page 24: ... preselection number to be used u List without preselection In this list you specify the exception to the rule The rule is what you specified in the list with preselection Example You have entered 08 in the preselection list All numbers beginning with 08 will be dialled automatically with the preselection number Entering 081 in the list without preselection restricts the above rule Numbers with 08...

Page 25: ... first digits of the number you have dialled are compared with both lists u If they match none of the entries on either list or if they match an entry on the list without preselection no call by call number will be placed in front of them Not even if the first digits of the number also match an entry in the list with preselection u If the first digits only match an entry in the list with preselect...

Page 26: ... 1 again How to enter text is described from page 63 The EATONI p 63 predictive text feature helps you write your message Rules u A text message can be up to 612 characters long u If your text is longer than 160 characters or you send large picture data it will be sent as a linked message up to four messages with 153 characters each Please remember u When the SMS function is active the first ring ...

Page 27: ... text message in the draft message list so that you can edit and send it later on Saving a text message in the draft messages list You are writing a text message p 23 Press the display key Save Entry Select and press OK Opening the draft message list reading or deleting text message v î SMS Mailbox mailbox PIN Outgoing Select and press OK The first entry in the list is displayed for example q Sele...

Page 28: ...the list The display tells you if the message memory is full Press OK and delete the text messages you no longer need Linked text messages are displayed as one SMS If it is too long or has not been transferred completely it will be split into individual messages and stored in the incoming message list Incoming message list The incoming message list shows you u All received messages starting with t...

Page 29: ... melodies are not sent Forwarding text messages Read SMS then Press the display key Send Select and press OK Then continue as on page 23 Attachments are also sent If your service provider does not support forwarding text message with attachments select Use Text to forward it without attachments Confirm the prompt New SMS will not contain picture melody Proceed Adding telephone number to the direct...

Page 30: ...th a PIN A mailbox is identified by a name and a mailbox ID kind of extension number Please remember u If you operate a number of devices base stations with SMS functionality on a single phone line then each SMS mailbox ID may only occur once In this case you must also change the preset ID of the general mailbox 0 u You can only use personal mailboxes if your service provider supports this This is...

Page 31: ...ot be delivered Using data in the attachment You can save melodies and pictures logos in your handset u A new melody has the iMelody format It can either be saved in the File Manager or installed as a ringer tone for example u New pictures can be saved in the File Manager or installed as a logo You can save and install melodies and pictures on other handsets that are registered with the same base ...

Page 32: ...centre SMS centres 2 5 u Activate the SMS centre as send centre p 29 u Send the text message Text messages to PABXs u You can only receive a text message when the Calling Line Identification is forwarded to the extension of the PABX CLIP The CLIP of the phone number of the SMS centre is evaluated in your Gigaset u You may have to prefix the number of the SMS centre with an access code this depends...

Page 33: ...se text is incomplete 1 Your phone s memory is full Delete old messages p 25 2 The second provider has not yet sent the rest of the message You have stopped receiving messages 1 You have changed the ID of your mailbox Tell your SMS contacts your new ID Undo the change p 27 2 You have not activated your mailbox Activate mailbox p 27 3 Call diversion is activated with When All Calls or for the netwo...

Page 34: ...ew MMS Putting together MMS content An MMS message must contain at least one page of content An MMS page can contain text picture photograph animation and sounds Entering the text In the Notes input field Edit Press the display key This opens the text editor Enter text Press the display key Save Text Select and press OK Using other text editor functions Press the display key Delete Text Delete all...

Page 35: ...one page the content of this page is deleted Properties View properties of the MMS message Scrolling between pages u Enter number of the page you want to view u Press t in Text to scroll to the previous page u Press s in Sound to scroll to the next page Writing the MMS header In overview mode select Send to put together the content of the MMS message The MMS header comprises the telephone number e...

Page 36: ...nt this message will be stored in the MMS not sent list Lists MMS messages are stored in four lists Contains received MMS messages and notifications p 34 Contains drafts of MMS messages sorted by date Press Send to send MMS message to play MMS message Opening lists v î MMS Inbox Draft You can also call up the MMS incoming message list using the message key f p 18 if there are new MMS messages pres...

Page 37: ...anager p 37 Install selected photographs pictures animations and sounds with v Install Properties All lists View properties of the selected MMS message Capacity All lists Display available memory Receiving and viewing MMS messages Your phone line is busy while an MMS message is being sent received Receiving an MMS Your telephone provides two possible settings for receiving MMS messages u Immediate...

Page 38: ... u Press t to play the current page again u Press t twice to scroll to the previous page Opening attachments You can open save install MMS attachments via the incoming messages list p 34 Activating setting up an MMS centre Centre 1 has been set appropriately for your country see page 61 v î MMS Settings Service Centres The list of MMS centres is displayed The currently activated MMS centre is indi...

Page 39: ...ing with Save MMS send centre dial up number for sending receiving MMS messages Save setting with Save Entry Notification No Number of the SMS centre you receive the notifications from Enter as instructed by your service provider and save with Save User Name Optional User name at this MMS centre Save setting with Save Password Optional If no password has been assigned enter a password and save it ...

Page 40: ...ed as a ringer tone or logo you will see an error message a Press and hold idle status All entries in a list Delete List Select and press OK All deletable entries in the list will be deleted a Press and hold idle status Sending entry as MMS v Open menu Send as MMS Select and press OK Turn to section Writing sending MMS messages page 31 Viewing properties v Open menu Properties Select and press OK ...

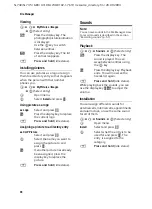
Page 41: ...OK q Select the name you want to assign the picture to and press OK Yes If another picture has already been assigned press the display key to replace the picture a Press and hold idle status Sounds Playback v Ï Sounds q Select entry Play Press the display key The sound is played You can swap between entries using the q key End Press the display key Playback ends You will now see the Sounds list ag...

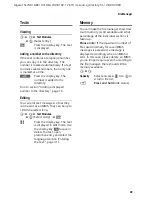
Page 42: ... as an MMS They can be up to 1 000 characters long v Ï Text Modules q Select entry View Edit Press the display key The text is displayed in edit mode Use the display key to save or delete the text open predictive entry and select the language section Entering the text page 31 Memory You can make the file manager show how much memory is still available and what percentage of the individual sections...

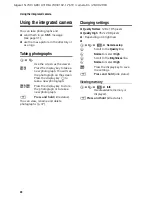
Page 43: ... display key p to take a new photograph Save New Press the display key to store the photograph or to take a new photograph a Press and hold idle status You can view rename and delete photographs p 37 Changing settings u Quality Normal 128 x 105 pixels u Quality High 352 x 288 pixels u Depending on brightness u v ë Camera setup s Scroll to the Quality line r Normal or select High s Scroll to the Br...

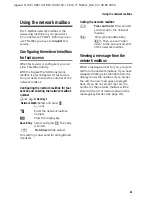
Page 44: ... Key 1 Network Mailb Select and press OK on Enter the network mailbox number Press the display key Save Entry Select and press OK The entry is stored a Hold down idle status This setting is now valid for all registered handsets Calling the network mailbox 1 Press and hold This connects you directly to the network mailbox d Press the handsfree key d Then you can open listen to the announcements of ...

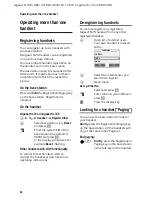
Page 45: ...PIN of the base station the default is 0000 and press OK In the display you will see for example Base 1 flashing Other handsets with GAP functionality To connect other handsets start to register the handset as described in its operating instructions De registering handsets You can de register any registered Gigaset SL74 handset from any other registered handset u Open list of internal users Your o...

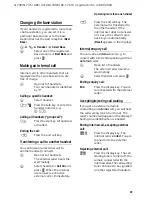
Page 46: ... All and press OK When the internal user answers announce external call or immediately a Press the end call key The external call is transferred to the other handset If the internal user does not answer or is busy the call will come back to you automatically Recall appears in the display Internal enquiry call You can call an internal user e g to consult with him while speaking with an external cal...

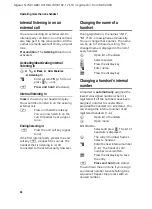
Page 47: ...is still connected to the external party however Changing the name of a handset During registration the names INT 1 INT 2 etc are assigned automatically You can change these names The name can be up to 10 characters long The changed name is displayed in the list of every handset u Open list of handsets s Select handset Edit Press the display key Enter name Save Press the display key Changing a han...

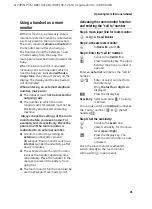
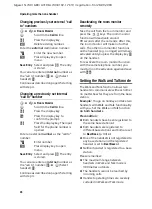
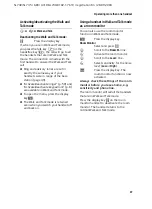
Page 48: ...A room monitor stops calling an external number after around 90 seconds Room monitor calls to an internal number handset stop after about 3 minutes u The activated room monitor function reduces the handset operating time considerably Place the handset in the charger to prevent the battery from going flat u The room monitor function can also be used in Walk and Talk mode p 47 Activating the room mo...

Page 49: ...the call from the room monitor and press the 9 keys The room monitor function will deactivate around 90 seconds after the call ends After this the room monitor will make no further calls The other room monitor functions on the handset e g no ringer will remain activated until you press the display key Off on the handset To reactivate the room monitor function with the same telephone number you mus...

Page 50: ... are available in Walk and Talk mode u To open the menu press the display key u The Walk and Talk mode is retained even when you switch your handset off and back on Using a handset in Walk and Talk mode as a room monitor You can also use the room monitor function in Walk and Talk mode Press the display key Room Monitor Select and press OK s Scroll to the Room M line r Activate the room monitor s S...

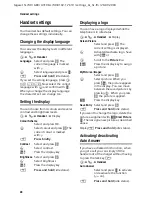
Page 51: ...ect brightness Save Press the display key a Press and hold idle status Displaying a logo You can have a logo displayed while the telephone is in idle status v Ð Handset Display Screen Picture Select and press OK The current setting is displayed r Activate deactivate logo Save with Save or v Scroll to the Picture line Insert Press the display key to assign a picture MyPictures Images Select and pre...

Page 52: ...ases with each ring u Ringer tones You can choose any sound from the File Manager Melodies 1 3 are the classical ringer tones You can choose different ringer tones for the following functions u Ext Calls For external calls u Internal Calls For internal calls u Appointments For set appointments p 52 u Alarm For a pre set wake up call p 52 u All The same for all functions Settings for external calls...

Page 53: ...w set volume and ringer tone as described in Settings for internal calls wake up calls and appointments Yes Press the display key to confirm the prompt a Press and hold idle status Activating deactivating the ringer All handsets ring when there is an incoming call You can cancel the ringer on your handset before you answer a call or when the handset is in idle status the ringer can be cancelled pe...

Page 54: ... recommended name and enter a name for the sound max 16 characters do not use spaces special characters or umlauts and press the OK display key a Press and hold idle status Open the File Manager to play edit or delete sounds p 38 Activating deactivating advisory tones Your handset uses advisory tones to tell you about different activities and statuses The following advisory tones can be activated ...

Page 55: ...n appointment In the Appoint line select On or Off s Scroll to the Date line Enter the day months 4 digit s Scroll to the Time line Enter the hours minutes 4 digit am pm If in 12 hour mode p 8 you can switch between am and pm s Scroll to the Notes line Edit Press the display key Enter text max 32 characters to appear in the display whenthe appointment is due and press OK If you do not enter a text...

Page 56: ...isplay key to delete the appointment anniversary or MMS Press the display key to write an MMS a Press and hold idle status If there is a new appointment anniversary in the list the display shows Appoint Pressing the display key also opens the Missed Dates list If the list contains 30 entries the oldest entry is deleted when the next appointment call rings Restoring the handset to factory settings ...

Page 57: ...idle status Emergency numbers Emergency numbers are preset to local requirements You can enter your own emergency numbers The emergency numbers are valid for all handsets Emergency numbers can still be dialled even if your handset is barred for external dialling Entering or changing an emergency number v Ð Base Add Features Add Emerg No Enter system PIN and press OK Enter or change emergency numbe...

Page 58: ...acters p 63 Save Now press the display key to save the setting Repeater support With a repeater you can increase the range and reception strength of your base station the repeater must be registered To use the repeater you must first activate the repeater mode This will cancel any calls that are in progress v Ð Base Add Features Repeater Mode Select and press OK Yes Press the display key Restoring...

Page 59: ...efore the telephone number when making an external call e g 0 v Ð Base Add Features Access Code Enter or change the access code maximum 3 digits and press the display key Save Entry Select and press OK a Press and hold idle status If you have stored an access code the following will apply u The access code is inserted automatically when dialling from the following lists emergency numbers SMS servi...

Page 60: ...hanging dialling pause pause after access code Precondition You have stored an access code p 56 v Open menu O I 1 1 Press keys Enter a number for the length of the pause 1 1 sec 2 2 sec 3 3 sec 4 6 sec and press OK Switching temporarily to tone dialling DTMF If your PABX works with pulse dialling but you need tone dialling for a call e g to listen to an external mail box answering machine you must...

Page 61: ...k at www siemens mobile com gigasetcustomercare The following table lists the most frequent problems and their possible solutions The display is blank 1 The handset is not switched on Press the end call key a and hold 2 The battery is flat Charge or replace the battery p 7 The handset fails to respond to a key press Keypad protection is activated Press the hash key again and hold p 8 Base station ...

Page 62: ... the telephone cannot hear you You have pressed the 9 key This mutes the handset Switch on the microphone again p 12 The caller s telephone number is not displayed although CLIP is set Calling line identification is not enabled The caller should ask his network provider to enable the identification of his number CLI You hear an error tone when keying an input a descending tone sequence The action ...

Page 63: ...rging times These operating and charging times apply only when using the recommended battery Power consumption In standby approx 2 5 Watt During a call approx 2 Watt General technical data Capacity 700 mAh Standby time approx 115 hours 4 days Calling time approx 24 hours Charging time approx 2 hours DECT standard is supported GAP standard is supported No of channels 60 duplex channels Radio freque...

Page 64: ...ailbox without telephone number page 41 Text message notification notification no off deleted page 27 SMS incoming and draft messages list empty page 24 SMS function on page 29 SMS send centre Anny Way page 29 System PIN 0000 page 42 Access code none page 56 Dialling mode DTMF page 56 Function Factory setting Page Battery tone Key click Confirmation tone on page 51 Auto Answer on page 48 Room moni...

Page 65: ...d on a separate data medium shall be excluded from the Guarantee u The purchase receipt together with the date of purchase shall be required as evidence for invoking the Guarantee Claims under the Guarantee must be submitted within two months of the Guarantee default becoming evident u Ownership of devices or components replaced by and returned to Siemens shall vest in Siemens u This Guarantee sha...

Page 66: ...star key briefly to switch from the Abc mode upper case 1st letter upper case all others lower case to 123 from 123 to abc and from abc back to Abc Press the star key before entering the letter u Star key press and hold Displays the selection line of the characters assigned to the star key u The first letter of the name of directory entries is automatically capitalised followed by lower case lette...

Page 67: ...r example it is still activated for writing text messages Precondition You are in a text input field MMS SMS name in the directory speed dial list or email directory Press the display key Predictive Text Select and press OK on a Press the end call key briefly to return to the text area Now enter your text Order of directory entries The directory entries are normally sorted alphabetically Spaces an...

Page 68: ...alarm clock Main menu With the telephone in the idle status press v open menu 1 Select Services ê 1 3 Withhold No 1 4 All Calls 1 4 1 Call Divert 1 4 3 Call Waiting 1 5 Ringback Off 2 Camera ë Search mode is activated 3 Audio Settings ï 3 1 Handset Volume 3 2 Ringer Settings 3 2 1 Ext Calls 3 2 2 Internal Calls 3 2 3 Appointments 3 2 4 Alarm 3 2 5 All 3 3 Advisory Tones 3 4 Ringer Echo 4 Add Featu...

Page 69: ...l or private without PIN 5 2 SMS 5 2 1 Write Message 5 2 2 Inbox 00 00 5 2 3 Outgoing You have activated an SMS mailbox with a PIN or 2 4 mailboxes 5 2 SMS 5 2 1 Mailbox 5 2 1 1 Write Message 5 2 1 2 Inbox 00 00 5 2 1 3 Outgoing 5 2 2 bis 5 2 4 Mailbox 1 Mailbox 2 Mailbox 3 5 2 2 1 bis 5 2 4 1 Write Message 5 2 2 2 bis 5 2 4 2 Inbox 00 00 5 2 2 3 bis 5 2 4 3 Outgoing 6 Calendar ì 6 1 Set Appoints ...

Page 70: ...e 9 2 1 3 Contrast 9 2 1 4 Brightness 9 2 1 4 Night mode 9 2 2 Language 9 2 3 Register H Set 9 2 3 1 Base 1 to Base 4 9 2 3 5 Data Base 9 2 4 Select Base 9 2 4 1 Base 1 to Base 4 9 2 4 5 Best Base 9 2 5 Auto Answer 9 2 6 Reset Handset 9 3 Base 9 3 2 System PIN 9 3 3 Base Reset 9 3 4 Add Features 9 3 4 1 Dialling Mode 9 3 4 2 Recall 9 3 4 3 Repeater Mode 9 3 4 4 Access Code 9 3 4 5 Add Emerg No 9 3...

Page 71: ...tones 16 chord u Recording ringer tones via the handset u PC interface for transfer management of directory Outlook appointments polyphonic melodies etc u Balloon Shooter game installed Gigaset Handset SL 1 u Large illuminated graphical display with date and time u SMS u Download options for obtaining melodies via SMS u Polyphonic ringer tones 16 chord u Recording ringer tones via the handset u PC...

Page 72: ...ion for 29 names u Announce name when calling Gigaset Repeater The Gigaset repeater can be used to increase the reception range of your Gigaset handset to the base station Mobile handsfree set with PTT key With the mobile handsfree set you can make a call while keeping your hands free In addition conversations can be heard on the handset Data Cable DCA 500 For connecting your telephone to the seri...

Page 73: ...ile phone retailer Or you can order direct online from the my siemens Online Shop www my siemens com shop or phone 0180 5333 225 0 12 Euro Min The Online Shop also has the latest product information Only use original accessories This will avoid possible health risks and damage and also ensure that all the relevant regulations are complied with ...

Page 74: ... provider preselection 21 B Balloon Shooter 63 Base station changing 43 changing the name of the base station 55 connecting the device 6 connecting to a PABX 56 range 5 restoring factory settings 55 setting 53 setting up 5 Battery charging 7 display 7 inserting 6 recommended batteries 60 Battery tone 51 Best base station 43 Block activating deactivating keypad lock 8 external dialling 54 handset 5...

Page 75: ...ete key 9 Deleting anniversary 53 appointment 53 De registering a handset 42 Dialling emergency number 54 Dialling mode 56 changing 56 Dialling pause 57 Directory 14 adding number from MMS 34 adding number from SMS text 39 adding number from text 16 assigning a picture 38 opening the 8 order of entries 64 sending entry to a handset 15 using for number entry 16 Display 12 24 hour display 8 changing...

Page 76: ...rward 26 MMS 33 G General call diversion 13 Group call 43 H Handset activating 8 authorisation 54 blocking 54 changing for best reception 43 changing internal number 44 changing to another base station 43 deactivating 8 de registering 42 idle status 9 list 8 muting 12 operating and charging times 60 operating more than one handset 42 paging 42 preparing to use 6 registering 42 registering on anoth...

Page 77: ...rectory speed dial list Email directory 18 File Manager 39 MMS lists 34 photo 40 Menu back one menu level 9 end tone 51 opening the 8 overview 65 Message key open list 25 35 opening lists 18 Messages key 1 Microphone 1 Missed anniversary 53 appointment 53 Missed calls 19 MMS 31 adding number to the directory 34 attachments 34 default settings 33 deleting entry from list 34 editing 33 entering text...

Page 78: ...ing 42 Pause after access code 57 after line seizure 56 after Recall key 57 setting for a PABX 56 PC Interface 63 Phone number enter number of network mailbox 41 storing of SMS in the directory 26 Photo deleting 40 memory 40 picture quality 40 renaming 40 sensitivity to light 40 settings 40 taking a 40 viewing 40 Photograph viewing 38 PIN changing the system PIN 54 Power consumption 60 Power suppl...

Page 79: ... CLIP 11 Signal strength 5 Signal tone see Advisory tones SMS 23 activating deactivating function 29 adding telephone number to directory 26 changing mailbox 28 copying an email address 24 forwarding 26 input language 24 inserting picture 24 inserting sounds 24 linking 23 mailbox ID 27 mailboxes 27 mark as new 26 notification by SMS 27 notify number 27 notify type 27 opening an attachment 26 recei...

Page 80: ...onfiguring for fast access 41 Toggling 13 Tone confirmation 51 error tone 51 Tone dialling 57 U Update firmware 7 V Viewing network mailbox message 41 Volume earpiece volume 49 loudspeaker volume 49 ringer volume 49 setting 49 50 W Wait melody 12 Wake up call deactivating 52 setting the ringer 50 Walk and Talk mode 47 activating 47 deactivating 47 setting 46 using handset as room monitor 47 Warnin...

Reviews: