6
Creating Project Files—SEAbus Port Expander
48
Siemens Energy & Automation, Inc.
6.2
SEAbus Device Setup—Port 2
One or more Siemens devices may be connected to
port 2. You must have a SEAbus Port Expander project
file open to configure port 2 using the instructions in
this section.
Select
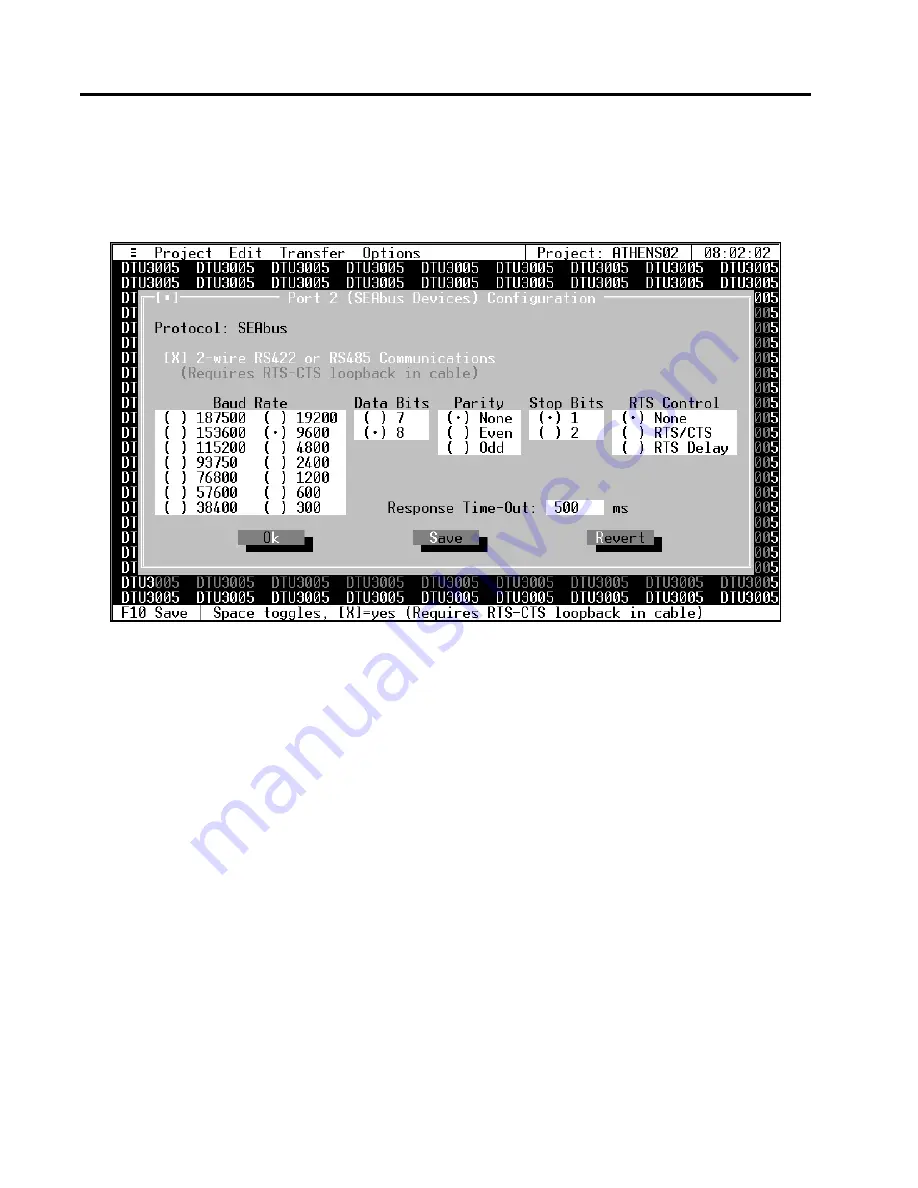
Port 2 (SEAbus Devices)
from the
Edit
menu,
and the Port 2 configuration screen appears.
Configuration Information
The configuration selections with the exception of
Response Time-Out are the same as those for port 1.
Refer to
Section 6.1
for instructions on configuring
these fields.
Response Time-Out
The Response Time-Out tells the DTU how long to wait
after transmitting a request to the PLC if no response
has been received from the PLC. After this amount of
time passes with no response being received, the DTU
will assume that no response is coming and will retry
the request. Enter the time in milliseconds.
Saving Port 2 Configuration Information
Once you have entered all the configuration informa-
tion, select
Save
to save the configuration to the
project file. Then select
Ok
or press the
Esc
key to
close the configuration screen.
If you have changed the configuration and have not
saved it to the project file, you will be prompted to
either save or discard the changes.
Select
Revert
to return to the last previously saved
configuration without saving any changes.
6.3
Passthrough Setup—Port 3
Select
Port 3 (Passthrough)
from the
Edit
menu, and
the Port 3 Passthrough configuration screen appears.
It is identical to the port 1 configuration screen, but
configures the communications settings for the super-
visory computer connected to port 3. The settings can
be different than those for port 1, depending on the
system. See
Section 6.1
for directions for setting up
the passthrough port.
After configuring port 3, select
Save
to save the port 3
configuration to the project file, and then select
Ok
or
press
Esc
to exit the Port 3 Passthrough configuration
screen.


