5
Creating Project Files—Modbus Master to Devices
34
Siemens Energy & Automation, Inc.
Passthrough to Port 2 (SEAbus)
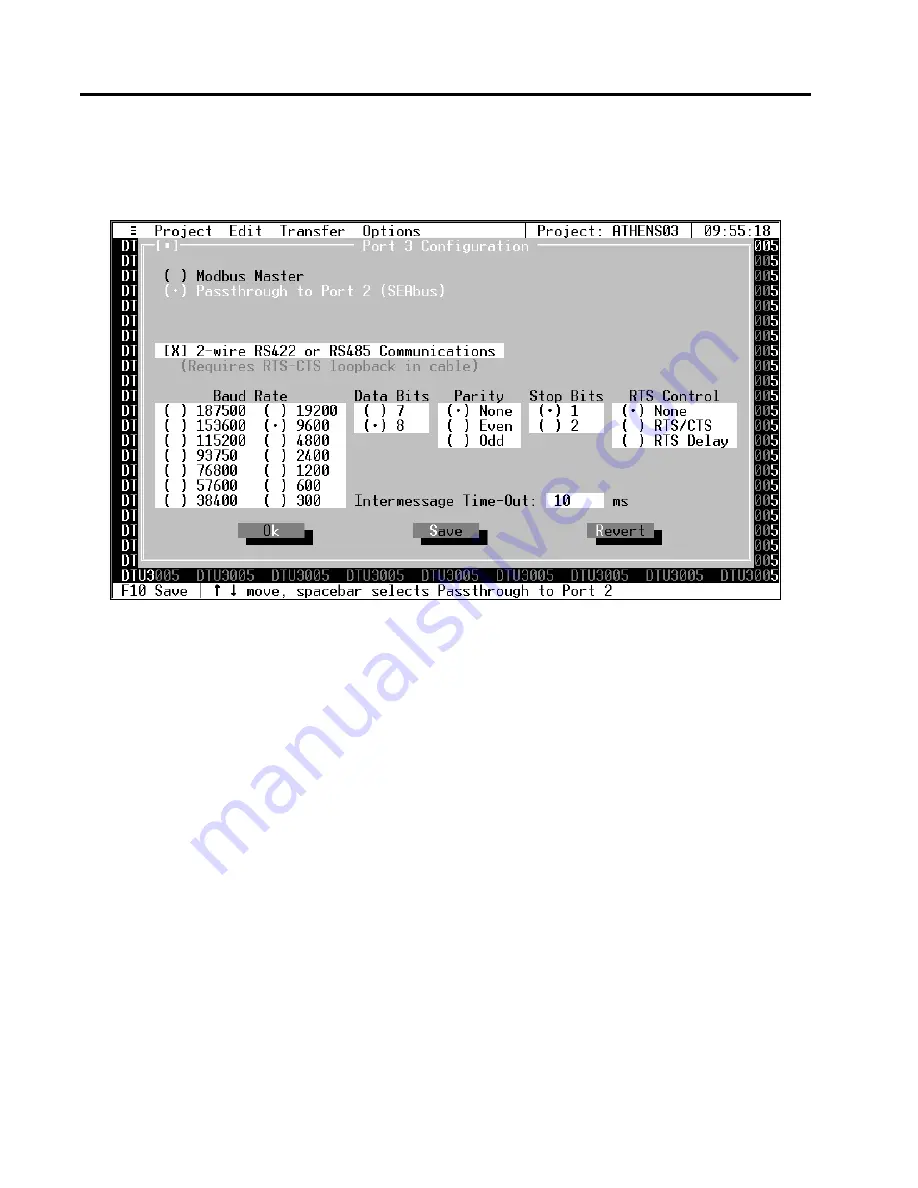
If you select
Passthrough to Port 2 (SEAbus)
, the
screen appears as shown below.
2-Wire RS422 or RS485 Communications
After you have selected
Passthrough to Port 2 (SEA-
bus)
, press
Tab
or select
2-Wire RS422 or RS485 Com-
munications
. This box will only need to be checked if
the communications with your SEAbus devices use a
2-wire RS485 or RS422 interface. This is the usual
method of connecting SEAbus devices. When 2-wire
communications are being used, RTS must be looped
back to CTS on the DTU side of the cable. This can be
done on the RS232 side by looping pins 4 and 5 or on
the RS422/485 side by looping 16 to 18 and 17 to 19.
See
Appendix D
for wiring diagrams for your particu-
lar PLC, and whether it uses a 2-wire connection.
To select the checkbox, click on it with the mouse or,
with the
2-Wire RS422 or RS485 Communications
selection highlighted, press the
spacebar
. An “X” will
appear inside the brackets when it is selected.
Press the
Tab
or
Right Arrow
key to move to the next
field without selecting this checkbox.
Intermessage Time-Out
The DTU3005 uses the intermessage time-out to
determine when a complete message has been
received on the passthrough port. Once the first char-
acter of a message has been received, if the amount of
time specified by the intermessage time-out passes
with no additional characters being received, the
DTU3005 will consider the message to be complete
and process it.
To change the intermessage time-out, select
Intermes-
sage Time-Out
and enter the value in milliseconds,
then press
Enter
.
Saving Port 3 Configuration Information
Once you have entered all the configuration informa-
tion, select
Save
to save the configuration to the
project file. Then select
Ok
or press the
Esc
key to
close the configuration screen.
If you have changed the configuration and have not
saved it to the project file, you will be prompted to
either save or discard the changes.
Select
Revert
to return to the last previously saved
configuration without saving any changes.
Other Configuration Information
The remaining configuration selections are the same
as those for port 1. Refer to
Section 5.3
for instructions
on these fields.


