background image

Operating Instructions 

Chapter

 5

LD-MRS

Electrical installation

8012948/ZMQ0/2017-06-09

©

 SICK AG · Germany · All rights reserved · Subject to change without notice

77

5.4.5

Connect PC/laptop 

Ethernet interface

To configure using the visualization tool SICK LaserView Customer Edition (measuring 
mode) or the configuration software program SOPAS-ET (field monitoring), use a crossover 
cable such as Part No. 2049826 to connect the LD-MRS to the ethernet port of the comput-
er.

RS-232 interface

In order to be able to access the RS-232 interface as auxiliary data interface, connect the 
LD-MRS via a data cable, e. g. Part no. 2049831, to the COM port of the PC, see 

Fig. 5-12

.

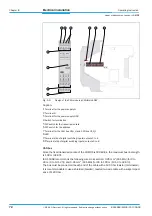
Fig. 5-12: 

Wiring of the RS-232 interface

Summary of Contents for LD-MRS400001

Page 1: ...O P E R A T I N G I N S T R U C T I O N S LD MRS 3D LiDAR sensors...

Page 2: ...PDF at www sick com Device Software Tool Function Version LD MRS400001 LD MRS Firmware DSP Firmware FPGA as of V 2 0 x as of V 9 0 x LD MRS400102 LD MRS HD Firmware DSP Firmware FPGA as of V 2 0 x as...

Page 3: ...mounting steps 57 4 2 Preparations for mounting 57 4 3 Mounting and adjustment of the device 58 4 4 Mount the optional CAN module 62 4 5 Dismounting the device 63 5 Electrical installation 65 5 1 Ove...

Page 4: ...t sensor LD MRS 4 SICK AG Germany All rights reserved Subject to change without notice 8012948 ZMQ0 2017 06 09 Content 10 2 Additional documentation 107 10 3 Ordering information 107 10 4 Glossary 108...

Page 5: ...only Memory non volatile memory that can be electrically erased and programmed LED Light Emitting Diode light emitting diode INT Integer LD Ladar Digital Ladar Laser Radar MRS Multi Layer Range Scann...

Page 6: ...the cable splitter 1 3 80 Tab 5 9 Pin assignment of the CAN connecting cable 81 Tab 5 10 Wire colour assignment of the supply cable 81 Tab 6 1 Default setting of SOPAS ET 83 Tab 6 2 Password 85 Tab 8...

Page 7: ...allation of the LD MRS 65 Fig 5 2 Field monitoring Electrical installation of the LD MRS and the CAN module 65 Fig 5 3 Connection of the voltage supply and wiring of the Ethernet interface 71 Fig 5 4...

Page 8: ...nformation This document contains all information required for mounting electrical installation and commissioning of the LD MRS with factory settings All tasks are described step by step The configura...

Page 9: ...on Recommendations are designed to assist in the decision making process with respect to a certain function or a technical measure Basic settings Marks a section listing the values of the factory sett...

Page 10: ...and authorized service personnel of SICK AG may repair the LD MRS The different tasks require the following qualification Activities Qualification Mounting maintenance practical technical basic traini...

Page 11: ...the LD MRS in the permitted ambient temperature range see Chapter 9 Technical specifications Page 94 The user of the LD MRS has to ensure that the device is only used in compliance with the listed spe...

Page 12: ...ns safety rules other pertinent safety rules Adhere to the following safety notes in order to prevent dangers for persons and or property The operator must ensure by suitable instructions and inspecti...

Page 13: ...CAUTION Laser radiation The LD MRS uses infrared light laser The device is specified as laser class 1 eye safe The laser beam is invisible to the human eye Caution use of controls adjustments or perfo...

Page 14: ...S Switch on the supply voltage or connect the supply cable again with the Power con nection The LD MRS starts operation with the most recently stored permanently parameter set 2 6 Environmental protec...

Page 15: ...Disposal after final decommissioning Currently the SICK AG does not offer a return service for inoperative or irreparable devices Always dispose of unserviceable or irreparable devices in compliance w...

Page 16: ...consult the section before starting 3 1 Design of the device The laser measurement sensor LD MRS consists of a laser measurement system and a mir ror construction The components laser measurement sys...

Page 17: ...09 SICK AG Germany All rights reserved Subject to change without notice 17 3 1 1 Device view Caption 1Ventilation element 2Mounting hole 6 6 mm 4 x 3Window 4 Ethernet connection 5 Power connection 6Da...

Page 18: ...in the Internet http get adobe com reader Quantity Component Comment 1 Laser measurement sensor LD MRS Type depending on order 1 Notes on Device with information and elec trical circuit diagram for ge...

Page 19: ...4 planes enclosure rat ing IP 69k 1047145 LD MRS HD LD MRS400102 Scanning range 30 m 98 4 ft at 10 remis sion measurement on 4 planes heavy duty particularly robust in dusty environments and areas wit...

Page 20: ...ization tool with Windows and Linux And configuration of field monitoring using the SOPAS ET the configuration software with Windows alternatively using commands in messages Operating states wait mod...

Page 21: ...ngs or rather of the objects located within the radial field of view The object detection is done with laser beams that the LD MRS emits in four stacked planes The device measures the distance and the...

Page 22: ...resolution and the scanning frequency the preprocessed and filtered data 3 4 2 Time of flight measurement Caption 1Object 2Laser pulse transmitted 3Laser pulse reflected 4LD MRS The laser pulses emitt...

Page 23: ...of the LD MRS the received intensity is transformed into a voltage In the example shown in Fig 3 3 a reflected echo of a glass pane yields a high voltage over a short period of time The echo of a rai...

Page 24: ...Object The multi layer technology of the LD MRS allows for a pitch angle compensation by means of four scan planes with different vertical angles e g if the device is mounted to a vehicle Thus the LD...

Page 25: ...our hues visualize the planes and colour saturation of the echoes Tab 3 5 illustrates the naming convention for the planes and their predefined colors that are used for the visuali sation The colour s...

Page 26: ...nd relation of angle to range Scanning range Caption 1central working range green 2lateral scanning range light green 3LD MRS The LD MRS has been designed with a central scanning range of 85 for four...

Page 27: ...range Caption 1Curves of the upper planes scan planes 1 and 2 2Curves of the lower planes scan planes 3 and 4 scanning range in angle in Due to the optical design of the LD MRS the scanning range dep...

Page 28: ...reduced sensitivity For greater distances the measurements are taken at normal sensitivity In addition the measure ments are evaluated Criteria such as proximity relationships between measurements wit...

Page 29: ...scanning frequencies 12 5 Hz 25 Hz and 50 Hz which allow four different settings of the angular resolution The operator can configure these parameters Angular resolution Two scan planes each are measu...

Page 30: ...e with the SICK LaserView Customer Edition This function is not possible for field monitoring The scanning frequencies of 25 Hz and 50 Hz only allow for constant angular resolution Fig 3 11 Example An...

Page 31: ...resolution 0 25 3Lateral area of the angular resolution 0 5 4LD MRS The focus of the angular resolution is in an area of 1 0 central area around x axis of the sensor A slightly lesser angular resoluti...

Page 32: ...5 Hz At the scanning frequency 12 5 Hz with constant angular resolution the angular resolution is 0 25 see Fig 3 13 Scanning frequency 25 Hz At the scanning frequency 25 Hz with constant angular reso...

Page 33: ...09 SICK AG Germany All rights reserved Subject to change without notice 33 Scanning frequency 50 Hz At the scanning frequency 50 Hz with constant angular resolution the angular resolution is 0 5 see F...

Page 34: ...ct the laser beam better than dark surfaces and can be detected by the LD MRS over larger distances Brilliant white plaster reflects approx 100 of the incident light black foam rubber approx 2 4 On ve...

Page 35: ...is almost entirely deflected see Fig 3 19 Instead of the surface of the mirror it is possible that the object on which the deflected laser beam is incident may be detected Objects that are smaller th...

Page 36: ...es refer to Chapter 5 3 Electrical connections and cables Page 66 See Ethernet Data Protocol for further information 3 5 Measuring mode 3 5 1 Scan data Scanning the sensor surroundings within the scan...

Page 37: ...start the measurement mode Start using the SICK LaserView Customer Edition visualization tool Start using a telegramm see Telegram Listing Ethernet Data Protocol art no 8014492 3 5 3 Data communicatio...

Page 38: ...rdware or software is required for object track ing The LD MRS outputs the following dynamic object parameters in relation to the data for its own movement Position of the object Speed of the object S...

Page 39: ...referred to as preprocessing During this process the LD MRS classifies every measured point and divides them up into values based on contamination atmospheric disturbances e g rain and impact on the...

Page 40: ...e raw data to generate an object contour The scan data is divided to form groups consisting of related scan points This division is dependent on the vehicle s own movement When the Show Bounding Box o...

Page 41: ...the object Size length and width of the object Direction of movement of the object Age scans time of the object Contour of the object Ego motion data It is possible to transfer information on the pro...

Page 42: ...onditions This filter reduces the sensitivity of the four low er levels to ensure more accurate measurement 3 6 3 Reduced sensitivity NOTICE If the sensitivity is reduced the NoiseControl sensitivity...

Page 43: ...at are further away NOTICE If the LD MRS has been mounted upside down make sure that the Upper layers and Lower layers columns are swapped over and that the Upside down active option has been activate...

Page 44: ...xceeded it can be assumed that the measurement target is solid and fixed If only the lower threshold is exceeded the target is scattered For example dust Within the output of measured values the measu...

Page 45: ...e g sunlight erroneous measurements may be taken which can be evaluated and filtered by performing a plausibility check on a downstream ex ternal computer The Noise control active function activates a...

Page 46: ...n mounted upside down it is necessary to activate the Upside down active option The installation position is selected from the Laserview Telegram listing to ensure that the scan data output coordinate...

Page 47: ...valuated situation For each evaluation instance and the following are selected one of 16 configurable evaluation fields one evaluation strategy per field a logical output and in certain circumstances...

Page 48: ...uation instances In this case for example two evaluation instances are active simultaneously Evaluation strategy for evaluation field The LD MRS offers three different evaluation strategies Pixel eval...

Page 49: ...imum object size and the configured expanded response time has passed Evaluation field A field is selected from the configuration evaluation fields for the evaluation instance Is shape must correspond...

Page 50: ...s can have the following shapes and posi tions Polygon Rectangle Extending up to the LD MRS At a distance from the LD MRS When the range to be monitored changes the LD MRS can be reconfigured using so...

Page 51: ...wing angle and thus measure differ ent approach angles The rotating mirror that deflects the lasers is mounted at a slight angle to the axis of rota tion This design means that the front and back of t...

Page 52: ...on instances Page 48 The external outputs of the LD MRS can be reset by using inputs Chapter Resetting a logical output Page 50 3 10 2 External switching outputs digital The LD MRS does not have a dir...

Page 53: ...description 8012948 ZMQ0 2017 06 09 SICK AG Germany All rights reserved Subject to change without notice 53 Fig 3 36 CAN 8 dio SNAP module The image may differ Compatible with top hat rail TS35 Only o...

Page 54: ...t No 2050648 8 m 26 2 ft in maximum configuration both CAN modules are connected to the end of the bus via the 9 pin D sub connector The required terminals are created using the internal switches of e...

Page 55: ...Operating Instructions Chapter 3 LD MRS Product description 8012948 ZMQ0 2017 06 09 SICK AG Germany All rights reserved Subject to change without notice 55 Notes...

Page 56: ...material contact SICK AG The following accessories are required for mounting 4 M6 screws of property class 8 8 to attach the LD MRS at the mounting support The length of the screws depends on the wal...

Page 57: ...4 3 2 Distance between LD MRS and object surface to be monitored Caption a vertical beam expansion for four layers b vertical beam expansion for two layers one laser pulse c vertical beam expansion fo...

Page 58: ...y All rights reserved Subject to change without notice 8012948 ZMQ0 2017 06 09 Mounting 4 3 3 Mount the LD MRS on the optional holder Part No 1047429 Fig 4 2 Mount the LD MRS on holder Part No 1047429...

Page 59: ...7LD MRS 1 Mount bracket 2 to quick release 1 2 Mount quick release 2 on the mounting plate 3 Mount bracket 1 to bracket 2 4 Mount quick release 1 to quick release 2 5 Mount LD MRS to the mounting plat...

Page 60: ...Fig 4 4 Mount the LD MRS on the weather resistant cover Part No 2058033 and on the holder Part No 1047429 6 7 Components of the weather resistant cover and ways to install the fastening bracket Instal...

Page 61: ...of version 2 The weather protection cover can be removed for cleaning without having to unscrew the LD MRS from the retention bracket 1 Mount retention brackets 1 and 2 on the body with the frame see...

Page 62: ...ve the attachment screws of the LD MRS and remove the device 4 5 1 Storage NOTICE Property damage Improper storage can cause damages at the LD MRS Condensing humidity can damage the optical components...

Page 63: ...Operating Instructions Chapter 4 LD MRS Mounting 8012948 ZMQ0 2017 06 09 SICK AG Germany All rights reserved Subject to change without notice 63 Notes...

Page 64: ...ay perform the electrical installation Caption 1LD MRS 2Power supply line 3Ethernet data cable 4Power supply 5Desktop laptop temporary configuration or host computer measurement processing Fig 5 1 Mea...

Page 65: ...o 27 V DC typical 12 24 V DC function extra low voltage in ac cordance with IEC 60364 4 41 The voltage supply must provide at least 36 W power output The device can be con nected to a supply by solar...

Page 66: ...AN synchronization interface Power supply 5 3 1 Pin assignment of the connections Connection Ethernet Connection Data interfaces Synchronization Pin Signal Function 1 RX Receive 2 TX Transmit 3 TX Tra...

Page 67: ...spring wire plug 8 m 26 2 ft 2049826 Ethernet data cable crossover shielded 4 pin plug round plug in connection and 8 pin RJ 45 plug 40 to 80 C 40 to 176 C 2 m 6 56 ft Ethernet PC directly or via net...

Page 68: ...hout notice 8012948 ZMQ0 2017 06 09 Electrical installation Pin wire colour assignment of the cables see Chapter 5 5 Pin assignments and wire colors of the assembled cables Page 78 NOTICE Damage hazar...

Page 69: ...in accordance with IEC 742 Important The output circuit of the power supply must be safely electrically isolated from the input circuit this feature is normally provided by a safety transformer in acc...

Page 70: ...mportant For the next steps of the installation the supply voltage of the LD MRS remains switched off 5 4 2 Connect the optional CAN modules external I O ports CAN modules optional accessory NOTICE Po...

Page 71: ...ts 3DIP switch for the transmission rate 4DIP switch for the address 5Terminal V PWR 6Terminal VPWR 7Terminal for the power supply V 8Terminal for the power supply GND 9Terminal for CAN bus CAN_L blTe...

Page 72: ...trip of digital switching inputs outputs 1 to 4 blTerminal strip of digital switching inputs outputs 5 to 8 CAN bus Since the fixed transmission rate of the LD MRS is 500 kBit s the maximum bus line l...

Page 73: ...9 pin D sub connector see Fig 5 6 Caption 1LD MRS 2CAN module If only one CAN module is connected to the LD MRS the CAN terminating resistance D Sub connector Part no 6042511 is integrated in the ter...

Page 74: ...required termination is provided by a CAN module via the internal termination switch see Fig 5 4 page 71 and Fig 5 5 page 72 Termination is active when the termination switch is in the ON position Dig...

Page 75: ...iguring the CAN module Setting the CAN address For addressing in the CAN bus the address range 1 to 127 is available By default the ad dress of theLD MRS is 1 Each address assigned to a device may onl...

Page 76: ...tallation Setting the transmission rate Set a transmission rate of 500 kBit s for the CAN modules 5 4 4 Connect the CAN to the supply voltage Use the supply cable to connect the supply voltage 8 to 50...

Page 77: ...ICK LaserView Customer Edition measuring mode or the configuration software program SOPAS ET field monitoring use a crossover cable such as Part No 2049826 to connect the LD MRS to the ethernet port o...

Page 78: ...Signal Pin 1 RX 2 2 TX 3 3 TX 6 4 RX 1 4 to 8 not assigned Twisted wire pair RX 1 with RX 4 TX 3 with TX 2 Tab 5 6 Pin assignment of the Ethernet data cable 12 pin plug round plug in connection 9 pin...

Page 79: ...in 9 4 Data GND 5 5 Data GND 8 6 Data GND 5 7 RxD 3 8 Data GND 5 9 CAN_L1 2 10 CAN_H1 7 11 CAN_L2 4 12 CAN_H2 8 Twisted wire pair Sync in 3 with Data GND 4 Sync out 2 with Data GND 5 TxD 1 with Data G...

Page 80: ...signed 9 CAN_L1 2 10 CAN_H1 7 11 CAN_L2 4 12 CAN_H2 8 Twisted wire pair CAN_L1 9 with CAN_H1 10 CAN_L2 11 with CAN_H2 12 Tab 5 9 Pin assignment of the CAN connecting cable 4 pin socket round plug in c...

Page 81: ...nd does not require any operator interven tion 6 1 Overview for the startup steps for field monitoring Install the SOPAS ET configuration program on the computer Connect PC to LD MRS Take the LD MRS i...

Page 82: ...exe on the CD 3 To complete the installation follow the operation instructions 6 2 3 Default setting of SOPAS ET 6 3 Establish communication with the LD MRS Important To communicate via TCP IP the TCP...

Page 83: ...r that access the ethernet or TCP IP 1 In the SCAN ASSISTANT dialogue go to INTERNET PROTOCOL IP COMMUNICATION and check the box ACTIVATE IP COMMUNICATION and USE AUTOIP 2 Confirm the settings in the...

Page 84: ...e password to ensure protection Use the structure of the project tree in SOPAS ET to configure the required parameters for your application Do not turn off the power during configuration If the power...

Page 85: ...ERMANENTLY 6 6 Synchronization Caption 1LD MRS 2 Data interfaces synchronization connecting line 3External device e g camera optional 4External synchronization pulse signal generator optional In a fus...

Page 86: ...quency of 25 Hz and 50 Hz the precision is 500 s equivalent to an angular precision of 4 5 or 9 respectively The external synchronization frequency fsync can be selected in a range of 8 5 Hz fsync 50...

Page 87: ...he external unit can also be a different LD MRS Each LD MRS starts as a master unit sending trigger points to the next unit The LD MRS always sets the output signal to tPulse_out 20 s see the red outp...

Page 88: ...Chapter 6 Operating Instructions Laser measurement sensor LD MRS 88 SICK AG Germany All rights reserved Subject to change without notice 8012948 ZMQ0 2017 06 09 Commissioning and configuration Notes...

Page 89: ...ce is specified as laser class 1 eye safe Do not open the device opening the housing does not interrupt the laser operation Observe the valid laser protection regulations in their newest version 7 2 1...

Page 90: ...e water can permeate the seals or damage parts of the LD MRS housing 7 3 Exchanging an LD MRS Important Only trained and authorized service personnel of SICK AG may repair the LD MRS A faulty or damag...

Page 91: ...maximum of twice 16 Bit each for warnings and faults 8 2 Overview of possible errors and faults 8 2 1 Mounting error LD MRS not mounted conveniently e g limited field of vision LD MRS adjusted incorr...

Page 92: ...ing between the LD MRS and the CAN module 4 Field monitoring The CAN modules are not working correctly optional accessory The supply voltage V is not connected to the CAN electronics the poles are swi...

Page 93: ...ult However the LD MRS can be rapidly replaced by the user See Chapter 7 3 Exchanging an LD MRS Page 90 If an error occurs which cannot be eliminated please contact SICK Service International Competen...

Page 94: ...0 25 25 Hz 0 25 50 Hz 0 5 Tracking 12 5 Hz 0 25 focussed 0 125 0 5 Flexible resolution 0 125 0 5 Measurement resolution 40 mm 1 58 in Statistical error 1 sigma 100 mm 3 94 in Beam divergence Horizont...

Page 95: ...93 2 mm including fastening tabs Weight Approximately 1 kg 2 2 lb UAV Approximately 0 77 kg 1 69 lb Electrical safety As per EN 50178 1997 10 Enclosure rating IP 69k plug IP 68 2 m 24 h as per EN 605...

Page 96: ...lation between outputs Electrical connection 16 screw terminals 36 cage clamps Supply voltage UV 8 to 50 V DC protected against polarity reversal Power consumption 1 5 W 60 mA at DC 24 V without load...

Page 97: ...hnical specifications 8012948 ZMQ0 2017 06 09 SICK AG Germany All rights reserved Subject to change without notice 97 9 2 Dimensional drawings 9 2 1 LD MRS laser measurement sensor Dimensions Fig 9 1...

Page 98: ...specifications 9 2 2 LD MRS laser measurement sensor Dimensions Fig 9 2 Dimensions of the LD MRS UAV All lengths in mm 5 91 3 3 59 24 0 94 3 1 5 0 06 45 1 77 13 9 0 55 5 115 4 53 6 61 2 40 4 x 6 6 0 2...

Page 99: ...ions 8012948 ZMQ0 2017 06 09 SICK AG Germany All rights reserved Subject to change without notice 99 9 2 3 Laser measurement sensor LD MRS UAV sensor coordinate origin Fig 9 3 Position of the sensor c...

Page 100: ...urement sensor LD MRS 100 SICK AG Germany All rights reserved Subject to change without notice 8012948 ZMQ0 2017 06 09 Technical specifications 9 2 4 Holder optional accessory Fig 9 4 Dimensions of th...

Page 101: ...al specifications 8012948 ZMQ0 2017 06 09 SICK AG Germany All rights reserved Subject to change without notice 101 9 2 5 Weather resistant cover optional accessory Fig 9 5 Dimensions of the weather re...

Page 102: ...ed Subject to change without notice 8012948 ZMQ0 2017 06 09 Technical specifications 9 2 6 CAN modules optional accessory Fig 9 6 Dimensions of the two designs of the CAN modules All lengths in mm Par...

Page 103: ...s Chapter 9 LD MRS Technical specifications 8012948 ZMQ0 2017 06 09 SICK AG Germany All rights reserved Subject to change without notice 103 9 2 7 Shock mounting Fig 9 7 Dimensions of the shock mounti...

Page 104: ...at least the marked areas clear Additionally only use materials with a low remission as materials bordering to the field of view Avoid edges close to the window of the LD MRS For optimum design integr...

Page 105: ...tion tool English Installation and use of the SICK LaserView Customer Edition software 8013906 Manual CAN 8 dio SNAP module English Detailed technical description of the module 8013908 Manual CAN 8 di...

Page 106: ...example parameters were changed SOPAS ET configuration software For configuring adapting to requirements and the situation of use and starting the LD MRS for field monitoring Parameter set Data set w...

Page 107: ...shows page 1 of the EC Declaration of Conformity size reduced for the LD MRS If needed you can download the complete EC statement of conformity with a list of the device versions and satisfied standa...

Page 108: ...rt sick jp Malaysia Phone 6 03 8080 7425 E Mail enquiry my sick com Mexico Phone 52 472 748 9451 E Mail mario garcia sick com Netherlands Phone 31 30 2044 000 E Mail info sick nl New Zealand Phone 64...

Reviews: