


71
13. Application Functions
13.4 Auto Print
Using Auto Print allows measurement results to be automatically output via the RS-232C connector or
DATA I/O connector without pressing the
[PRINT]
key with every measurement. This function can be
combined with WindowsDirect (see
). When Auto Print is activated, if a sample weighing 10 counts or
more is placed on the pan while the mass displayed is within
±
5 counts of zero, the result is output via
the RS-232C cable or DATA I/O connector automatically upon display stabilization.
Subsequent sample measurement results will output automatically, if the previous sample is first
removed from the pan and the display returns to within
±
3 counts of zero.
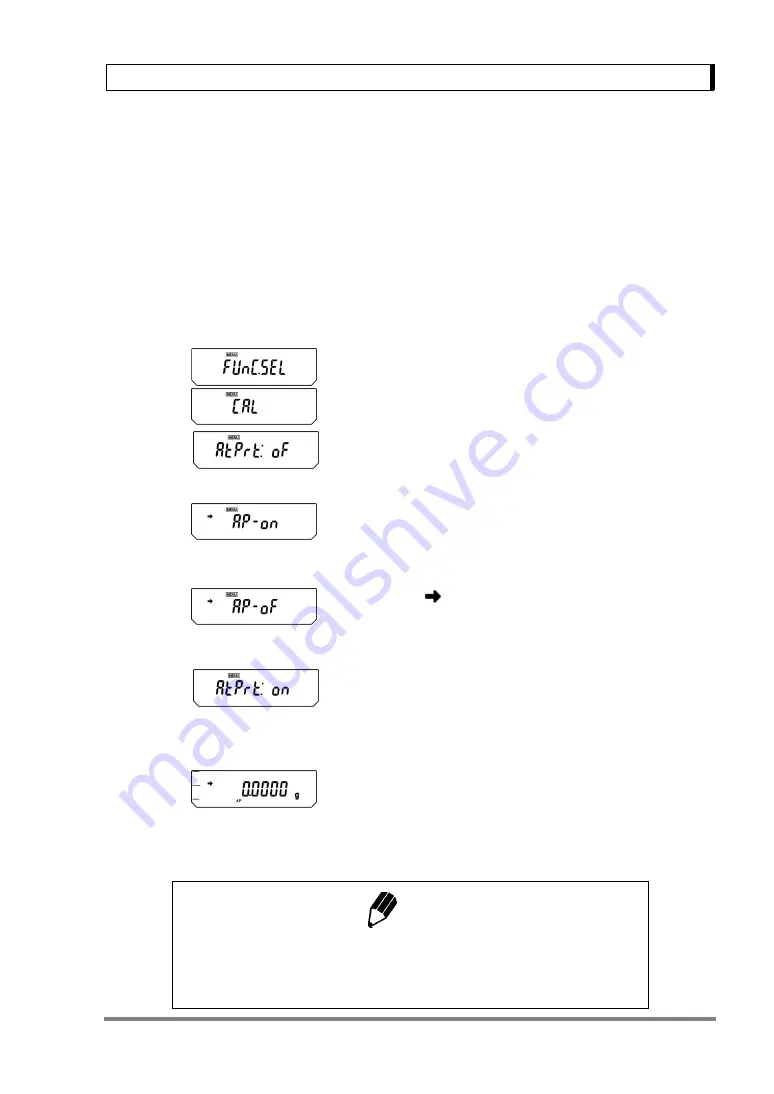
1
Press the
[CAL]
key repeatedly from the mass
display until “FUnC.SEL” appears. Press the
[O/T]
key. The display will show “CAL”.
2
Press the
[CAL]
key repeatedly until “AtPrt:
∗∗
”
appears. the “
∗∗
” shows the current setting, “on”
for on and “oF” for off.
3
Press the
[O/T]
key. The display shows “AP-on”
and after this, pressing the
[CAL]
key switches
the displays between “AP-on” and “AP-oF”. When
the current setting is displayed, the stability mark
(
) appears. To change the setting, press the
[O/T]
key when the desired setting appears, or
4
Press the
[POWER]
key to return to “AtPrt:
∗∗
”
without changing the setting.
5
Pressing the
[POWER]
key again returns to the
mass display.
6
When the Auto Print mode is set up, the Auto
Print symbol appears in the mass display.
7
To turn the Auto Print function off, follow steps 1
through 3, above.
(Example)
(When ON)
(When OFF)
(When OFF)
(When ON)
Setting
check
During
setting
(Example)
(Example)
(Example)
(Example)
During
setting
Setting
check
Note
No more than one of the four application modes, Auto Print (
), Interval
Timer (
), Add-on Mode (
), Formulation Mode (
), can be set
ON at the same time.


