SHIELD SmartCam USER MANUAL
12
Camera WiFi Setup
So, you have got the camera installed successfully and been able to view what you want via
the network but you may also want to avoid the cable running down the hallway? You could
setup your IP camera wirelessly. Before start your wireless setup, please check if your
wireless router works, and remember to connect your router, desktop and the IP camera as
page 6. There are 2 methods to build up your wireless connection.
Note:
Wireless viewing only works while the IP camera locates in your wireless network,
while the connective signal is weak, the video may be disruptive. Please make sure your IP
camera is in the wireless network or we suggest you to view with Ethernet cable connected.
Connected via your PC with Web Interface
To setup the wireless connectivity, you need to enter the
Web Interface
to finish your
wireless setup and check the IP camera is connected with your wireless router wirelessly. To
get into the
Web Interface
, you need to know the IP address of your IP camera.
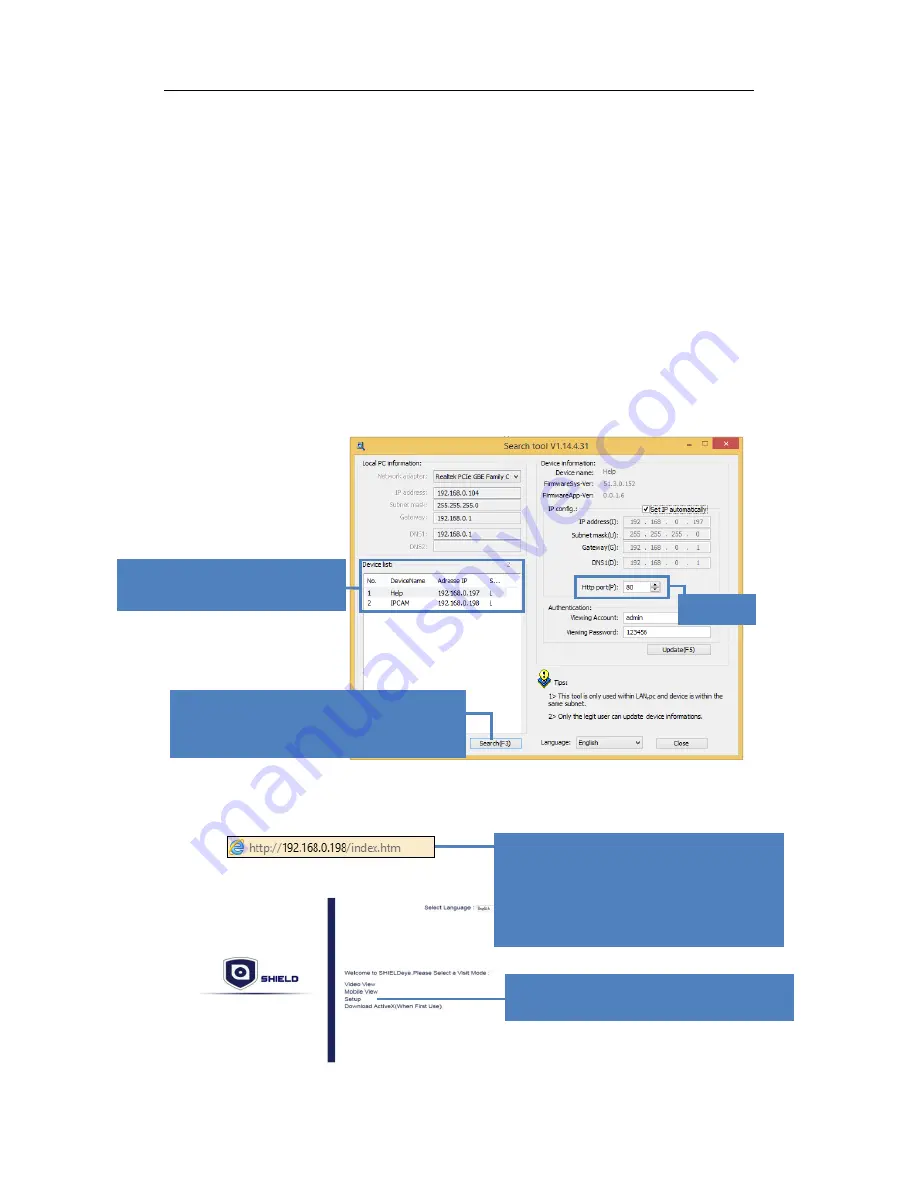
1. You can find
SearchTool.exe
in the Installation CD. Double click it and you will see the
image below. Click
Search
and you can see the IP address of your device in the device
list, and write down the IP address for further setup.
2. Open your Internet browser and enter the IP address of the camera to get into the
Web
Interface
. Choose your language and browser to enter the
Web Interface
, and find the
Setup
for
Network Configuration
.
↓
1.
You can find
SearchTool.exe
in the CD.
Double click to run, and click
Search
to
get the IP address of the IP camera.
3.
Enter the IP address you recorded in
step 2 to your browser.
Note:
If you changed the port# (80 as
default), please be sure to add at the end
in IP address you enter in IP address box.
EX: 192.168.0.198:port#
2.
Here is the IP address you
need to take note of.
4. Then enter the
Setup
for
Network
Configuration
.
Http Port
Summary of Contents for SmartCam RSCM-13701W
Page 1: ......


