background image

High Accuracy Gloss Meter Operation Manual 


22

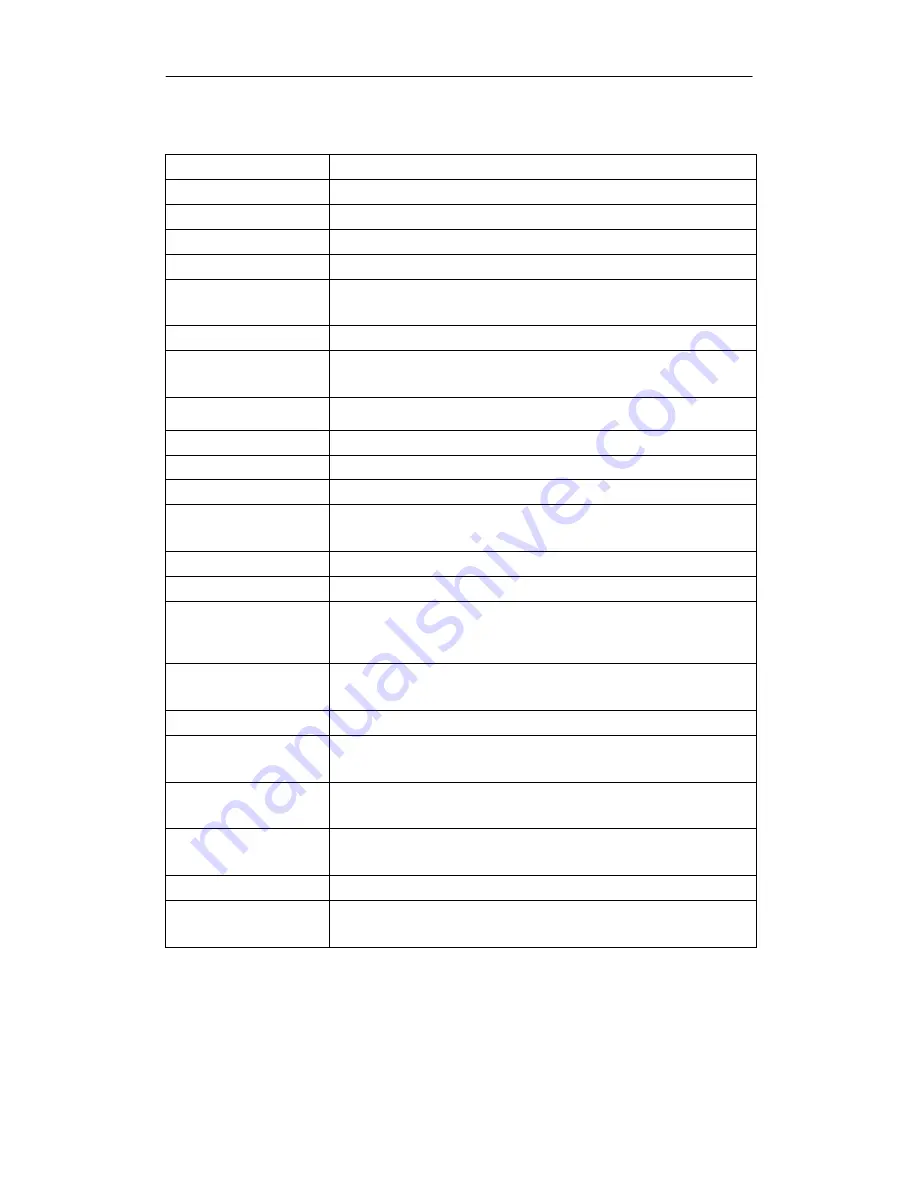
10.Technical Specifications 

Measurement Angle 

20°/60°/85°/20°60°85° 

Standard 

ISO 2813

GB/T 9754

ASTM D 523

ASTM D 2457 

Measuring Area(mm)  20°: 9X10    60°: 9X15    85°: 5X38 
Measuring Range 

20°: 0 ~ 2000GU    60°: 0 ~ 1000GU    85°: 0 ~ 160GU 

Division Value 

0.1 GU 

Accuracy 

Conform with JJG696 first class gloss meter working 
requirements 

Repeat ability 

0~100GU

±0.2GU ; 100~2000GU

±0.2%GU 

Automatic switch time 

30 seconds, 60 seconds, 90 seconds, two minutes or never 
shut down 

Calibration 

Automatically Calibration when startup/manual calibration 

Measuring Time 

0.5 seconds per angle 

Dimension 160X52X84mm 
Weight About 

300g 

(including calibration box and battery) 

Measurement mode 

Basic mode, Statistical mode, Continuous mode, Quality 
control mode 

Display 

2.3 inch black and white display 

Language 

Simplified Chinese,English,Traditional Chinese 

Storage 

35,000(Basic mode/Continuous mode:15,000 Quality control 
mode: 10,000  Statistical mode:10,000) 

Power supply 

1 pcs AA battery (Alkaline or NiMH rechargeable battery) for 
1000 times measurement; or use USB port 

Interface USB 

PC Software 

GQC6 Quality Control Software with QC report printing 
function and more extended functions 

Operation 
Temperature 

0~40

 (32~104°F) 

Storage Temperature  -20~50

 (-4~122°F) 

Humidity 

<85% relative humidity, no condensation 

Standard Accessories 

USB cable, User Manual,GQC6 software(Official website 
download or after sales offer), Calibration board 

*Note: The specifications are subject to change without notice. 


Summary of Contents for YG series

Page 1: ......

Page 2: ...2 Basic Mode 10 5 2 1 Measurement 10 5 2 2 Basic mode menu 11 5 3 Quality Control Mode 11 5 3 1 Interface Introduction 11 5 3 2 Measurement 12 5 3 3 Measurement Standard 12 5 4 Statistical Mode 13 5...

Page 3: ...ferent measurement requirements and it has standard accessory high end quality management software This manual is only suitable for our single angle and multi angles gloss meters All the operations ar...

Page 4: ...damage the device 1 External structure description Figure 1 External structure of the instrument Button name Icon Function Measurement button Switch ON OFF measurement quick return to measurement int...

Page 5: ...ing startup the instrument will be calibrated automatically If the calibration is passed as shown in Figure 2 it will enter to the measurement interface saved at the last normal shutdown Figure 2 cali...

Page 6: ...figure is the menu title is the currently selected menu item means it has sub menu items continues to page up and other menu items Click the OK button on the measurement interface to enter the menu in...

Page 7: ...andard management Turn on off the difference value check modify add and delete the standard 5 Calibration calibrate the instrument and modify the calibration parameters 6 Setting system setting 3 3 Co...

Page 8: ...return button to cancel the input operation 3 5 Editing operation The number or character displayed on the right side of some menu items is editable For example in the item of the average number of st...

Page 9: ...as to re calibrate it after changing the power supply mode for battery to USB or from USB to battery power and it also needs to re calibrate the instrument after modifying the calibration parameter If...

Page 10: ...nt is calibrating it will display Calibrating and flashes green light After the calibration is completed if the calibration is successful it is as shown in Figure 13 At this time press the measurement...

Page 11: ...tory to re calibrate the calibration tile or replace the calibration box 5 Measurement Modes The instrument has four measurement modes They are basic mode quality control mode statistical mode and con...

Page 12: ...completed and display the measurement results as shown in Figure 17 Figure 17 Basic Mode Measurement Results Figure 18 Enter the sample name If the storage function is turned on it prompts to enter th...

Page 13: ...in menu enter the main menu 2 Delete Delete the current measurement result 3 Storage Enable or disable the storage function If the storage function is turned on ON will be displayed on the right other...

Page 14: ...urement result will be displayed 5 3 3 Measurement Standard Press the OK button to enter the quality control mode menu then select the measurement standard After the measurement is ready press the OK...

Page 15: ...he Display Options in the Statistics Mode menu Figure 24 Statistics Mode Measurement Interface 5 4 2 Measurement After entering the statistical mode measurement interface press the measurement button...

Page 16: ...he measurement press the return button to cancel the measurement or press the OK button to complete the measurement 5 4 4 Set the number of measurements Enter the statistics mode menu and select the A...

Page 17: ...gure 26 Continuous Measurement Interface Ready Press the measurement button in the continuous measurement interface to start measurement If the storage is enabled it will prompt to enter a name before...

Page 18: ...ode menu When the measurement is performed a specified number of times the measurement is stopped and the average minimum and maximum values of all measured samples are displayed Figure 30 Continuous...

Page 19: ...urement results the statistical records store the statistical measurement results the basic records store the basic model and continuous model measurement results To view the corresponding record sele...

Page 20: ...Browse Edit Delete Standards In the standard management menu select Browse Standards and press the OK button to enter the browse standards interface as shown in Figure 33 Figure 33 View standards int...

Page 21: ...the measurement Use average measurements in statistical mode otherwise use basic measurements The average measurements procedure is similar to the standard measurement under the statistical mode stand...

Page 22: ...tem language 9 2 Bluetooth Only partial models For models supporting Bluetooth there is Bluetooth item in the system menu Choose Bluetooth item and press confirm button select on then press confirm bu...

Page 23: ...tion Press the OK button after selecting Reset Instrument in the system menu At this time the system will prompt to execute the operation or not If confirm to execute the operation please press the OK...

Page 24: ...ng calibration box and battery Measurement mode Basic mode Statistical mode Continuous mode Quality control mode Display 2 3 inch black and white display Language Simplified Chinese English Traditiona...

Page 25: ...at the battery is fully charged Calibration failed Check whether the calibration box is in good connection the calibration board is clean calibration board protection paper is removed Abnormal samplin...

Page 26: ......

Reviews: