Precautions
•
Before installation, be sure to turn off the power.
•
Use gloves to protect your hand from being cut by the angle
and the chassis.
•
Connect all the cables securely. When connecting or
disconnecting the cables, be careful not to apply stress to the
cables. (It may cause disconnection.)
•
Ground the human body to prevent against troubles and dust
adhesion to the LCD by static electricity. When assembling the
LCD, use a discharge blower to prevent against dust intrusion.
•
Be careful to the high voltage of the invertor PWB transformer.
•
About placing top cabinet with LCD panel side down, Please
use a clean dust free clothe to protect the touch panel and LCD
area.
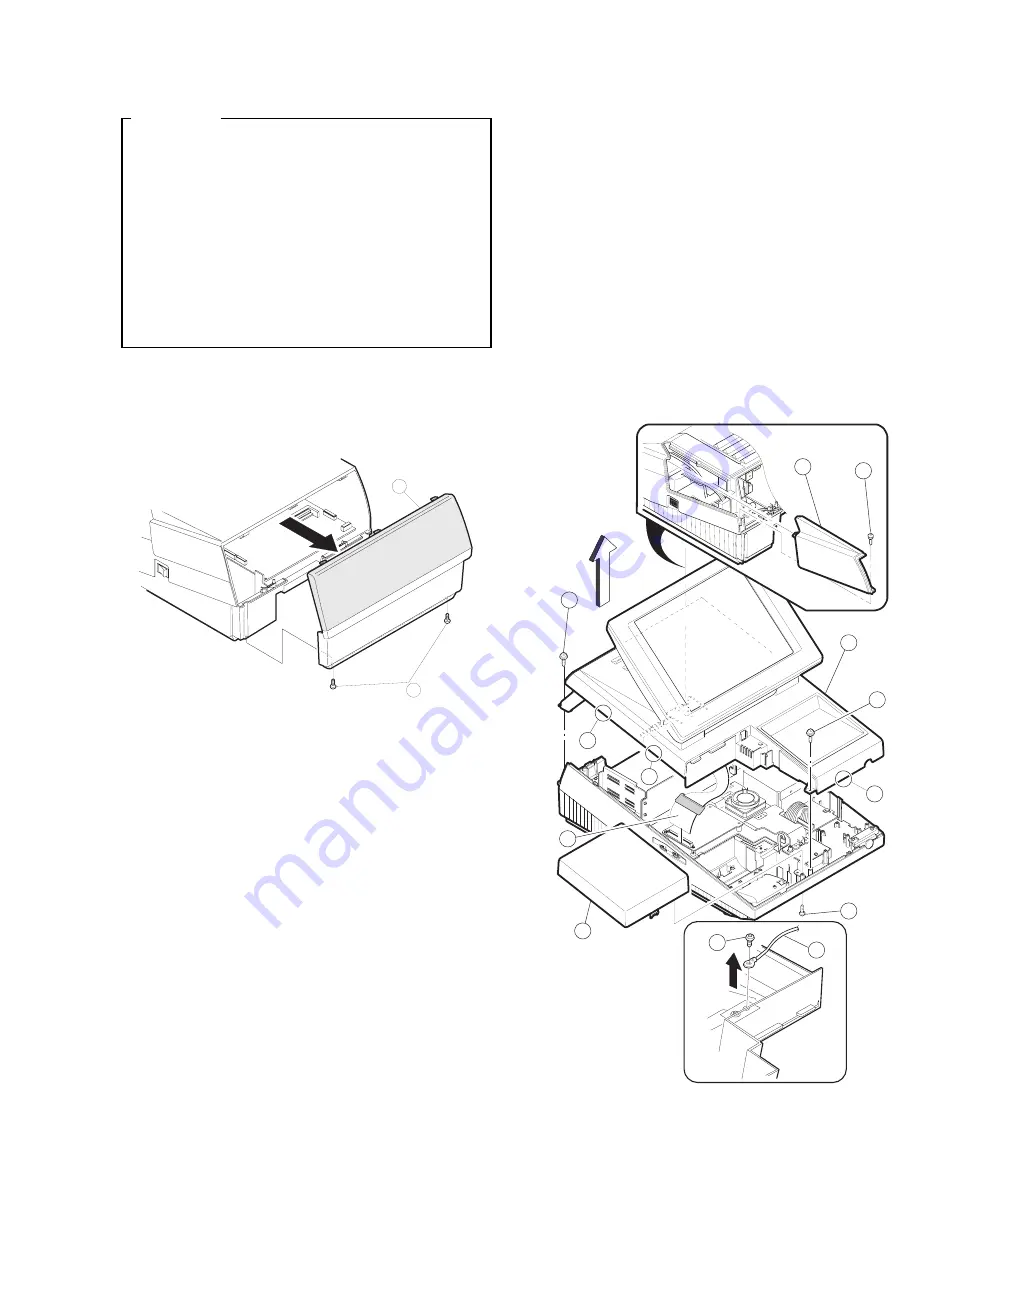
1. Removing the Rear display filter
1) Remove the two Screws
1
.
2) Remove the Rear display filter
2
.
2. Replacing the Rear display filter
Install the Rear display filter in the reverse order of removing.
3. Removing the Top cabinet
1) Remove the two Screws
1
.
2) Remove the Side cabinet
7
.
2) Remove the Screw
2
.
3) Remove the Printer cover
3
.
4) Remove the Screw
4
.
5) Remove the Top cabinet
8
.
a) Release the latches
a
,
b
and
c
in that order. Slide the
upper cabinet to the right and release the latch on the right.
b) Lift the top cabinet and put it straight in the direction of arrow
A. ( Be careful not to pull the cable between the LCD I/F PWB
of the top cabinet and the MAIN PWB of the Bottom cabinet.)
c) Pull and remove the following cables between the LCD I/F
PWB of the top cabinet and the MAIN PWB of the Bottom
cabinet.
•
LCD Cable
5
: MAIN PWB : CN11
•
Earth wire
6
.
4. Replacing the Top cabinet
Install the top cabinet in the reverse order of removing. Before install-
ing, make sure that each connector is connected securely.
1
2
A
1
7
3
5
2
6
4
1
8
9
a
b
c
– 1 –


