32
Operation
Computer Image Adjustments (INPUT 1 or 2 mode Only)
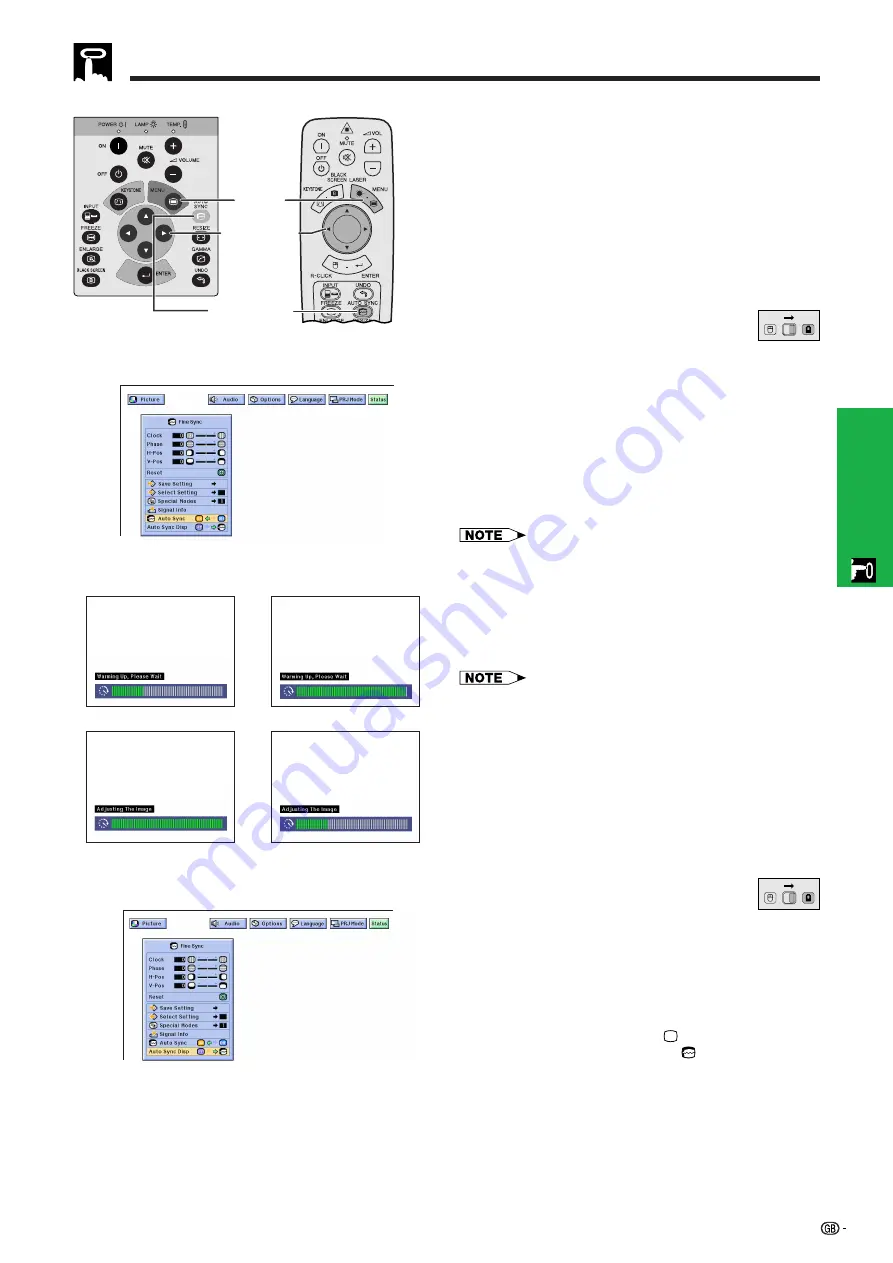
• Used to automatically adjust a computer image.
• Auto Sync adjustment can be made manually by
pressing
AUTO SYNC
, or automatically by setting
“Auto Sync” to “ON” in the projector’s GUI menu.
When “Auto Sync” is set to “ON”:
• The
adjustment is automatically made each time
the projector is turned on while connected to a com-
puter or the input selection is changed.
• The Auto Sync adjustment setting previously made is
cleared when the projector’s setting is changed.
(Slide the
MOUSE/ADJUSTMENT
switch
on the remote control to the ADJ. position.)
1
Press
MENU
.
2
Press
ß
/
©
to select “Fine Sync”.
3
Press
∂
/
ƒ
to select “Auto Sync”.
4
Press
ß
/
©
to select “ON”.
5
To exit from the GUI, press
MENU
.
• Automatic adjustments can be made by pressing
AUTO
SYNC
.
• When the optimum image cannot be achieved with Auto
Sync adjustment, use manual adjustments. (See page 29.)
During Auto Sync adjustment, the On-screen Display
changes as shown on the left.
• Auto Sync adjustment may take some time to complete,
depending on the image of the computer connected to the
projector.
Auto Sync Display Function
Normally, an image is not superimposed during Auto
Sync adjustment. You can, however, choose to
superimpose a background image during Auto Sync
adjustment.
(Slide the
MOUSE/ADJUSTMENT
switch
on the remote control to the ADJ. position.)
1
Press
MENU
.
2
Press
ß
/
©
to select “Fine Sync”.
3
Press
∂
/
ƒ
to select “Auto Sync Disp”.
4
Press
ß
/
©
to select “
” to superimpose a
background image or “
” to remove the
background image during Auto Sync adjustment.
5
To exit from the GUI, press
MENU
.
(GUI) On-screen Display
2
,
3
,
4
1
,
5
Projector
g
s
f
On-screen Display
AUTO SYNC
button
MOUSE
ADJ.
(GUI) On-screen Display
Remote control
MOUSE
ADJ.


