Camera
36
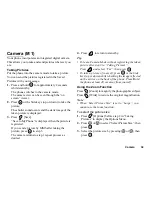
Mode indicator (p. 35)
: Mode 1
: Mode 2
Making Adjustments According to Lighting
Conditions
Adjusting the Brightness of the Picture
Adjust the brightness of the picture by pressing
or
.
Once the phone has returned to the stand-by screen the
brightness settings return to default.
Viewing the Taken Pictures
The taken pictures can be viewed in the Saved Pictures.
1.
In camera mode, press
[Options].
The Options Menu is displayed.
2.
Select “Existing Pictures”, then press
.
The Saved Pictures is displayed.
3.
Select the file name you wish to view by pressing
or
, then press
.
The selected picture is displayed.
4.
Once you have finished, press
[Back] to return
to the list.
Tip
• Your pictures are given file names which show the
time and date when the picture was taken.
Example:
The file name “13-05-02_12-34-56” is displayed for
the picture taken at 12:34:56 of 13th May 2002. The
file names of your pictures can be changed (p. 41).
Using the Timer
Taking a Picture with the Timer
1.
In camera mode, press
[Options].
The Options Menu is displayed.
2.
Press
or
to select “Delay Timer”, then press
.
3.
Press
or
to select “On”, then press
.
“
” appears on the screen and the phone returns
to camera mode.
4.
Press
to take the picture.
Delay timer begins.
10 seconds after the timer sound occurs, the camera
takes a picture, and sounds a tone.
Summary of Contents for GX10
Page 8: ...Getting Started 8 Getting Started ...
Page 132: ...Quick Reference GX10 132 ENGLISH Quick Reference GX10 ...
Page 133: ...133 Quick Reference GX10 ...
Page 135: ...135 Quick Reference GX10 ...
Page 136: ...Quick Reference GX10 136 Guida di consultazione rapida GX10 ITALIANO ...
Page 137: ...137 Quick Reference GX10 ...
Page 138: ...Quick Reference GX10 138 Referencia rápida GX10 ESPAÑOL ...
Page 139: ...139 Quick Reference GX10 ...
Page 140: ...Quick Reference GX10 140 Beknopt overzicht GX10 NEDERLANDS ...
Page 141: ...141 Quick Reference GX10 ...
Page 142: ......


