background image

DV-SL2200W

28

DV-SL1200W

Preparation for Use

Preparation for Use

H

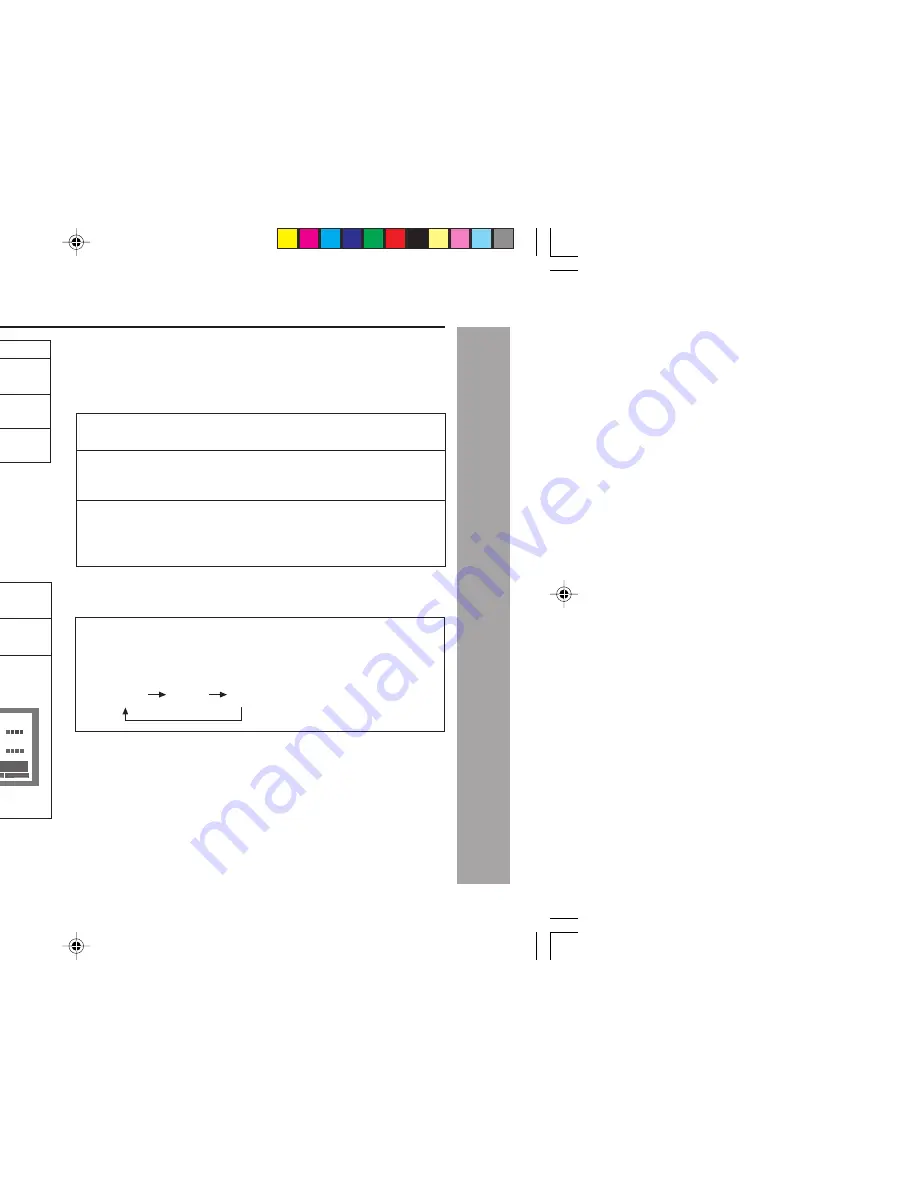
Setting/changing the Country/Area code

You can find the Country/Area code list on page 50.

1

Repeat step 1 and 2 in “Password setting” but this time
select “Country Code”.

2

Use the Direct Number buttons to enter your password,
then press ENTER button.

3

Select a Country/Area code by pressing 

2

,

3

,

5

 or 

button then press ENTER button.

There are two ways you can select the Country/Area code:

I

Use 

5

 or 

 button to change the

Country/Area code by select code
letter.

I

Select by code number; press 

3

button then use the Direct Number
buttons to enter the 4-digit
Country/Area code.

I

The new Country/Area code is set and you will return to the
“Initial Settings” menu screen.

Note:

The new Country/Area code does not take effect until the next disc is loaded
or the current disc is reloaded.

Initial Settings

Video Output

Password

Language
Display

Digital


Audio Out

Parental Lock: Change Country Code

Move

Make advanced settings

Select

Exit HOME MENU

ENTER

Return RETURN

Options

Country Code List

Code

2

US

1 1 9

* * * *

H

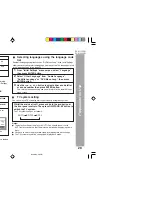
Selecting languages using the language code
list

Some of the languages options such as “DVD Menu Lang.” in the “Initial Settings”
allow you to set your preferred language from any of the 136 languages listed
in the language code list on page 50.

1

From “Initial Settings” menu screen, select “Language”
then press ENTER button.

2


Select “Other Language” from “Audio Language”,

“Subtitle Language” or “DVD Menu Lang.” then press
ENTER button.

3

Use the 

2

,

3

,

5

 or 

 button to select either a code letter

or a code number then press ENTER button.

This sets the languages using and you will return to the “Initial Settings”
menu screen.

H

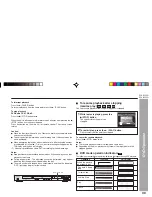
TV system setting

You can select a TV system to match your country or region’s system.

Whilst the main set is off, press and hold the 

¢

 button at

the front panel controls. Then press ON/STAND-BY button to
switch the TV system.

The TV system changes as follows:

Notes:

I  

The default setting of this player is AUTO. You should leave it set to

AUTO unless you notice that the picture is distorted when playing some
discs.

I  

You have to switch the player into stand-by mode before each change.

I  

The TV system may not be changed whilst playback mode.

AUTO

NTSC

PAL

Indicator

Setting

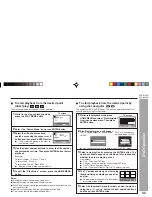
1 KID SAFE

Only DVD software intended for children can be
played back.

2G to 7 NC-17

Only DVD software intended for general use and
children can be played back.

8 ADULT

Note:

Whilst playing a disc with parental lock, the display may appear restricted
statement screens. In such case, eject the disc and return to “Initial Settings”
to change the parental level.

DVD software of any grade (adult/general/
children) can be played back.

DV-SL1200_2200W 01-28_EN

6/20/08, 4:48 PM

28

Summary of Contents for DV-SL1200W

Page 1: ...W DV SL2200W OPERATION MANUAL DV SL1200W DV SL2200W Thank you for purchasing this SHARP product To obtain the best performance from this product please read this manual carefully It will guide you in operating your SHARP product ...

Page 2: ...r e e n i g n e e s r e v e R S U r e h t o 2 4 9 1 5 4 5 t n e t a P S U r e d n u e s n e c i l r e d n u d e r u t c a f u n a M e r a t u O l a t i g i D S T D d n a S T D g n i d n e p d e u s s i s t n e t a p e d i w d l r o w d n a f o s k r a m e d a r t e r a l o b m y S d n a s o g o l S T D e h t d n a s k r a m e d a r t d e r e t s i g e r d e v r e s e R s t h g i R l l A c n I S T ...

Page 3: ...dia compact discs digital versatile discs semiconductor chips hard drives memory cards and the like An independent license for such use is required For details please visit http mp3licensing com MPEG Layer 3 audio coding technology licensed from Fraunhofer IIS and Thomson NOTE Audio visual material may consist of copyrighted works which must not be recorded without the authority of the owner of th...

Page 4: ...dly repeat play 35 To play the contents between the specified points repeatedly A B repeat 36 To select a title from the top menu of the disc 36 To select a subtitle or audio language from the disc menu 36 Page Various settings To change the subtitle language 37 To change the audio language audio output 37 To change the HDMI resolution type and color DV SL2200W only 38 To change the display on TV ...

Page 5: ...re or other type of accident causing damage SHARP will not be held responsible for any damage resulting from use of this unit with a voltage other than that which is specified H Care of DVD CD discs DVD CD discs are fairly resistant to damage however mistracking can occur due to an accumulation of dirt on the disc surface Follow the guidelines below for maximum enjoyment from your DVD CD collectio...

Page 6: ...played on the screen This means that the operations described in this manual are not possible Copyright Information I Unauthorised copying broadcast public display transmission public performance and rental regardless of whether or not such activities are for profit of disc contents are prohibited by law I This system is equipped with copy protection technology that causes substantial degradation ...

Page 7: ... wide screen TV or 4 3 size TV Recorded in 4 3 You can enjoy wide images on a wide screen TV and 4 3 images with the side edges cut on the 4 3 size TV Example 1 English 2 French Number of angles recorded on the DVD Angles can be selected with the ANGLE button Number of camera angles Example 1 Original English DTS 5 1 Surround 2 English Dolby Digital 5 1 Surround The number of audio tracks and audi...

Page 8: ...en Close Button 29 21 Disc Tray 29 22 Remote Sensor 20 H Main unit front panel DV SL2200W Reference page 1 Play and Pause Indicator 30 2 Chapter Indicator 30 3 Title Indicator 30 4 Angle Indicator 30 5 Progressive scan Indicator 30 6 Repeat Indicator 30 7 Remain Time Indicator 30 8 ON STAND BY Button 20 9 Chapter track Skip Down Button 31 39 10 Chapter track Skip Up Button 31 39 11 Stop Button 29 ...

Page 9: ...DV SL2200W 8 DV SL1200W Reference page 19 10 13 16 15 19 15 5 4 Reference page 16 10 13 15 19 15 General Information 6 20 08 4 48 PM ...

Page 10: ...Button 29 31 33 39 44 14 Chapter track Skip Up Button 31 39 15 Stop Button 29 30 35 39 16 Disc Tray Open Close Button 29 17 Audio Select Button 37 18 On Screen Display On Off Button 38 19 Top Menu Button 36 20 Cursors 21 34 35 41 42 44 45 21 Home Menu Button 21 22 Play Mode Button 42 23 Surround Button 22 24 Step Backward Fast Backward and Slow Backward Button 31 33 25 Chapter track Skip Down Butt...

Page 11: ...ction is not necessary You can enjoy high quality picture playback 2 You also need to connect the left and right audio cables to the AUDIO OUT sockets of DVD player and the Audio input sockets of the TV Component video cable not supplied l TV f the power ctions have T sockets of it to the TV picture will COMPONENT VIDEO INPUT Y PB PR DVD player TV Green Blue Red Green Blue Red put sockets System C...

Page 12: ...hannel number CHANNEL 3 or CHANNEL 4 on both TV and RF Modulator whichever is not used for regular broadcast in your area Note For more details please refer to the instruction manual of the RF Modulator A V INPUT VHF UHF AERIAL IN ANT IN 2 1 3 TO TV R AUDIO L VIDEO CHANNEL 3 4 4 TV pplied RF Modulator White L Red R To video input socket Yellow To audio input sockets SL1200W 6 20 08 4 48 PM ...

Page 13: ...ator the TO TV minal of the 4 Connect the Audio Video cable supplied between the AUDIO OUT and VIDEO OUT sockets of the DVD player and theAUDIO INPUT and VIDEO INPUT sockets of the RF Modulator 5 Turn on the TV and set the channel number CHANNEL 3 or CHANNEL 4 on all TV VCR and RF Modulator whichever is not used for regular broadcasts in your area Note For more details please refer to the instruct...

Page 14: ...sive scan capability Please consult your local audio video dealer el controls set on page 49 R AUDIO INPUT COMPONENT VIDEO INPUT L Y PB PR Green Red R White L Green Blue Red Component video cable not supplied To COMPONENT VIDEO INPUT sockets To audio input sockets TV with progressive scan capability 6 20 08 4 48 PM ...

Page 15: ...or still image or other picture containing long texts or horizontal lines off the power and disconnect both units from the wall socket until all the connections have been ck picture will be distorted because DVD video discs are copy protected ons o turn off the power and disconnect both units from the wall socket until all the connections System Connections 6 20 08 4 48 PM ...

Page 16: ...aler em and sure to the wall layback ected AUDIO INPUT R AUDIO L VIDEO AUDIO VIDEO INPUT 1 L R Video cable supplied To audio input sockets White L Red R Audio System To video input Yellow TV with Audio Video input sockets To VIDEO OUT socket Yellow 6 20 08 4 48 PM ...

Page 17: ...ur local audio video dealer 3 igital Decoder or DTS Decoder Amplifier with Dolby Digital Decoder DTS Decoder or MPEG 2 Decoder Centre speaker left er Front right speaker Subwoofer Surround right speaker d left System Connections 6 20 08 4 48 PM ...

Page 18: ... 23 Please consult your local audio video dealer System Connections audio input Amplifier with a coaxial digital input Front left speaker Front right speaker nued Additional Connection continued 6 20 08 4 48 PM ...

Page 19: ...ult your local audio video dealer ro Logic Decoder ets Amplifier with Dolby Pro Logic Decoder Centre speaker Front left speaker Front right speaker Subwoofer Surround right speaker Surround left speaker System Connections 6 20 08 4 48 PM ...

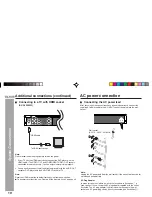
Page 20: ...he AC plug adaptor is not included in areas where the wall socket and AC power plug can be directly connected see illustration 1 H Connecting to a TV with HDMI socket DV SL2200W HDMI cable To HDMI input socket Note Please follow the below steps before turn on the power 1 If your TV has the HDMI input socket connect the DVD player with the HDMI cable The VIDEO OUT and COMPONENT VIDEO OUT sockets co...

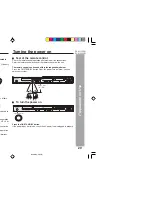
Page 21: ...be used within the range shown below Press the ON STAND BY button Does the power turn on Now you can enjoy your system 0 2 m 6 m 8 20 H To turn the power on Press the ON STAND BY button If the power does not turn on check the AC power lead is plugged in properly Turning the power on cated in e battery ds of time exposed to e operation HP 16 or sensor on h operation vibrations Preparation for Use 6...

Page 22: ...otes I During playback Initial Settings cannot be changed I Settings are stored even if the unit is set to the stand by mode I The backup function protects the stored settings for a few hours should there be a power failure or the AC power lead disconnection DVD Initial Settings Video Output Language Display Options Digital Audio Out Digital Out Dolby Digital Out DTS Out 96 kHz PCM Out MPEG Out HD...

Page 23: ...etup for surround sound and other audio adjustments Select Exit HOME MENU ENTER Play Mode A B Repeat A Start Point B End Point Off Repeat Title Repeat Chapter Repeat Repeat Off Random Random Title Random Chapter Random Off Program Create Edit Playback Start Playback Stop Program Delete Search Title Search Mode Chapter Search Time Search You can play the desired portion repeatedly by specifying it ...

Page 24: ...r Full Range RGB DV SL2200W RGB only Component Digital audio is downmix to 2 channels for stereo linear PCM output Select the digital output terminal Convert the Dolby Digital audio signal to PCM audio before being output Convert the DTS audio signal to PCM audio before being output Convert the 96kHz signal to 48kHz for digital output Convert the MPEG audio to PCM for digital output The screen mod...

Page 25: ...ay language for the set up menu or playback control screen Example To select Spanish language choose Español from the menu Press ENTER button and below screen will appear in Spanish Default password none Default level off Default Country Area code US 2119 dicates default settings Description Settings DivX R Video On Demand Your registration code is XXXX XXXX To learn more visit www divx com vod Do...

Page 26: ...ust TV screen gradation After press ENTER button press 2 or 3 button to adjust the gamma from min 3 to max 3 To adjust TV screen red green balance After press ENTER button press 2 or 3 button to adjust the hue level from green 9 to red 9 To adjust TV screen saturated colours After press ENTER button press 2 or 3 button to adjust the chroma level from min 9 to max 9 See page 32 for detail Video Adj...

Page 27: ... be set You can specify a language for conversation and narration Subtitle Language A language for subtitle can be set The subtitles are displayed in a specified language DVD Menu Lang A language for disc menus can be set Menu screens are displayed in a specified language English Chinese DISC LOADING DISQUE CHARGEMENT English French Thank you Merci English French Merci Thank you English French ACT...

Page 28: ...HOME MENU ENTER tal Lock Register Code Number Exit HOME MENU TER Return RETURN H Changing your password To change your password confirm your existing password then enter a new one 1 Repeat steps 1 and 2 in Password setting but this time select Password Change 2 Use the Direct Number buttons to enter your existing password then press ENTER button Enter a new password and press ENTER button I This r...

Page 29: ...button to select either a code letter or a code number then press ENTER button This sets the languages using and you will return to the Initial Settings menu screen H TV system setting You can select a TV system to match your country or region s system Whilst the main set is off press and hold the button at the front panel controls Then press ON STAND BY button to switch the TV system The TV syste...

Page 30: ...ace 8 cm 3 discs in the middle of the disc position 5 Press the 0 OPEN CLOSE button to close the disc tray Discs supporting auto start will start to play once you close the disc tray even if you do not press the 3 PLAY button 6 If playback does not start in step 5 press the 3 PLAY button DVD playback DVD Operation H Playback Turn on the TV and switch the input to the VIDEO 1 VIDEO 2 etc accordingl...

Page 31: ... an operation This operation cannot be performed may appear indicating that the operation is disabled by the disc I The main unit detects loaded discs automatically and then the indicators DVD light up on display for few second H To resume playback after stopping resume play You can resume playback from the point playback is stopped 1 Whilst a disc is playing press the 7 STOP button The system sto...

Page 32: ... a malfunction I When search is performed during the DVD playback pictures may not be forwarded or reversed in the search speed specified in this manual depending on the disc or the scene being played I The search does not operate on JPEG discs H To locate the beginning of a chapter track skip You can move to other tracks with simple operations When playing VCD cancel the P B C playback control se...

Page 33: ...mode 3 Select a view option by pressing the ENTER button The options available depend on the kind of disc loaded and whether the disc is playing or not View options I Title Titles from DVD disc I Chapter Chapters from the current title of DVD disc I Track Tracks from a VCD disc I Time Thumbnails from VCD disc at 10 minutes intervals 4 The TV screen shows up to six moving thumbnail images displayed...

Page 34: ...motion play You can slow down the playback speed forward and backward 1 Whilst a disc is playing press the 8 PAUSE button then follow by long press of 83 or 8 3 button Follow by press the 83 or 8 3 button repeatedly the speed changes as follows Slow motion play forward Play 3 Normal play Slow 1 16 Slow 1 8 Slow 1 4 Slow 1 2 Slow motion play backward Play 3 Normal play Slow 1 16 Slow 1 8 Slow 1 4 S...

Page 35: ...lay it To return to normal view Press the ZOOM button repeatedly until ZOOM OFF No display Notes I Images may become distorted when zoomed I Subtitles cannot be zoomed I For JPEG ZOOM function please refer page 46 for details DVD Operation H To change the angle You can change the angle of view when playing a DVD disc that contains scenes recorded from multiple angles When is displayed in the right...

Page 36: ...press the HOME MENU button Notes I Repeat play options available for DVD and DVD RW discs are Title Repeat Chapter Repeat or Repeat Off I For CD and VCD discs you can select Disc Repeat Track Repeat or Repeat off I For DivX discs you can select Title Repeat and for some DivX media files select Chapter Repeat or Repeat Off Caution After performing repeat play be sure to select Repeat Off and then p...

Page 37: ...ocedure shown here provides only general steps I The actual procedure for using the title menu depends on the disc you are using See the disc jacket for details H To select a subtitle or audio language from the disc menu You can select the desired subtitle or audio language and sound system Dolby Digital 5 1ch or DTS sound on your DVD if it has a disc menu 1 Whilst in the stop or playback mode pre...

Page 38: ...pe you select during playback are reset each time you set this unit to the stand by mode or switch the input To keep your own settings set them in the setup menu see page 24 DVD Operation H To change the subtitle language You can change the subtitle language or hide subtitles during playback Whilst a disc is playing press the SUBTITLE button repeatedly to select the desired subtitle language Notes...

Page 39: ...M Auto Exit HOME MENU 3 Chinese Audio Dolby Digital 2 0CH 5 English 1 Subtitle Angle Current Total Title 1 2 Elapsed 21 07 Remain 84 11 Total 105 18 Play DVD Video Current Total Chapter 7 34 Elapsed 0 36 Remain 0 37 Total 1 12 Tr Rate 3 9 Mbps Play DVD Video DVD Title name Barnyard 2006 DyDrip Eng aXXo avi Title Elapsed 0 20 Remain 89 20 Total 89 40 Play MOVIE DivX Play VCD VCD P B C on Current To...

Page 40: ...the P B C mode whilst in the stop mode press Direct Number buttons then press ENTER button I To return back to the P B C mode whilst in the playback mode press 7 STOP button twice then press 3 PLAY button I To interrupt playback press the 8 PAUSE button To resume playback from the same point press the 3 PLAY button I To stop playback press the 7 STOP button twice I To stop the current operation an...

Page 41: ...random play you can select a new track title chapter at random I In random play the player will select and play tracks title chapter automatically You cannot select the order of the tracks I During programme play or repeat play random function will not work I Random function will not work during P B C play Cancel the P B C mode before using this function on VCD disc with P B C I You cannot use ran...

Page 42: ...m and Repeat play Program Search Mode The following playback functions are the same as DVD or VCD operations Page Playback 29 To resume playback after stopping resume play 30 To locate the beginning of a chapter track skip 31 Fast forward Fast backward search 31 To play repeatedly repeat play 35 To play the contents between the specified points repeatedly A B repeat 36 To change the display on TV ...

Page 43: ... time I With CD you can specify the desired time only in the current track and not in another track I Time search feature is disabled on some discs5 CD CD R and CD RW Operation Play Mode Repeat Random Program A B Repeat Time Search Input Track Move Select Exit HOME MENU ENTER Setup playback functions such as Program Random and Repeat play Search Mode 0 1 Track Search 4 Use the cursor 5 2 or 3 butt...

Page 44: ...or by connecting a USB Memory Player device I Your downloaded song files are for personal use only Any other usage of the song without owner s permission is against the law H About folder playback order If MP3 WMA files are recorded in several folders a folder number will be set to each folder automatically These folder can be selected by the 5 2 or 3 button on the remote control If there is no su...

Page 45: ...ID3 are not supported on this unit I If Cannot play this format is displayed it means Copyright protected WMA file or Not supported playback file is selected I After pressing the PAUSE button to pause the playback of MP3 WMA disc press PAUSE button again to restarts a paused MP3 WMA disc CD CD R and CD RW Operation 00 00 00 00 0kbps folder 1 DivX and JPEG disc operation The following playback func...

Page 46: ...hat have only one type of format no need to do above step 3 Press the MENU button the file menu screen appears 4 Press the cursor 5 2 or 3 button to select a folder or a track and press the ENTER I Playback starts when you select a track I When the format is JPEG the next file is automatically displayed after a while Note Due to the structure of the disc information it takes longer time to read a ...

Page 47: ...epeatedly Press the button Press the button Press the button Press the button To return to normal view Press the ZOOM button again H Rotating a picture You can rotate images 1 During playback press the PAUSE button 2 Press the 5 2 3 button The image rotates as shown below 3 button 90 rotation in a clockwise direction 2 button 90 rotation in an anti clockwise direction 5 button Horizontal mirror im...

Page 48: ...may not work correctly with the USB terminal on this unit I External storage devices cannot be played back using the USB terminal on this unit I This unit only supports MPEG 1 Audio Layer 3 format Sampling Frequency is 32 44 1 48kHz I MPEG 2 Audio Layer 3 MPEG 2 5 Audio Layer 3 and MP1 MP2 format are not supported I Playlists are not supported on this unit I The display playback time may not be di...

Page 49: ...on formed inside the unit I Is the disc very dirty I Does the disc satisfy the standards I Is the unit located near excessive vibrations I Has condensation formed inside the unit I Is the disc very dirty I Is the unit located near excessive vibrations I Has condensation formed inside the unit I Is a disc other than a DVD region number on the back of the unit VCD audio CD CD R or CD RW loaded I Are...

Page 50: ...lay Notes I This operation will erase all data stored in the memory I All the player s settings are now reset to the factory default H Condensation Sudden temperature changes storage or operation in an extremely humid environment may cause condensation inside the cabinet laser pickup etc or on the transmitter on the remote control Condensation can cause the unit to malfunction If this happens leav...

Page 51: ...y 0405 de Hong Kong 0811 hk India 0914 ln Indonesia 0904 id Italy 0920 it Japan 1016 jp Korea Republic of 1118 kr Malaysia 1325 my Mexico 1324 mx Netherlands 1412 nl New Zealand 1426 nz Norway 1415 no Pakistan 1611 pk Philippines 1608 ph Portugal 1620 pt Russian Federation 1821 ru Singapore 1907 sg Spain 0519 es Sweden 1905 se Switzerland 0308 ch Taiwan 2023 tw Thailand 2008 th United Kingdom 0702...

Page 52: ...t with a soft cloth and a diluted soap solution then with a dry cloth I Do not use chemicals for cleaning petrol paint thinner etc It may damage the cabinet finish I Do not apply oil to the inside of the unit It may cause malfunctions ns properly the een DVD is not the e unit 6 16 08 4 36 PM ...

Page 53: ...00 lines S N ratio 65 dB Signal system PAL 625 50 NTSC 525 60 Frequency characteristics S N ratio Dynamic range Total harmonic distortion ratio Linear PCM DVD 4 Hz to 44 kHz 1 0 dB DVD 90 dB 1kHz Linear PCM DVD 88 dB 0 01 maximum References H USB DV SL2200W only Support file Format support Bitrate support Other MP3 WMA do not support DRM file Class Mass storage class FAT 16 or FAT 32 MP3 32 320 kb...

Page 54: ...MEMO 6 5 08 4 22 PM ...

Page 55: ...MEMO 6 5 08 4 22 PM ...

Page 56: ...08F R KI 1 J2L32101A SH 08 07 K ...

Reviews: