18
Connecting to a USB device
You can connect USB devices to this player (USB memory device, USB HDD) to
enjoy video, music, or picture files stored on the USB device. This player has 2
USB terminals, one on the front side and another on the rear side.
NOTE
• When you insert or remove a USB device, be sure to turn off the main power of this
player and the USB device (only if connecting a USB HDD). Also, be sure to set “Quick
Start” to “No” (See page 47) before inserting or removing the device. If you insert or
remove the device with the player or Quick Start on, the data may become damaged.
• Refer to “Wireless connection (wireless LAN)” on page 20 when connecting a wireless
LAN adapter.
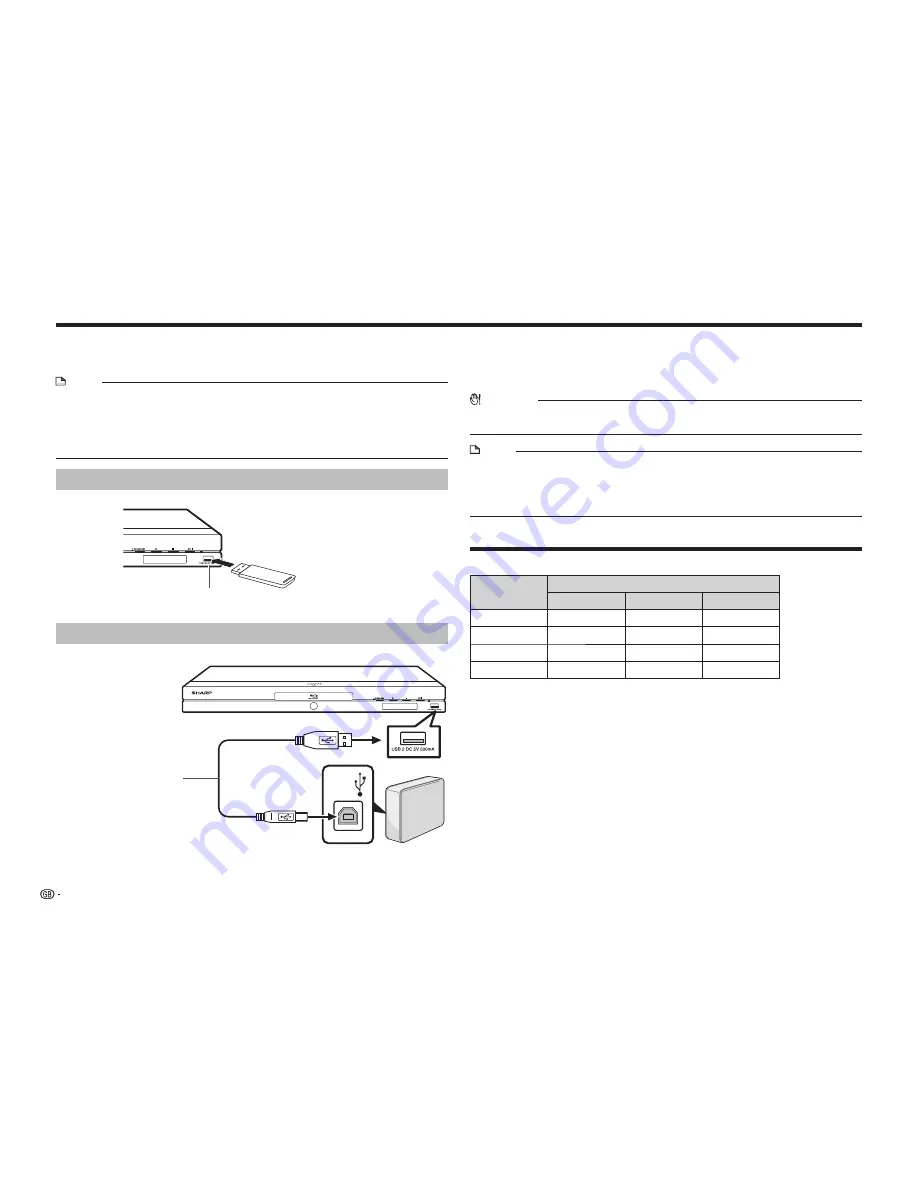
USB memory device connection
Example: Front*
USB memory
device
USB2 terminal
*
A USB terminal is also available on the rear side (USB1 terminal).
USB HDD connection
Example: Front*
USB cable
(commercially available)
USB
USB HDD
*
A USB terminal is also available on the rear side (USB1 terminal).
1
Connect a USB cable (commercially available) to the USB1 or USB2 terminal
on this player and the USB port of the USB HDD.
2
Turn on the power of the USB HDD.
3
Press
B
to turn on the power of this player.
CAUTION
• SHARP cannot guarantee breakdown or malfunction of a USB HDD, or loss of the
stored data in a USB HDD caused by connecting to other equipment.
NOTE
• Make sure to use a USB device supporting USB 2.0 High Speed (480 Mbps).
• Only self-powered type USB HDD can be used with this player. USB-powered HDD
cannot be used.
• Refer to the operation manual for the USB HDD for details regarding usage.
• This player cannot play back TV programmes recorded in a USB HDD by a recorder.
Regarding USB HDD formats
USB HDD is compatible with the following formats:
Formats
FAT32
NTFS
EXT3
Format
✔
—
—
Copy
✔
✔
✔
Delete
✔
✔
✔
Play
✔
✔
✔
E
After connecting
• To play back video, music or picture files stored in a USB device, see pages 32–33
and 35–36.
• To initialise data stored in a USB device or delete BD-LIVE data, see page 54.
Summary of Contents for BD-AMS10S
Page 2: ......


