background image

2-2

CHAPTER

2

AUDITING ACCOUNTS

If this copier has been programmed in the auditing mode, it will not function until an assigned 5-digit account number
has been entered.The auditing mode can be set for both the color and black/white (B/W) copy modes or for only the
color copy mode.

KEY OPERATOR

See page 9 of the KEY OPERATOR’S GUIDE for setting the auditing mode.

MAKING COPIES  

Auditing accounts

If the auditing mode has been set for both the color and B/W copy
modes, the initial status of the message display will be:

ENTER YOUR ACCOUNT NUMBER. -----

If the auditing mode has been set for only the color copy mode, the
following display will appear when the AUDIT key or the COLOR
COPY START (

) key is pressed.

ENTER YOUR ACCOUNT NUMBER
FOR COLOR COPYING.
                      -----

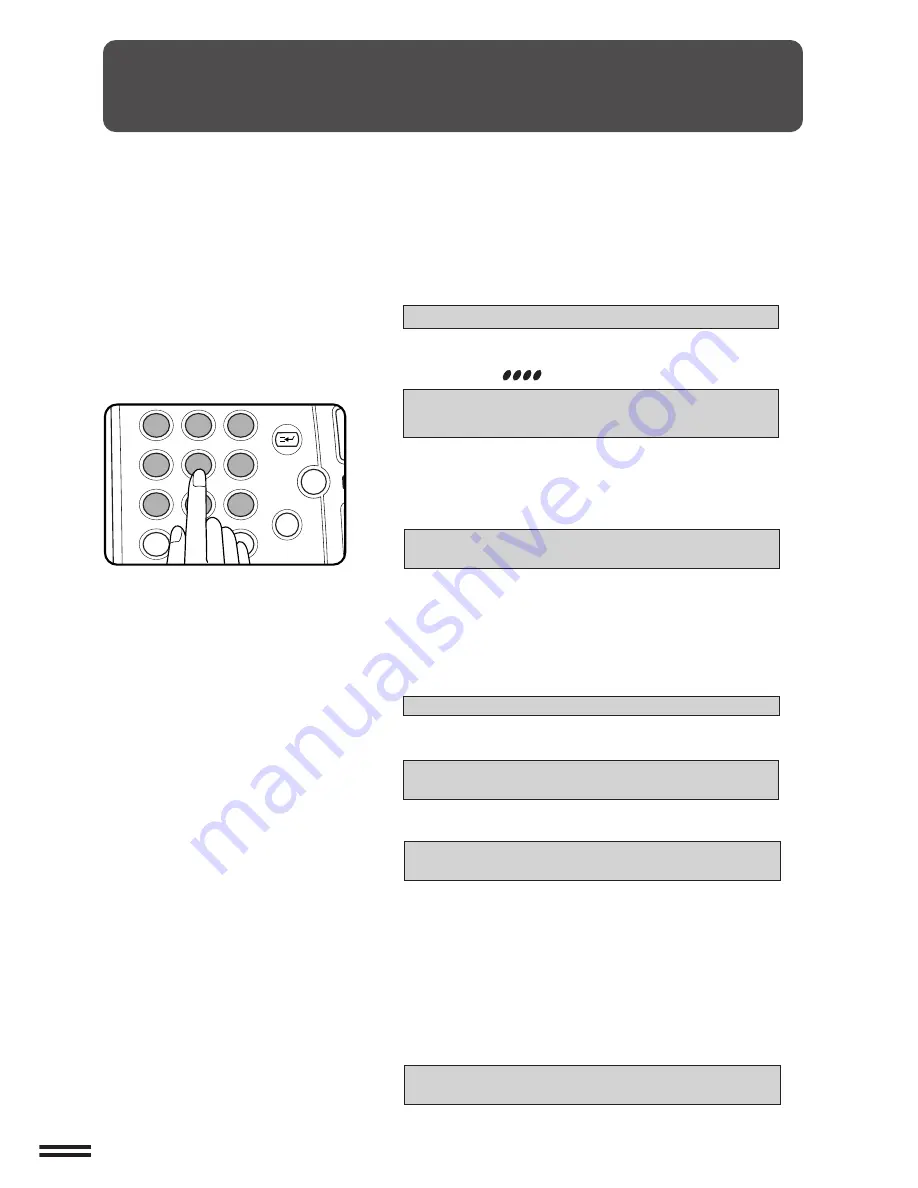
Enter your account number using the 10-key pad.

As each digit is entered, the dashes in the display will change to
asterisks.

The following message will appear after the number is entered.

ACCOUNT STATUS: COPIES MADE /REMAINING
B/W:


000,000/000,000 CL:


000,000/000,000

“COPIES REMAINING” will appear only if account limit has been
set using a key operator program.

KEY OPERATOR

See page 16 of the KEY OPERATOR’S

GUIDE for account limit settings.

The message will be displayed for several seconds, then change
to the following message.

READY TO COPY.

When a copy run is performed, the following message will
appear.

READY TO COPY.
PRESS [AUDIT] WHEN FINISHED.

In the interrupt copy mode (see page 2-20), the following
message will appear instead of the message above.

READY TO COPY. WHEN COPYING IS
FINISHED, PRESS [INTERRUPT].

NOTE:
If an unassigned number is entered, the message display will show

ENTER YOUR ACCOUNT NUMBER.-----

”, indicating that the

number was not accepted.

When the key operator program of account number security has
been set:
If an unassigned number is entered three successive times, the
copier will not accept another number for one minute, and the
following message will appear.

PLEASE SEE YOUR KEY OPERATOR FOR
ASSISTANCE.

KEY OPERATOR

See page 17 of the KEY OPERATOR’S

GUIDE for account number security.

1

2

3

4

5

6

7

8

9

0

P

C

CA

CLEAR

PROGRAM

AUDIT

INTERRUPT

CLEAR

ALL

N

Summary of Contents for AR-C160

Page 1: ...INFORMATION OPTIONAL EQUIPMENT 1 1 2 1 3 1 4 1 5 1 6 1 7 1 DIGITAL FULL COLOR COPYING MACHINE OPERATION MANUAL Page GETTING STARTED MAKING COPIES SPECIAL FUNCTIONS SUPPLIES COPIER TROUBLE GENERAL INFORMATION OPTIONAL EQUIPMENT 1 1 2 1 3 1 4 1 5 1 6 1 7 1 DIGITAL FULL COLOR COPYING MACHINE OPERATION MANUAL Page ...

Page 2: ...rical disconnection pull out the main plug The socket outlet shall be installed near the equipment and shall be easily accessible FOR YOUR RECORDS To protect against loss or theft record and retain for reference the copier s serial number located on the right hand side at the rear corner of the copier Model Number AR C160 Serial Number Date of Purchase Place of Purchase Authorized Sharp Copier Ser...

Page 3: ...p AR C160 digital full color copying machine Notethatthesamplesshownonpage1topage8arenot actualcopiesfromtheAR C160copier Thecolorsdisplayed may differ from those of actual copies Color Copying with Special Features 1 Single color copying See page 3 26 The single color function is used to produce copies using a selected single color Original Red Purple Green Orange Blue Brown COLOR COPY SAMPLES ...

Page 4: ...thisfunction is selected in the black white mode the black and white areas of the original will be reversed Original 3 Photo repeat See page 3 32 PHOTO REPEAT is used to produce multiple copies of a photo on a single sheet of copy paper Copy 8 1 2 x 11 Copy 11 x 17 Color copy Black white copy Original 3 x 5 Original 5 x 7 ...

Page 5: ... 36 This function is used to enlarge an original image to a size larger than 11 x 17 and to print portions of the image onto multiple sheets of paper Original 8 5 x 11 Copies 2 sheets of 11 x 17 Original 11 x 17 Copies 4 sheets of 11 x 17 ...

Page 6: ...RATOR CODE NUMBER A key operator code number must be r e g i s t e r e d b e fo r e a k e y o p e r a t o r program can be used The key operator must remember this number Only this registered number will allow access to the key operator programs Register ing the key o p e ra t o r c ode number 1 Press the CUSTOM SETTINGS key Photo These modes provide the best balance for copying originals which co...

Page 7: ...seordecreasetheoverallamountofasingleprimarycolor Theamountofchange dependsuponthecharacteristicsoftheparticularoriginalbeingcopied Generally lightertonedareaswillbeaffected to a greater degree than will darker toned areas Original Blue Blue Green Green Red Red ...

Page 8: ...ecessary background colors on the original image when copying This function is used to adjust the density level of background colors to be erased Original Copy 3 Sharpness See page 3 18 This function is used to sharpen or soften image outlines Original Softer Sharper ...

Page 9: ...lance function allows the density of colors to be adjusted Adjusted color samples are shown below Black adjustment Cyanadjustment Magenta adjustment Yellow adjustment Black adjustment Cyan adjustment Magenta adjustment Yellow adjustment Original ...

Page 10: ...copierallowsthelevelofbrightness intensityorcontrastofimagestobeadjusted Ifbrightnessisselected color tone can be darkened or lightened If intensity is selected the level of color saturation can be modified between vivid and dull If contrast is selected the contrast between two image areas can be adjusted higher or lower ...

Page 11: ...ON REQUIREMENTS 1 2 CAUTIONS 1 3 POWER ON AND OFF 1 5 Power save modes 1 6 INFORMATION FUNCTION 1 7 USING THE TOUCH PANEL 1 8 How to use the touch panel 1 8 Selection of function 1 8 Function setting icons 1 9 COPY MODE AND PRINT MODE 1 10 Printing documents from the computer 1 10 Using the operation panel in the print mode 1 11 How to select the paper type for the bypass tray 1 11 General operati...

Page 12: ...de is however written on pages 1 10 to 1 12 This copier can be equipped with an optional document cover or reversing automatic document feeder RADF The illustrations in this manual are mainly for the copier with an optional RADF installed The display on the touch panel varies with installation of optional equipment Theillustrationsofthetouchpanelinthismanualaremainlyforthecopierwith an optional RA...

Page 13: ...5 Power save modes 1 6 INFORMATION FUNCTION 1 7 USINGTHETOUCH PANEL 1 8 How to use the touch panel 1 8 Selection of function 1 8 Function setting icons 1 9 COPY MODE AND PRINT MODE 1 10 Printing documents from the computer 1 10 Using the operation panel in the print mode 1 11 How to select the paper type for the bypass tray 1 11 General operation steps for the scanner use 1 12 ...

Page 14: ...d subject to extreme temperature or humidity changes e g near an air conditioner or heater 4 Ensure that the area chosen for the machine location is level 5 Besuretoallowtherequiredspacearoundthemachineforservicingand proper ventilation A small amount of ozone is produced within the copier during operation The emission level is insufficient to cause any health hazard NOTE The present recommended l...

Page 15: ...el positionandtakecareifitistobemovedthatoilleakagedoes not occur 5 This copier is equipped with a forgery prevention feature If paper that closely resembles paper money is used as an original copying may not be performed properly GETTING STARTED Cautions Fusing unit Paper transport Lock Release Adjuster BATTERY DISPOSAL THIS MACHINE CONTAINS A MANGANESE DIOXIDE BATTERY WHICH MUST BE DISPOSED OF P...

Page 16: ... This means that the copier does not produce hazardous laser radiation For your safety observe the precautions below Do not remove the cabinet operation panel or any other covers The copier s exterior covers contain several safety interlock switches Do not bypass any safety interlock by inserting wedges or other items into switch slots Caution Use of controls or adjustments or performance of proce...

Page 17: ...ier is ready the message display will change to READY TO COPY and the START key indicators will light up indicating that copying is possible Ifthecopierhasbeenprogrammedintheauditingmode themessage ENTER YOUR ACCOUNT NUMBER willappearafterwarming up Once a valid account number has been entered copying will become possible GETTING STARTED Power on and off Power off Power on Be sure to extend the tr...

Page 18: ...aintained at a lower heat level thereby saving power The preheat level is however high enough to allow the copier to come to a ready condition or begin copying approximately 30 seconds after any key input is made To copy from the preheat mode make desired copier selections and press a START key using the normal copying procedure KEY OPERATOR See page 26 of the KEY OPERATOR S GUIDE for information ...

Page 19: ... the scroll key to display additional informationuntilallinformationforthatfeaturehasbeendisplayed To return to the copier feature item screen press the INDEX key To exit the INFORMATION mode press the EXIT key on the touch panel INFORMATION FUNCTION The information function provides a quick reference guide to the use of the various features and functions of this copier The information mode can be...

Page 20: ...lberegisteredasaselectedfunction Some special functions can be selected by pressing the relevant keys on the SPECIAL MODES screen page 3 4 or on the IMAGE EDIT menu page 3 26 to highlight the keys To cancel these functions press the relevant keys again to return the keys to the normal display These functions are Dual page copying Centering Transparency inserts Neg pos reverse Mirror image and 11x1...

Page 21: ...ff type functions and have no associated setting screens USING THE TOUCH PANEL GETTING STARTED Using the touch panel 5 1 8 11 1 2 2 17 11 3 8 14 1 READY TO COPY ERASE EDGE ERASE CENTER ERASE EDGE CENTER ERASE CANCEL 1 2 OK OK 0 1 inch Margin shift p 3 4 Erase p 3 6 Dual page copying p 3 8 Centering p 3 10 Transparency film with insert sheets p 3 12 Covers p 3 14 Color adjustments p 3 16 Single col...

Page 22: ...eck the paper tray s to ensure that the desired paper is loaded 3 Using the computer and any appropriate application software load the document to be printed set any desired features using the installed printer driver and give the command to print the document If necessary refer to the documentation for the computer and or the application software for help on issuing the necessary commands 4 The p...

Page 23: ... the printer operation manual To return to the printer basic screen press the return key How to select the paper type for the bypass tray Before the paper type can be selected paper must be placed in the bypass tray and the key operator program Enable Bypass Tray Type Detection must be used to enable the selection see page 33 of the KEY OPERATOR S GUIDE Proceed as follows 1 Press the PRINT key to ...

Page 24: ... to confirm that the ONLINE key is selected If not touch the ONLINE OFFLINE key to select the online status 4 Place the original on the document glass or in the document feeder optional NOTE Even if multiple originals are set in the document feeder images must be processed one at a time 5 Acquire the image using the application software For the details refer to the operation manual supplied with t...

Page 25: ...pying reduction enlargement and exposure adjustments Page AUDITING ACCOUNTS 2 2 COPYING FROMTHE DOCUMENT GLASS 2 3 USINGTHE RADF 2 6 REDUCTION ENLARGEMENT ZOOM 2 11 SPECIAL PAPERS manual feed 2 14 Two sided copying with bypass tray 2 15 EXPOSURE ADJUSTMENTS 2 16 JOB MEMORY 2 18 INTERRUPTING A COPY RUN 2 20 ...

Page 26: ...PIES MADE REMAINING B W 000 000 000 000 CL 000 000 000 000 COPIES REMAINING will appear only if account limit has been set using a key operator program KEY OPERATOR See page 16 of the KEY OPERATOR S GUIDE for account limit settings Themessagewillbedisplayedforseveralseconds thenchange to the following message READY TO COPY When a copy run is performed the following message will appear READY TO COP...

Page 27: ...tity display of the touch panel A single copy can be made with the initial setting i e when 0 is displayed Use the CLEAR C key to cancel an entry if a mistake is made MAKING COPIES Copying from the document glass Use the document glass for copying single originals bounddocuments andotheroriginalsthatcannotbeset in the optional RADF Only 1 sided to 1 sided and 1 sided to 2 sided copying can be sele...

Page 28: ...will stop and the number in the copy quantity display will be reset to 0 2 sided copies from 1 sided originals Tocopyinthe1 sidedto2 sidedcopymode anoptionalduplexmodule AR DU2N must be installed For an odd number of originals 1 Set the last page of the document onto the document glass and copy it in the 1 sided to 1 sided mode 2 Press the 2 SIDED COPY key 3 Press the EVEN NUMBER ORIGINALS key on ...

Page 29: ...key 3 Copy the originals in reverse order When making color copies in the duplex mode or making B W copies in the duplex mode onto paper 8 1 2 x 14 or larger only one copy per original can be made Even if a multiple number of copiesisset thenumberwillbechangedto1whenaSTARTkey is pressed MAKING COPIES Copying from the document glass COPYING FROM THE DOCUMENT GLASS OUTPUT 2 SIDED COPY AUTO 3 6 9 P C...

Page 30: ...RADF will handle multiple originals Before loading originals into the document feeder tray be sure to remove any staples or paper clips from them Damaged or crumpled originals or originals which have been folded may misfeed in the RADF or cause incorrectsizedetection Itisrecommendedthatthese becopiedfromthedocumentglassandthecopiesbe used as original documents When feeding originals which have clo...

Page 31: ...panel When no icon is displayed in the area indicated in the illustration the 1 sided to 1 sided copying mode is selected If the 1 sided to 1 sided mode is not selected press the 2 SIDED COPY key and then press the 1 sided to 1 sided key on the touch panel Press the OK key to return to the basic screen 3 Use the 10 key pad to enter the desired number of copies The number will be shown in the copy ...

Page 32: ...NUMBER ORIGINALS or ODD NUMBER ORIGINALS as above 4 Press the OK key 5 Enter the desired number of copies When making color copies in the duplex mode or making B W copies in the duplex mode onto paper 8 1 2 x 14 or larger only one copy per original can be made Even if a multiple number of copiesisset thenumberwillbechangedto1whenaSTARTkey is pressed 6 Press the COLOR COPY START key or BLACK COPY S...

Page 33: ...ber of copiesisset thenumberwillbechangedto1whenaSTARTkey is pressed 6 Press the COLOR COPY START key or BLACK COPY START key To perform color copying press the COLOR COPY START key To perform black white copying press the BLACK COPY START key To cancel a copy run during duplex copying press the CLEAR ALL CA key Copy 2 sided Original 2 sided OUTPUT 2 SIDED COPY AUTO READY TO COPY DOCUMENT FEEDER M...

Page 34: ...ss the CLEAR ALL CA key Copying will stop and the RADF will output any originals which have been fed Also the number in the copy quantity display will be reset to 0 MAKING COPIES Using the RADF USING THE RADF OUTPUT 2 SIDED COPY AUTO READY TO COPY DOCUMENT FEEDER MODE 2 SIDED COPY PRE COUNT EVEN NUMBER ORIGINALS ODD NUMBER ORIGINALS OK AUTO EXPOSURE PAPER SELECT 100 COPY RATIO 8 11 AUTO 1 2 Maximu...

Page 35: ... original should be placed ROTATE ORIGINAL FROM TO 4 Enter the desired number of copies 5 Press the COLOR COPY START key or BLACK COPY START key Tocanceltheautomaticreduction enlargementmode pressthe AUTO IMAGE key again REDUCTION ENLARGEMENT ZOOM Reduction and enlargement ratios can be selected either automatically with the AUTO IMAGE key or manually with the reduction enlargement or ZOOM keys on...

Page 36: ...to 100 press the 100 key on the touch panel The message IMAGE IS LARGER THAN COPY PAPER may appear indicating that the selected copy ratio is too large for the copy paper size However if you press the START key a copy will be made 5 Press the OK key MAKING COPIES Reduction Enlargement Zoom REDUCTION ENLARGEMENT ZOOM MENU 1 MENU 2 1 8 11 1 2 2 17 11 3 8 14 1 2 PAPER SELECT 100 COPY RATIO AUTO 8 14 ...

Page 37: ...led use the bypass tray and press the PAPER SELECT key to select the bypass tray 7 Enter the desired number of copies 8 Press the COLOR COPY START key or BLACK COPY START key REDUCTION ENLARGEMENT ZOOM MAKING COPIES Reduction Enlargement Zoom READY TO COPY AUTO EXPOSURE PAPER SELECT 129 COPY RATIO 1 8 11 2 11 17 3 8 14 1 2 1 2 16 28 lbs 28 35 lbs 35 75 lbs TRANSPARENCY PAPER TYPE 3 6 9 P C CA CLEA...

Page 38: ...e in the bypass tray section 16 28 lbs PLAIN PAPER 28 35 lbs HEAVY PAPER 1 35 75 lbs HEAVY PAPER 2 or TRANSPARENCY can be set 6 Set the number of copies 7 Press the COLOR COPY START key or BLACK COPY START key MAKING COPIES Special papers manual feed SPECIAL PAPERS manual feed The bypass tray is used to copy onto transparency film and other special purpose papers Up to 50 sheets of standard copy p...

Page 39: ...eorientedinthesame way on the document glass If an optional document feeder is used the originals must be fed one at a time 3 Turn the first copy over without changing its top bottom orientation and place it into the bypass tray Be sure to feed the copies one sheet at a time 4 Press the PAPER SELECT key and select the desired paper type in the bypass tray section 5 Press the COLOR COPY START key o...

Page 40: ... shown on the touchpanelandtheexposurecanonlybeadjusted manually EXPOSURE ADJUSTMENTS Exposure selections for this copier should be selected according to the type of originals being copied TEXT PRTD PHOTO TEXT TEXT PHOTO PHOTO PRINTED PHOTO or MAP Refer to the samples on page 4 to see the effects on copy images in relation to the EXPOSURE ADJUSTMENTS If the original image type is TEXT PRTD PHOTO T...

Page 41: ...R TONE ENHANCEMENT mode cannot be selected with the single color function This mode however can be used with the RGB adjust function 3 If TEXT PRTD PHOTO TEXT or TEXT PHOTO hasbeenselectedinstep2 select AUTO or MANUAL When the COPY OF COPY check box is checked the exposure is automatically set to MANUAL 4 If the manual mode has been selected use the and keys to adjust the copy density as desired E...

Page 42: ...press the EXIT key or the CLEAR ALL CA key 3 Select a program number from 1 to 9 on the touch panel The numbers which are highlighted are job registers which already contain job programs If a program number containing a registered job program is selected a message will appear to confirm the selection To replace a stored job program with a new program press the STORE key and proceed to the next ste...

Page 43: ...PROGRAM key The JOB PROGRAMS screen will appear on the touch panel Thenumberswhicharehighlightedareprogramnumberswhich contain stored programs 2 Select a stored program from 1 to 9 on the touch panel All selections stored in the program will appear on the touch panel Therecalledsettingsmaybemodifiedforaparticularjobrun but any changes made will not be stored in the job memory To store the new sett...

Page 44: ...t feeder tray 3 Select the desired available copier functions 4 Press the COLOR COPY START key or BLACK COPY START key 5 When the interrupt copy run is complete press the INTERRUPT key again to cancel the mode and remove the original s used for interrupt copying The copier will reset itself to the functions which were in use before the INTERRUPT key was first pressed 6 Replace the original s for t...

Page 45: ... MARGIN SHIFT 3 4 ERASE 3 6 DUAL PAGE COPYING 3 8 CENTERING 3 10 TRANSPARENCY FILM WITH INSERT SHEETS 3 12 COVERS 3 14 COLOR ADJUSTMENTS 3 16 RGB adjust 3 16 Sharpness 3 18 Suppress background 3 20 Color balance 3 22 Brightness intensity contrast 3 24 IMAGE EDITING FUNCTIONS 3 26 Single color 3 26 Neg pos reverse 3 28 Mirror image 3 30 Photo repeat 3 32 11 x 17 full bleed 3 34 Multi page enlargeme...

Page 46: ...to increase the ratio XY ZOOM The XY ZOOM feature allows the horizontal and vertical copy ratios to be changed independently If this feature is selected the copy ratios can be set from 25 to 400 SPECIAL FUNCTIONS XY zoom Original Copy ELECT 100 COPY RATIO 8 11 1 2 AUTO XY ZOOM 64 11 17 8 11 8 11 5 8 100 ZOOM MENU EXPOSURE PAPER S AUTO 1 2 1 2 1 2 1 2 OUTPUT COPY READY TO COPY AUTO XY ZOOM X Y 100 ...

Page 47: ...size If the AUTO PAPER SELECT mode is on the appropriate copy paper size will have been automatically selected based on the original size and selected copy ratios 9 Enter the desired number of copies 10Press the COLOR COPY START key or BLACK COPY START key To cancel this function press the CANCEL key or the XY ZOOM key again as in step 3 SPECIAL FUNCTIONS XY zoom XY ZOOM TO COPY X Y 100 ZOOM 50 10...

Page 48: ... from 0 to 1 in 1 8 increments See page 20 of the KEY OPERATOR S GUIDE NOTE The front side and reverse side are referred to as SIDE 1 and SIDE 2 respectively on the touch panel MARGIN SHIFT Expanded margin Copy Original 1 Place an original on the document glass or in the optional document feeder tray 2 Press the SPECIAL MODES key The SPECIAL MODES screen will appear Initial setting copy image shif...

Page 49: ... the touch panel 7 Make all other desired copier selections and press the COLOR COPY START key or BLACK COPY START key To cancel the MARGIN SHIFT function select the MARGIN SHIFT function again and press the CANCEL key READY TO COPY SPECIAL MODES MARGIN SHIFT ERASE IMAGE EDIT COVERS CENTERING DUAL PAGE COPY COLOR ADJUSTMENTS TRANSPARENCY INSERTS OK AUTO EXPOSURE PAPER SELECT 100 COPY RATIO 8 11 AU...

Page 50: ...e page 20 of the KEY OPERATOR S GUIDE SPECIAL FUNCTIONS Erase ERASE 1 Place an original on the document glass or in the optional document feeder tray 2 Press the SPECIAL MODES key The SPECIAL MODES screen will appear 3 Press the ERASE key on the touch panel The setting screen for ERASE will appear 2 SIDED COPY SPECIAL MODES READY TO READY TO COPY SPECIAL MODES MARGIN SHIFT ERASE IMAGE EDIT COVERS ...

Page 51: ... upper OK key on the touch panel 7 Make all other desired copier selections and press the COLOR COPY START key or BLACK COPY START key TocanceltheERASEfunction selecttheERASEfunctionagain and press the CANCEL key SPECIAL FUNCTIONS Erase ERASE ERASE EDGE ERASE CENTER ERASE EDGE CENTER ERASE CANCEL 1 OK OK 0 1 inch INFORMATION CUSTOM SETTINGS CANCEL 1 2 OK OK 0 1 inch 3 6 9 P C CA CLEAR PROGRAM INTE...

Page 52: ...SPECIAL MODES screen will appear 3 Press the DUAL PAGE COPY key on the touch panel The DUAL PAGE COPY key will be highlighted 8 1 2 x 11 sized copy paper will be automatically selected If 8 1 2 x 11 copy paper is not loaded copying can be done on another size To leave a binding margin on the copy select the MARGIN SHIFT function See page 3 4 To erase shadows caused by document binding use the EDGE...

Page 53: ... or BLACK COPY START key To cancel the DUAL PAGE COPY function press the DUAL PAGE COPY key again on the SPECIAL MODES screen DUAL PAGE COPYING DUAL PAGE COPY SPARENCY INSERTS OK INFORMATION CUSTOM SETTINGS 1 8 11 1 2 2 17 11 3 8 14 1 2 TO COPY AUTO 100 8 11 AUTO 1 2 1 2 3 4 5 6 7 8 9 0 P C CA CLEAR PROGRAM AUDIT INTERRUPT CLEAR ALL N 3 6 9 P C CA CLEAR PROGRAM INTERRUPT CLEAR ALL ...

Page 54: ... onto a larger sized copy This function will not work when non standard size originals or copy paperareused Thisfunctioncannotbeselectedwhenenlargement copying has been selected 1 Place the originals on the document glass or in the optional document feeder tray 2 Press the PAPER SELECT key on the touch panel and select the desired paper size 3 Press the SPECIAL MODES key The SPECIAL MODES screen w...

Page 55: ...the CENTERING function press the CENTERING key again on the SPECIAL MODES screen SPECIAL FUNCTIONS Centering CENTERING READY TO COPY SPECIAL MODES MARGIN SHIFT ERASE IMAGE EDIT COVERS CENTERING DUAL PAGE COPY COLOR ADJUSTMENTS TRANSPARENCY INSERTS OK AUTO EXPOSURE PAPER SELECT 100 COPY RATIO 8 11 AUTO 1 2 ERASE DUAL PAGE COPY TRANSPARENCY INSERTS OK 1 2 3 4 5 6 7 8 9 0 P C CA CLEAR PROGRAM AUDIT I...

Page 56: ...st results use SHARP recommended transparency film 1 Place the originals on the document glass or in the optional document feeder tray 2 Press the SPECIAL MODES key The SPECIAL MODES screen will appear 3 Pressthe TRANSPARENCYINSERTS keyonthetouch panel The TRANSPARENCY INSERTS key will be highlighted SPECIAL FUNCTIONS Transparency film with insert sheets 2 3 4 Originals 1 sided Originals 2 sided I...

Page 57: ...ctions and press the COLOR COPY START key or BLACK COPY START key When copying is completed remove remaining transparency film To cancel the TRANSPARENCY INSERTS function press the TRANSPARENCY INSERTS key again on the SPECIAL MODES screen SPECIAL FUNCTIONS Transparency film with insert sheets INFOR CUS SET SE DUAL PAGE COPY RANSPARENCY INSERTS OK CUSTOM SETTINGS ORIGINAL TRANSPARENCY 8 11 1 2 11 ...

Page 58: ...ing mode of the RADF will always be off 1 Place the originals in the optional document feeder tray 2 Press the 2 SIDED COPY key and select the desired duplex mode if needed Press the OK key to close the duplex selection window To copy in the 1 sided to 2 sided or 2 sided to 2 sided copy mode an optional duplex module AR DU2N must be installed 3 Press the SPECIAL MODES key The SPECIAL MODES screen ...

Page 59: ... FOR BYPASS TRAY will appear if 16 28 lbs PLAIN PAPER 28 35 lbs HEAVY PAPER 1 or 35 75 lbs HEAVY PAPER 2 has not been selected 9 Select the paper type for the bypass tray Transparency film cannot be selected as cover stock The START key indicators will light up 10Enter the desired number of copies and press the COLOR COPY START key or BLACK COPY START key To cancel the COVERS function select the C...

Page 60: ...y color can be adjusted at a time If a second primary color is adjusted the first adjustment will be cancelled Refer to the samples on page 5 to see the effect on copy images in relation to the RGB ADJUST 1 Place the original on the document glass or in the optional document feeder tray 2 Press the SPECIAL MODES key The SPECIAL MODES screen will appear 3 Press the COLOR ADJUSTMENTS key on the touc...

Page 61: ...e RGB ADJUST function select the RGB ADJUST function again and press the CANCEL key COLOR ADJUSTMENTS SPECIAL FUNCTIONS Color adjustments CONTRAST READY TO COPY SPECIAL MODES COLOR ADJUSTMENTS RGB ADJUST BRIGHTNESS INTENSITY SHARPNESS SUPPRESS BACKGROUND COLOR BALANCE OK OK OK OK READY TO COPY SPECIAL MODES RGB ADJUST ONLY ONE COLOR CAN BE ADJUSTED CANCEL G GREEN R RED B BLUE 2 1 0 1 2 OK OK 2 1 0...

Page 62: ... function is used to sharpen or soften image outlines Refer to the samples on page 6 to see the effect on copy images in relation to the SHARPNESS SPECIAL FUNCTIONS Color adjustments 2 SIDED COPY SPECIAL MODES READY TO READY TO COPY SPECIAL MODES MARGIN SHIFT ERASE IMAGE EDIT COVERS CENTERING DUAL PAGE COPY COLOR ADJUSTMENTS TRANSPARENCY INSERTS OK AUTO EXPOSURE PAPER SELECT 100 COPY RATIO 8 11 AU...

Page 63: ...K COPY START key can be pressed for copying However the SHARPNESS setting will be ignored To cancel the SHARPNESS function select the SHARPNESS function again and press the CANCEL key SPECIAL FUNCTIONS Color adjustments COLOR ADJUSTMENTS READY TO COPY SHARPNESS CANCEL SOFT SHARP OK OK READY TO COPY SHARPNESS CANCEL SOFT SHARP OK OK 1 2 3 4 5 6 7 8 9 0 P C CA CLEAR PROGRAM AUDIT INTERRUPT CLEAR ALL...

Page 64: ... This function is used to adjust the density level of background images to be erased Refer to the samples on page 6 to see the effect on copy images in relation to the SUPPRESS BACKGROUND SPECIAL FUNCTIONS Color adjustments 2 SIDED COPY SPECIAL MODES READY TO READY TO COPY SPECIAL MODES MARGIN SHIFT ERASE IMAGE EDIT COVERS CENTERING DUAL PAGE COPY COLOR ADJUSTMENTS TRANSPARENCY INSERTS OK AUTO EXP...

Page 65: ...ART key can be pressed for copying However the SUPPRESS BACKGROUND setting will be ignored To cancel the SUPPRESS BACKGROUND function select the SUPPRESS BACKGROUND function again and press the CANCEL key SPECIAL FUNCTIONS Color adjustments COLOR ADJUSTMENTS SUPPRESS BACKGROUND LIGHT AREAS OF THE ORIGINAL MAY BE SUPPRESSED AS BACKGROUND CANCEL OK OK READY TO COPY SUPPRESS BACKGROUND LIGHT AREAS OF...

Page 66: ...agenta yellow and black The density range is divided into eight levels for each color from 1 lowest density areas to 8 highest density areas The density can be adjusted one level at a time or eight levels at once Refer to the samples on page 7 to see the effect on copy images in relation to the COLOR BALANCE SPECIAL FUNCTIONS Color adjustments 2 SIDED COPY SPECIAL MODES READY TO READY TO COPY SPEC...

Page 67: ...ight levels to the initial settings The initial color balance settings are the values set with key operator program Initial Color Balance Setting For this reason the initial settings may not necessarily be 0 the middle indicator position for all levels The initial setting of each level is shown by a gray indicator See page 22 of the KEY OPERATOR S GUIDE 6 Make all other desired copier selections a...

Page 68: ...ensity is selected color saturation can be made to be more vivid or more dull If contrast is selected the contrast between image areas can be made to be higher or lower Refer to the samples on page 8 to see the effect on copy images in relation to the BRIGHTNESS INTENSITY CONTRAST adjustments SPECIAL FUNCTIONS Color adjustments 2 SIDED COPY SPECIAL MODES READY TO READY TO COPY SPECIAL MODES MARGIN...

Page 69: ...gnored TocanceltheBRIGHTNESS INTENSITY CONTRASTfunction select the BRIGHTNESS INTENSITY CONTRAST function again and press the CANCEL key SPECIAL FUNCTIONS Color adjustments COLOR ADJUSTMENTS READY TO COPY SPECIAL MODES BRIGHT INTENS CONT ONLY ONE FUNCTION IS SELECTABLE CANCEL INTENSITY BRIGHTNESS CONTRAST OK OK BRIGHT INTENS CONT ONLY ONE FUNCTION IS SELECTABLE CANCEL INTENSITY BRIGHTNESS CONTRAST...

Page 70: ...epeat Produces repeated images of a photo on a single sheet of copy paper 11 x 17 full bleed Produces 11 x 17 full image copies onto 12 x 18 copy paper Multi page enlargement Enlarges an original image to a size larger than 11 x 17 and prints divided images onto multiple sheets of copy paper for assembly into large composite copy Extra size Allows copying from an extra sized original or onto extra...

Page 71: ...ess the CANCEL key IMAGE EDITING FUNCTIONS SPECIAL FUNCTIONS Image editing functions READY TO COPY SPECIAL MODES OK OK NEG POS REVERSE 11 17 FULL BLEED MIRROR IMAGE MULTI PAGE ENLARGEMENT IMAGE EDIT SINGLE COLOR PHOTO REPEAT EXTRA SIZE READY TO COPY SPECIAL MODES OK OK SINGLE COLOR 1 RED 3 BLUE 5 ORANGE 2 GREEN CANCEL 4 PURPLE 6 BROWN READY TO COPY OK OK SINGLE COLOR 1 RED 3 BLUE 5 ORANGE 2 GREEN ...

Page 72: ...iginal on the document glass or in the optional document feeder tray 2 Press the SPECIAL MODES key The SPECIAL MODES screen will appear 3 Press the IMAGE EDIT key on the touch panel The IMAGE EDIT menu will appear 4 Press the NEG POS REVERSE key on the touch panel The NEG POS REVERSE key will be highlighted Copy Original 2 SIDED COPY SPECIAL MODES READY TO READY TO COPY SPECIAL MODES MARGIN SHIFT ...

Page 73: ...ter the desired number of copies 7 Press the COLOR COPY START key or BLACK COPY START key TocanceltheNEG POS REVERSEfunction pressthe NEG POS REVERSE key again on the IMAGE EDIT menu screen NEG POS REVERSE MIRROR IMAGE MULTI PAGE 11 17 OK OK 1 2 3 4 5 6 7 8 9 0 P C CA CLEAR PROGRAM AUDIT INTERRUPT CLEAR ALL N 3 6 9 P C CA CLEAR PROGRAM INTERRUPT CLEAR ALL ...

Page 74: ...he document glass or in the optional document feeder tray 2 Press the SPECIAL MODES key The SPECIAL MODES screen will appear 3 Press the IMAGE EDIT key on the touch panel The IMAGE EDIT menu will appear A B C D A B C D Copy Original 2 SIDED COPY SPECIAL MODES READY TO READY TO COPY SPECIAL MODES MARGIN SHIFT ERASE IMAGE EDIT COVERS CENTERING DUAL PAGE COPY COLOR ADJUSTMENTS TRANSPARENCY INSERTS OK...

Page 75: ...ies 7 Press the COLOR COPY START key or BLACK COPY START key To cancel the MIRROR IMAGE function press the MIRROR IMAGE again on the IMAGE EDIT menu screen READY TO COPY SPECIAL MODES OK OK NEG POS REVERSE 11 17 FULL BLEED MIRROR IMAGE MULTI PAGE ENLARGEMENT IMAGE EDIT SINGLE COLOR PHOTO REPEAT EXTRA SIZE NEG POS REVERSE MIRROR IMAGE MULTI PAGE 11 17 OK OK 1 2 3 4 5 6 7 8 9 0 P C CA CLEAR PROGRAM ...

Page 76: ...ill be reset to 100 when this function is selected This function will not work when non standard size paper is used 1 Place the original on the document glass The optional document feeder cannot be used with this function Place 2 x 4 and 2 x 2 originals as shown below 2 Press the SPECIAL MODES key The SPECIAL MODES screen will appear 3 Press the IMAGE EDIT key on the touch panel The IMAGE EDIT men...

Page 77: ... holds paper of the same size as the selected paper tray the tray can also be selected 8 Press the COLOR COPY START key or BLACK COPY START key To cancel the PHOTO REPEAT function select the PHOTO REPEAT function again and press the CANCEL key READY TO COPY SPECIAL MODES OK OK NEG POS REVERSE 11 17 FULL BLEED MIRROR IMAGE MULTI PAGE ENLARGEMENT IMAGE EDIT SINGLE COLOR PHOTO REPEAT EXTRA SIZE PLEAS...

Page 78: ...he copy ratio will be reset to 100 when this function is selected 1 Place the original on the document glass and close the document cover The optional document feeder cannot be used with this function 2 Press the SPECIAL MODES key The SPECIAL MODES screen will appear 3 Press the IMAGE EDIT key on the touch panel The IMAGE EDIT menu will appear 11 x 17 12 x 18 Copy Original 2 SIDED COPY SPECIAL MOD...

Page 79: ...n the bypass tray 8 Make all other desired copier selections and enter the desired number of copies 9 Press the COLOR COPY START key or BLACK COPY START key To cancel the 11 x 17 FULL BLEED function press the 11 x 17 FULL BLEED key again on the IMAGE EDIT menu screen READY TO COPY SPECIAL MODES OK OK NEG POS REVERSE 11 17 FULL BLEED MIRROR IMAGE MULTI PAGE ENLARGEMENT IMAGE EDIT SINGLE COLOR PHOTO...

Page 80: ...T will appear 4 Select the desired enlargement size Select the desired size among the sizes displayed on the touch panel 2 SIDED COPY SPECIAL MODES READY TO READY TO COPY SPECIAL MODES MARGIN SHIFT ERASE IMAGE EDIT COVERS CENTERING DUAL PAGE COPY COLOR ADJUSTMENTS TRANSPARENCY INSERTS OK AUTO EXPOSURE PAPER SELECT 100 COPY RATIO 8 11 AUTO 1 2 READY TO COPY SPECIAL MODES OK OK NEG POS REVERSE 11 17...

Page 81: ...umber of copies The paper tray will be automatically selected If the copier has another paper tray including the bypass tray that holds the paper of the same size as the selected paper tray the tray can also be selected 9 Press the COLOR COPY START key or BLACK COPY START key The original image will be divided and copied onto multiple sheets of paper Overlapped areas will be made along the leading...

Page 82: ... of the copier can be made See page 22 of the KEY OPERATOR S GUIDE 1 Place the non standard original on the document glass or the non standard copy paper into the bypass tray Either one or both can be set 2 Press the SPECIAL MODES key The SPECIAL MODES screen will appear 3 Press the IMAGE EDIT key on the touch panel The setting screen for IMAGE EDIT selections will appear 2 SIDED COPY SPECIAL MODE...

Page 83: ...e and keys Ifthe ENABLEAUTOSIZEDETECTION checkboxischecked on either tab the size detection function will be activated In this case the X Y keys and keys will be grayed out not to allow any input READY TO COPY SPECIAL MODES OK OK NEG POS REVERSE 11 17 FULL BLEED MIRROR IMAGE MULTI PAGE ENLARGEMENT IMAGE EDIT SINGLE COLOR PHOTO REPEAT EXTRA SIZE 4 5 1 2 17 inch 4 11 3 4 inch Y CANCEL EXTRA SIZE ENA...

Page 84: ...GE key on the touch panel Refer to page 2 11 for the AUTO IMAGE function 8 Enter the desired number of copies and press either of the COLOR COPY START key or BLACK COPY START key C CA CLEAR INTERRUPT CLEAR ALL 1 2 3 4 5 6 7 8 9 0 P C CL PROGRAM AUDIT INTE CLE AL I 5 1 2 17 inch CANCEL OK OK 2 4 1 11 17 14 1 4 SELECT 100 COPY RATIO AUTO IMAGE Y 4 ...

Page 85: ... 4 SUPPLIES This chapter describes the supplies for this copier such as paper and toner Page PAPER 4 2 Types and sizes of copy paper 4 2 Loading copy paper 4 2 ADDINGTONER 4 5 USEDTONER DISPOSAL 4 8 STORAGE OF SUPPLIES 4 9 ...

Page 86: ...Ordinary paper 104 lbs index stock 155 lbs For best results use only paper recommended by SHARP Loading copy paper OPEN TRAY AND ADD PAPER will be displayed when there is no copy paper in a selected paper feed station When a selected paper tray is not installed or is improperly installed PUSH PAPER TRAY INTO MACHINE UNTIL IT LATCHES will be displayed Install it or push it back firmly into place Fo...

Page 87: ...s 1 Gently lift and pull out the paper tray 2 Fan the copy paper and insert it into the tray The tray holds 500 sheets of 20 lb bond paper Do not load paper above the maximum height line 3 Push the paper tray firmly back into the copier PAPER Maximum height line ...

Page 88: ...lock levers Slidethefrontandleftguidestomatchthewidthandlengthofthe copy paper 4 Load copy paper into the tray 5 Place the paper size card in the front of the paper tray The paper size card has three faces Fold the card properly to show the selected paper size The paper size indication which showsthroughtheslotonthefrontofthecopiershouldmatchthe selected paper size 6 Push the paper tray firmly bac...

Page 89: ...formed unless the black toner supply is empty During long copy runs of multiple originals containing many images and ordarkshades TONER REPLENISHMENT IN PROGRESS may appear and the copier may stop making copies even though toner is left The copier will automatically cycle and replenish the toner to the normal level and then the START key indicator will light up Press the START key to resume copyin...

Page 90: ...onermaynotfloweasilyinto the toner hopper 4 Place the new toner cartridge with the protrusions into the notches of the relevant toner hopper as shown The left example shows the toner hopper of black toner 5 Slide the toner cartridge along the guides over the toner hopper 6 Hold the toner cartridge with one hand while pulling on the sealing tape to remove it It will take about 40 seconds for the ca...

Page 91: ... toner may be scattered when the cartridge is removed 8 Slide the empty toner cartridge back along the guides and remove it The cartridge opening will be closed as it is moved back along the guides 9 Push the toner box back into the copier 10 Close the front cover NOTE Add only one cartridge of the color toner indicated as being low or empty SUPPLIES Adding toner ...

Page 92: ...ur authorized Sharp Service Technician will collect the container for disposal 3 Install a new toner collecting container until it clicks into place 4 Close the toner collecting container cover USED TONER DISPOSAL REPLACE USED TONER CONTAINER PRESS FOR GUIDANCE will appear when the toner collecting container is full The copier will stop and will not operate until a new container has been installed...

Page 93: ...elifeofthephotoconductivedrumbyautomatically compensating for the changes in drum characteristics due to wear operator use patterns and environmental conditions The automatic adjustments are made in response to a sensor that detects the reflectance characteristics of the drum WARNING This feature requires drums containing the special reflectance area recommended Sharp genuine photoconductive drum ...

Page 94: ......

Page 95: ...IER TROUBLE This chapter describes how to remove misfed originals and paper and other common trouble remedies Page MISFEED REMOVAL 5 2 MAINTENANCE REQUIRED 5 11 TONER COLLECTING CONTAINER OFTRANSFER UNIT 5 12 TROUBLESHOOTING 5 13 ...

Page 96: ...CATED AREA PRESS FOR RECOVERY INSTRUCTIONS will appear with a display of paper misfeed locations Press the INFORMATION key for more detailed information as necessary If paper becomes accidentally torn during removal be sure to remove all pieces Be careful not to damage the photoconductive drum or the corona wires First confirm the misfeed locations For misfeeds in an optional staple sorter see pag...

Page 97: ...close the document feeder cover to cancel the misfeed display C Open the feeding roller cover and the document feeder cover and remove the original NOTE After misfed originals are removed from locations A B and or C a messagemayappearindicatingthenumberoforiginalswhichmust be returned to the document feeder tray Return the originals and press the START key to resume copying Misfeed in the bypass t...

Page 98: ...er rotating knob A in the direction of the arrow to feed the misfed paper into the copier Donotpullthemisfedpaperoutthroughthebypasstraybecause unfixed toner may soil the inside of the copier 4 Pull out the paper transport 5 Remove the misfed paper 6 Push the paper transport back securely into the copier and turn the transport lever back Roller rotating knob A ...

Page 99: ...andle and gently open the cover 2 Remove the misfed paper Be careful not to tear the misfed paper during removal 3 If the paper cannot be seen from the side pull out the paper tray which was in use and remove the misfed paper Be careful not to tear the misfed paper during removal MISFEED HAS OCCURRED CLEAR INDICATED AREA PRESS FOR RECOVERY INSTRUCTIONS ...

Page 100: ...nsport area exit area and fusing area 1 Open the front cover 2 Turn the transport lever to the left Do not pull out the paper transport in this step 3 Check to see if any paper is misfed in the exit area If any paper is misfed turn roller rotating knob B in the direction of the arrow to remove the misfed paper NOTE Be sure to turn roller rotating knob B only in the direction of the arrow If the kn...

Page 101: ... is seen turn roller rotating knob A in the direction of the arrow to feed the misfed paper into the copier 3 Gently close the upper right side cover Caution 5 Pull out the paper transport 6 Remove any misfed paper from the paper transport Ifmisfedpaperhasbeenfedintothecopierinstep4orpaperhas misfed on the transport belt gently remove misfed paper not to touch the belt Roller rotating knob A ...

Page 102: ...emove the misfed paper NOTE Be sure to turn roller rotating knob B only in the direction of the arrow If the knob is turned in the opposite direction the copier may malfunction 3 Return the fusing unit cover securely to its original position 7 Push the paper transport back securely into the copier and turn the transport lever back 8 Close the front cover Confirm that the misfeed display is cleared...

Page 103: ...ptional Equipment If any other misfeed locations are indicated be sure to remove any misfed paper from these locations before pulling out the duplex module If not a sheet of paper in another location may become torn and difficult to remove 1 Open the left side cover 2 Remove the misfed paper 3 Close the left side cover 4 Pull out the duplex module MISFEED HAS OCCURRED CLEAR INDICATED AREA PRESS FO...

Page 104: ...d removal MISFEED REMOVAL 5 Remove the misfed paper Turn roller rotating knob C in the direction of the arrow and remove the misfed paper Slide the paper guide if needed 6 Push the duplex module back into the copier Roller rotating knob C ...

Page 105: ...D Whenthemessage READY TO COPY MAINTENANCE REQUIRED CODE appearsinthemessagedisplay servicebyanauthorized Sharp Service Technician will be required soon Contact your Service Center as soon as possible COPIER TROUBLE Maintenance required ...

Page 106: ... Toner collecting container of transfer unit TONER COLLECTING CONTAINER OF TRANSFER UNIT Whenthemessage TONER COLLECTING CONTAINER OF TRANSFER UNIT IS FULL CALL FOR SERVICE appears in the message display contact your Service Center ...

Page 107: ...nsity properly adjusted Istheoriginalplacedfacedownon the document glass or face up in the optional RADF Paper too heavy Paper damp Paper size indicator properly set Plug the copier into a grounded outlet Turn the power switch on See page 2 16 Place the original face down on the documentglassor faceupintheRADF Use copy paper within the specified range See page 4 2 Replace with dry copy paper Be su...

Page 108: ...sbuiltintothiscopier Shouldthe copier malfunction the self diagnostic function will locate the problem and stop the copier to prevent damage An alphanumeric code will appear in the message display Example Should the copier stop completely and the message CALL FOR SERVICE CODE appear in the message display contact your authorized Sharp Service Center KEY OPERATOR See page 35 of the KEY OERATOR S GU...

Page 109: ...is chapter describes general information for using this copier Page PART NAMES AND FUNCTIONS 6 2 Exterior 6 2 Interior 6 3 Operation panel 6 4 Touch panel Basic screen 6 5 USER MAINTENANCE 6 6 TOUCH PANEL CONTRAST ADJUSTMENT 6 7 SPECIFICATIONS 6 8 ...

Page 110: ... either a duplex module or a 500 sheet paper drawer When neither is installed the opening is covered The duplex module provides duplex copying capability Paper trays Each tray holds 500 sheets of 20 lb bond paper Front cover Open to remove misfeeds and to service the copier Right side covers Open to remove misfeeds in the paper feed area Document glass All originals which cannot be copied from the...

Page 111: ...ginals RADF exit area RADF is optional Finished originals are output here RADF exit roller cover RADF is optional Open to remove misfed originals Toner box Contains four toner hoppers Each toner hopper contains relevant color toner or black toner Fusing unit The fusing unit is hot Exercise care in this area Roller rotating knobs Turn to remove misfed paper Transport lever Turn to pull out the pape...

Page 112: ... quantity display or press during a copy run to terminate copying The copier will stop after copies in progress are finished COLOR COPY START key and indicator Color copying is possible when the indicator is on Press to start color copying BLACK COPY START key and indicator Black white copying is possible when the indicator is on Press to start black white copying SPECIAL MODES key p 3 1 Press to ...

Page 113: ...SURE key p 2 16 Press to select the exposure mode AUTO or MANUAL and TEXT PRTD PHOTO TEXT PHOTO TEXT PHOTO PRINTED PHOTO or MAP The COPY OF COPY and COLOR TONE ENHANCEMENT modes can also be selected with this key PAPER SELECT display Displays the selected paper size When AUTO is displayed paper size matching the original and copy ratio will be automatically selected PAPER SELECT key Press to selec...

Page 114: ...rtyareasfrombeing copied onto the copies Document glass and document cover Wipe the document glass the optional document cover or the transport belt of the optional RADF with a soft clean cloth If necessary dampen the cloth with water Do not use thinner benzene or similar volatile cleaning agents GENERAL INFORMATION User maintenance ...

Page 115: ...STOM SETTINGS key 2 Press the DISPLAY CONTRAST key on the touch panel 3 Press the LIGHTER or DARKER key to adjust the contrast 4 Press the OK key GENERAL INFORMATION Touch panel contrast adjustment 1 4 7 AUDIT CUSTOM SETTINGS KEY OPERATOR PROGRAMS ETTINGS EXI DISPLAY CONTRAST TTINGS ONTRAST LIGHTER DARKER R DARKER OK ...

Page 116: ... sec Black White 19 5 sec From the first tray In the default setting Warm up time Approx 330 sec at 68 F Copy ratio Variable 25 to 400 in 1 increments total 376 steps can be set in the horizontal and vertical directions independently Fixed presets 25 50 64 77 95 100 121 129 141 200 400 Exposure system Moving optical source stationary platen with automatic exposure function Copy paper feed Three pa...

Page 117: ...o 50 sheets for 5 1 2 x 8 1 2 and 8 1 2 x 11 originals provided the total aggregate thickness does not exceed 1 4 or 6 5 mm 14 to 20 lbs or 3 16 or 5 mm 21 to 34 lbs Up to 30 sheets for 8 1 2 x 14 and 11 x 17 originals Copier dimensions 29 17 32 W x 27 3 8 D x 41 47 64 H with optional document 750 mm W x 695 mm D x 1060 mm H cover Opperating conditions Temperature 59 F to 95 F 15 C to 35 C Humidit...

Page 118: ...Sound pressure Bystander positions 50dB A 48dB A 24dB A level LpA Operator position 50dB A 49dB A 24dB A Emission Concentration measurement according to RAL UZ62 Ozone 0 02 mg m3 or less Dust 0 075 mg m3 or less Styrene 0 07 mg m3 or less Specifications are subject to change for improvement without notice SPECIFICATIONS GENERAL INFORMATION Specifications ...

Page 119: ...aple sorter 7 4 Sorter capacity 7 5 Staple sort 7 6 Manual stapling 7 8 Staple cartridge replacement 7 9 Staple jam removal 7 11 Misfeed removal 7 13 Specifications 7 14 LARGE CAPACITYTRAY AR LC2N 7 15 Part names 7 15 Specifications 7 15 Loading copy paper 7 16 Misfeed removal 7 17 FINISHER AR FN4 7 19 Part names 7 19 Specifications 7 19 Offset stack 7 20 Staple print 7 21 Staple cartridge replace...

Page 120: ...atic document feeder AR RF1 Duplex module AR DU2N 20 bin staple sorter AR SS2 NOTE The specifications of the 500 sheet paper drawer AR CS2N are the same as those of the paper trays in the copier See page 4 2 Large capacity tray AR LC2N 500 sheet paper drawer AR CS2N Finisher AR FN4 Print engine power supply unit AR PX4 Fiery print controller AR PE2 The operation manuals for the printer controller ...

Page 121: ...r of copies varies with the selected mode The number of copies will be automatically reset to the maximum number allowable for the selected mode when copying begins if this maximum is exceeded KEY OPERATOR In the default setting if the number of copies exceeds the bin capacity in the SORT or the STAPLE SORT mode the copying will be automatically stopped To cancel this setting see page 24 of the KE...

Page 122: ...ith an optional RADF sorted copies will be automatically stapled GROUP Press the OUTPUT key and select the GROUP mode In the GROUP mode all copies of the same original will be deposited in the same bin Using the staple sorter Press the OUTPUT key and select the desired mode To cancel the mode press the OUTPUT key and select NON SORT on the touch panel GROUP SORT 20 BIN STAPLE SORTER AR SS2 OPTIONA...

Page 123: ...in the SORT STAPLE SORT or GROUP mode after copying starts When making single sided copies from two sided originals the maximum number of originals that can be copied is half the number shown in the above table Do not use special paper in the SORT STAPLE SORT or GROUP mode 20 BIN STAPLE SORTER AR SS2 The limits for the number of originals which can be used and the number of copies that can be set ...

Page 124: ...per the copies will not be stapled 2 Press the OUTPUT key and select the STAPLE SORT mode Make sure that there is no paper in any sort bin before selecting the STAPLE SORT mode 3 Set the number of copies Up to 20 sets can be made 4 Press the COLOR COPY START key or BLACK COPY START key 5 When all copies are made and sorted press the manual staple key Each set of copies will be stapled Sets of copi...

Page 125: ... that there is no paper in any sort bin before selecting the STAPLE SORT mode 3 Set the number of copies Up to 20 sets can be made 4 Press the COLOR COPY START key or BLACK COPY START key When copying and sorting are completed each set of copies will be automatically stapled Sets of copies containing copies of different width will not be stapled OPTIONAL EQUIPMENT 20 bin staple sorter AR SS2 Stapl...

Page 126: ... making sure the edges are flush with the inner right corner as shown in the figure Make sure that there is no paper in the other sort bins If there is the manual staple key will not light up Upto30sheetsofpapercanbestapledtogether Exceedingthis maximum may result in damage to the stapler 3 Press the manual staple key when it lights up The set of copies will be stapled OPTIONAL EQUIPMENT 20 bin st...

Page 127: ...o the box until it clicks in place Insert the new cartridge by aligning the arrows on the cartridge with those on the box Check that the cartridge locks in place by pulling it slightly The cartridge holds 5 000 staples NOTE Be sure not to remove the rear paper and tape before inserting the cartridge Staple cartridge replacement When the staple cartridge becomes empty the message ADD STAPLES will a...

Page 128: ...se the stapler cover 8 Placeasheetofpaperintothetopbin Pressthemanual staple key on the staple sorter when it lights up Check to see whether the sheet is stapled If it is not stapled press the manual staple key again If the stapler does not operate properly even after replacement a staple may be jammed in it See next page Staples for the staple sorter are available from your Sharp dealer OPTIONAL ...

Page 129: ...ox Then pull out the box 3 Lower the lever at the end of the staple box and remove the jammed staples 4 Return the lever to its original position Staple jam removal If staples become jammed in the stapler the message CHECK STAPLER POSITION OR STAPLE JAM will appear Remove the jammed staples in the manner described below OPTIONAL EQUIPMENT 20 bin staple sorter AR SS2 ...

Page 130: ...to the stapler unit until it clicks in place 6 Close the stapler cover 7 Following the stapling procedure on page 7 8 staple a copy to check that the stapler works properly If it does not repeat this procedure until it does OPTIONAL EQUIPMENT 20 bin staple sorter AR SS2 ...

Page 131: ...sorter release button and slide the sorter carefully along the guides away from the copier 2 Remove the misfed paper from the sorter or from the exit area of the copier 3 Slide the sorter back toward the copier and latch it into place Confirm that the misfeed display is cleared If the message indicating a misfeed is still displayed check the inside of the copier and remove any remaining misfed pap...

Page 132: ...Bin and Other Bins Mode NON SORT SORT GROUP STAPLE SORT Paper Weight 13 28 lbs 28 75 lbs 17 28 lbs 17 28 lbs 17 28 lbs 8 1 2 x 13 60 10 25 25 25 8 1 2 x 14 11 x 17 12 x 18 60 10 8 1 2 x 11 100 10 50 30 30 8 1 2 x 11R 5 1 2 x 8 1 2 100 10 50 30 7 1 4 x 100 10 10 1 2 R In the COVERS mode 2 sheets of 75 lb paper can be fed for each set from by pass If the stapler capacity limits are exceeded stapling...

Page 133: ...13 W x 21 17 64 D x 23 7 16 H 330 mm W x 540 mm D x 595 mm H Specifications are subject to change for improvement without notice LARGE CAPACITYTRAY AR LC2N The large capacity tray provides the added convenience of having 3 000 additional sheets of 8 1 2 x 11 paper available PART NAMES OPTIONAL EQUIPMENT Large capacity tray AR LC2N Paper tray control button ...

Page 134: ...copy paper 4 Load the paper onto the feed table Be sure to load paper appropriate for the large capacity tray See page 7 15 Do not exceed the maximum height line 5 Gently push the large capacity tray back into place The paper tray control button lamp will blink as the feed table returns to the feed position and will light up steadily when it is in position to feed The large capacity tray will auto...

Page 135: ...om the copier until it stops 2 Remove any misfed paper from the copier and the large capacity tray Be sure not to tear the misfed paper during removal Open and close the upper right side cover of the copier after removing the misfed paper from the copier If the misfed paper cannot be removed easily open the upper right side cover to remove the paper Misfeed removal OPTIONAL EQUIPMENT Large capacit...

Page 136: ...und in step 2 pull the tray out Whenpullingthelargecapacitytrayout besuretopullitoutafter the paper tray control button lamp goes out 5 Remove the misfed paper 6 Gently push the tray back into place Confirm that the misfeed display is cleared OPTIONAL EQUIPMENT Large capacity tray AR LC2N LARGE CAPACITY TRAY AR LC2N ...

Page 137: ...ffset 1 000 sheets 5 1 2 x 8 1 2 5 1 2 x 8 1 2 R 8 1 2 x 11 For printer 8 1 2 x 11 R 7 1 4 x 10 1 2 R use 700 sheets 8 1 2 x 13 8 1 2 x 14 500 sheets 11 x 17 12 x 18 Offset 1 000 sheets 5 1 2 x 8 1 2 8 1 2 x 11 8 1 2 x 11 R 700 sheets 8 1 2 x 13 8 1 2 x 14 500 sheets 11 x 17 Heavy paper Face up Non offset 10 sheets 8 1 2 x 11 8 1 2 x 11 R 11 x 17 Transparency film Paper weight Face up 16 75 lbs Fa...

Page 138: ... off To enable the offset stack function press the OUTPUT key and then touch the OFFSET icon on the touch panel To disable the OFFSET function press the OUTPUT key and then touch the NON OFFSET icon When the offset function is selected the output tray will move side to side each time a set is output so that each set is offset by approximately 0 8 inches 20 mm from the previous set NOTE Some type o...

Page 139: ...r 2 Check the paper tray s to ensure that the desired paper is loaded Themaximumnumberofsheetsforstaplingis20forpaperinthe size of 5 1 2 x 8 1 2 8 1 2 x 11 8 1 2 x 11 R 8 1 2 x 13 or 8 1 2 x 14 paper and 15 for 11 x 17 paper If the maximum is exceeded the sheets will not be stapled Ensure that no paper remains in the output tray Stapling will not be done if paper remains at the start of the print ...

Page 140: ...thestapleboxwithyourthumbandindexfinger andplace the heel of your hand against the finisher frame as shown with arrow 1 in the illustration Remove the staple box in the direction of the arrow 2 by squeezing with your fingers and rotating against the heel of your hand 3 Remove the empty staple cartridge from inside the staple box 4 Insert the new staple cartridge into the box until it clicks in pla...

Page 141: ...icks in place 7 Push the finisher toward the copier and latch it in place If the stapler does not work properly after cartridge installation it may have a jammed staple in it See next page Staples for the finisher are available from your Sharp dealer CAUTION Use caution while latching the finisher into place To prevent pinching your fingers do not place your hand or fingers on the release lever wh...

Page 142: ... out the staple box Topreventbumpingorscrapingyourhandduringremovalofthe staple box proceed as shown in the illustration and as follows Graspthestapleboxwithyourthumbandindexfinger andplace the heel of your hand against the finisher frame as shown with arrow 1 in the illustration Remove the staple box in the direction of arrow 2 by squeezing with your fingers and rotating against the heel of your ...

Page 143: ...o the stapler unit until it clicks in place 6 Push the finisher toward the copier and latch it in place CAUTION Use caution while latching the finisher into place To prevent pinching your fingers do not place your hand or fingers on the release lever while moving the finisher toward the copier ...

Page 144: ...ller rotating knob in the direction of arrow The misfed paper will be delivered to the offset tray Ifthepaperisnotdeliveredtotheoffsettray openthepaperguide as shown and remove the paper MISFEED HAS OCCURRED CLEAR INDICATED AREA PRESS FOR RECOVERY INSTRUCTIONS The copier will stop when a misfeed occurs The message MISFEED HAS OCCURRED CLEAR INDICATED AREA PRESS FOR RECOVERY INSTRUCTIONS will appea...

Page 145: ...the direction of arrow to remove the misfed paper 3 Push the finisher toward the copier and latch it in place Confirm that the misfeed display is cleared If the message indicating a misfeed is still displayed check the inside of the copier and remove any remaining misfed paper CAUTION Use caution while latching the finisher into place To prevent pinching your fingers do not place your hand or fing...

Page 146: ......

Page 147: ...d its own warranty to you on terms that are no less favorable than those given to the dealer by Sharp You should be aware however that Sharp does not itself extend any warranties either express or implied directly to you the end user and no one is authorized to make any representations or warranties on behalf of Sharp Specifically SHARP DOES NOT EXTEND TO YOU THE END USER ANY EXPRESS WARRANTY OR A...

Page 148: ...AR C160 PRINTED IN JAPAN 2001E KS1 TINSE2098FCZZ SHARP ELECTRONICS CORPORATION Sharp Plaza Mahwah New Jersey 07430 2135 SHARP CORPORATION ...

Reviews: