3-21
CHAPTER
3
4
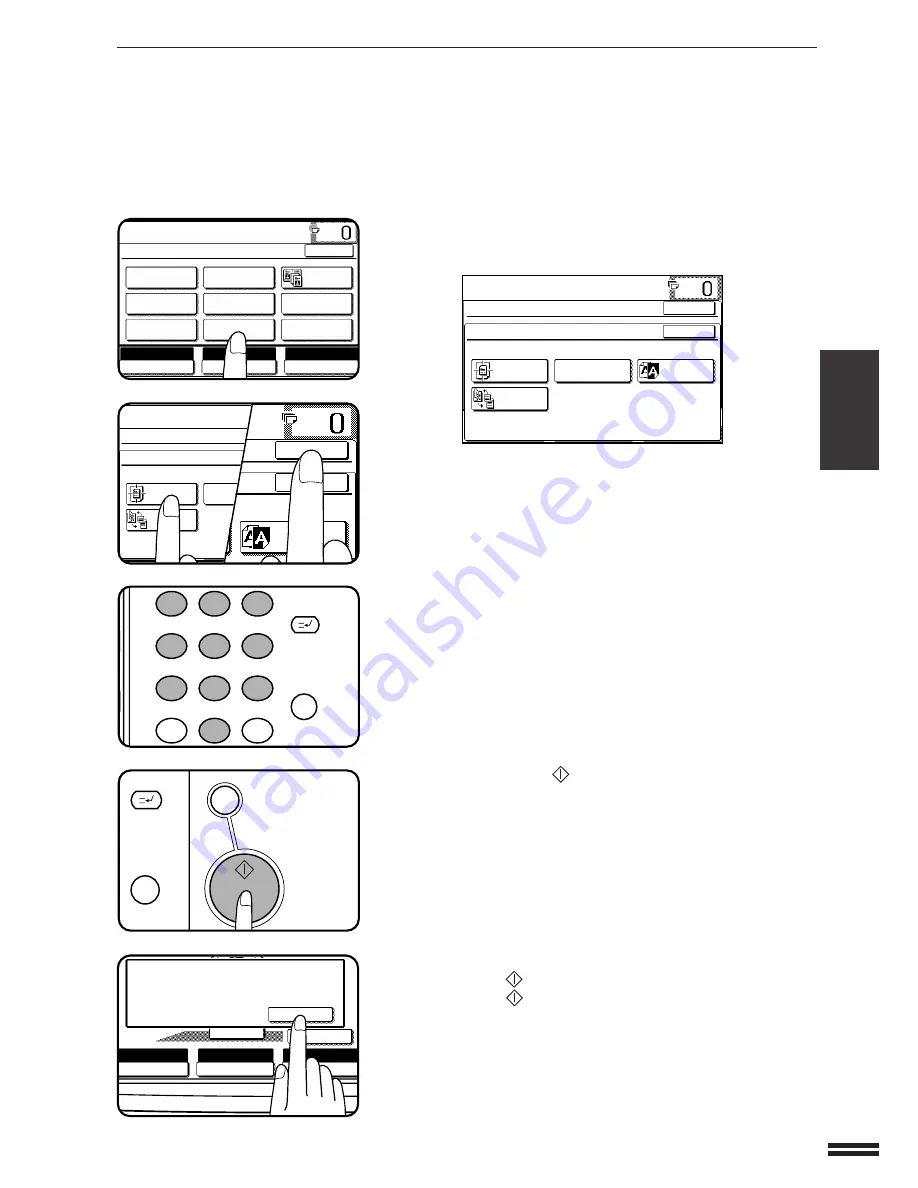
Press the “IMAGE EDIT” key on the touch panel.
●
The IMAGE EDIT menu will appear.
5
Press the “CENTRING” key.
●
The “CENTRING” key will be highlighted.
6
Press the upper “OK” key.
7
Make all other desired copier selections and enter the
desired number of copies.
8
Press the START (
) key.
●
If the document feeder is used, scanning of originals and copying
will start.
●
If the document glass is used in the SORT mode, proceed to the
next step.
9
Replace the finished original with the next original after
the START (
) key indicator lights up, and then press
the START (
) key. Repeat this step until all originals
have been scanned. Then, press the “READ-END” key
on the touch panel.
●
Copying will start at this time.
●
Up to 120 sheets of A4 (8-1/2" x 11") originals or up to 60 sheets
of originals larger than A4 (8-1/2" x 11") can be scanned.
●
To cancel the CENTRING function, press the “CENTRING” key
again on the IMAGE EDIT menu screen.
SPECIAL FUNCTIONS
Image editing functions
1
2
3
4
5
6
7
8
9
0
C
P
CLEAR
PROGRAM
AUDIT CLEAR
INTERRUPT
C
CLEAR
INTERRUPT
CA
CLEAR ALL
START
IMAGE EDITING FUNCTIONS
READY TO COPY.
SPECIAL MODES
IMAGE EDIT
CENTRING
B/W
REVERSE
REPEAT COPY
OK
OK
BINDING
CHANGE
READY TO COPY.
SPECIAL MODES
IMAGE EDIT
CENTRING
REPEAT CO
BINDING
CHANGE
OK
OK
B/W
REVERSE
READY TO COPY.
SPECIAL MODES
MARGIN SHIFT
MULTI SHOT
PAMPHLET COPY
ERASE
COVERS
IMAGE EDIT
TEXT STAMP
TRANSPARENCY
INSERTS
DUAL PAGE
COPY
OK
AUTO
EXPOSURE
PAPER SELECT
100%
COPY RATIO
A3
AUTO
EXPOSURE
PAPER SELECT
100%
COPY RATIO
AUTO IMAGE
READ-END
PLACE NEXT ORIGINAL. PRESS [START].
WHEN FINISHED, PRESS [READ-END].
A3


