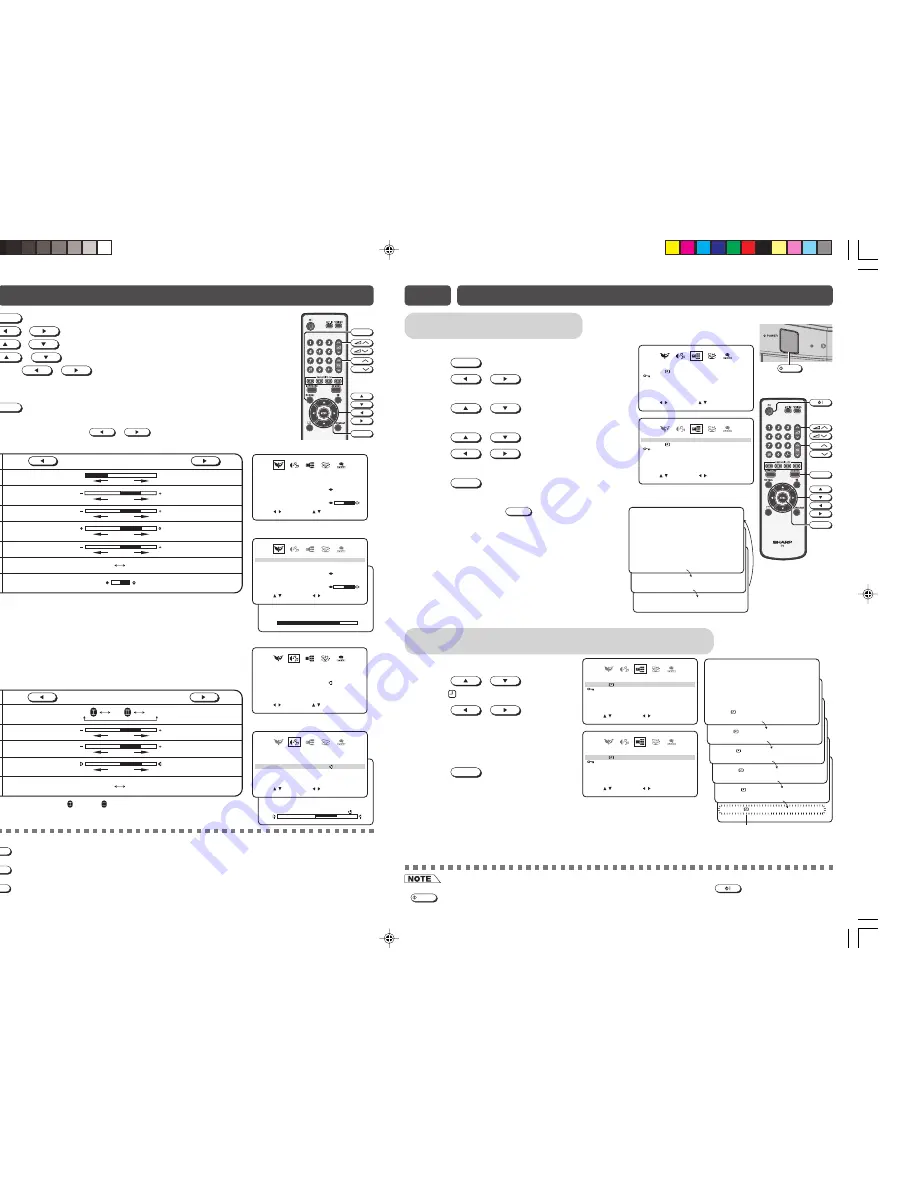
AV Mode
Changes picture and sound settings.
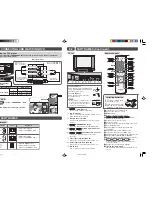
MENU screen
!
Press
MENU
to call MENU screen.
@
Press
/
to select FEATURES
icon.
#
Press
/
to enter FEATURES
menu.
$
Press
/
to select “AV MODE”.
%
Press
/
to select “MOVIE”,
“MUSIC” or “NEWS”.
^
Press
MENU
until normal screen appears.
Remote Control
Each time you press the
AV MODE
, the mode switches
between MOVIE, MUSIC and NEWS.
MOVIE: Movie mode
MUSIC: Music mode
NEWS: News mode
CH
CH
AV MODE
MENU
[ TV Set (Bottom) ]
POWER
• The Off timer is cancelled if the power is turned off or set to the Standby mode using
on the remote control or
POWER
on the TV set, or if the power is otherwise interrupted.
E10
FEATURES
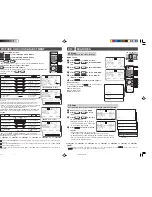
Off timer
Automatically turns power off after a set length of time has passed.
!
Repeat step 1 to 3 of AV MODE.
@
Press
/
to select
“OFF
”.
#
Press
/
to set time
for TV to turn off.
• Maximum time that can be preset is
12 hours and 50 minutes. Timer start
to count down after setting.
$
Press
MENU
until normal screen
appears.
• Five minutes before the preset length
of time expires, the remaining time appears on the screen.
• A flashing display of the remaining time appears during the last
few seconds. When the preset length of time has passed, the TV
set enters the Standby mode.
ENTE :
R
A V
M O D E
T V
P A S S W O R D
B L U E
B A C K
M
SELE T :
C
RETU N
R : MENU
. P .
I N
O F F
O
M
V I E
O F F
0
0
0 0
O F F
O F F
2
3 0
:
2
1
N E W S
M U S I C
M O V I E
A V
M O D E
T V
P A S S W O R D
B L U E
B A C K
M
SELE T :
C
D
A JUS :
T
RETU N
R : MENU
. P .
I N
O F F
O
M
V I E
O F F
0
0
0 0
O F F
O F F
– –
– –
:
A V
M O D E
T V
P A S S W O R D
B L U E
B A C K
M
SELE T :
C
RETU N
R : MENU
. P .
I N
O F F
O
M
V I E
O F F
0
0
0 0
O F F
O F F
2
3 0
:
D
A JUS :
T
CH
CH
NORMAL
MENU
E9
PICTURE OR SOUND ADJUSTMENT
!
Press
MENU
to call MENU screen.
@
Press
/
to select PICTURE or SOUND icon.
#
Press
/
to enter PICTURE or SOUND menu.
$
Press
/
to select adjustment items.
%
Adjust using
/
.
• Wait for approximately five seconds to return to PICTURE/SOUND menu.
^
Repeat steps 4 and 5 above to adjust other items.
&
Press
MENU
until normal screen appears.
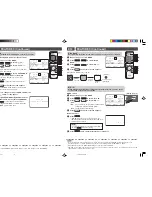
The following table lists the adjustment items shown in the PICTURE/SOUND menu
and how they change as you press
/
.
PICTURE menu table
Selected item
Press
Press
CONTRAST
To decrease contrast
To increase contrast
COLOUR
For less colour
intensity
For more colour
intensity
BRIGHTNESS
For less brightness
For more brightness
TINT
To move tint toward
red
To move tint toward
green
WHITE TEMP
To more reddish
background
To more bluish
background
SHARPNESS
For less sharpness
For more sharpness
PICTURE NR
(see note below)
ON
OFF
C O N T
T
R
5 0
A S
[ PICTURE menu screen ]
C O N T R A S T
B R I G
T I N T
H T N E S
S H A R P N E S S
S
W
SELE T :
C
D
A JUS :
T
RETU N
R : MENU
H I T E
T E M P
P I C T U R E
N R
C O L
5 0
+ 2 5
2 0
– 2 0
O N
– 1 0
O U R
MOV I E
• TINT can only be selected and adjusted when receiving NTSC broadcasts.
• Picture Noise Reduction
Noise might be generated on images when playing deteriorated video tapes or
when receiving broadcasts with relatively weak signals. In these cases, set
PICTURE NR to “ON” to reduce the noise. However, when receiving good images
without noise, you can get better image quality by turning OFF this feature.
• WHITE TEMP can only be adjusted on PICTURE menu.
• The CONTRAST, COLOUR, BRIGHTNESS, TINT, SHARPNESS, PICTURE NR
and WHITE TEMP setting can be set differently for individual AV mode setting.
SOUND menu table
Selected item
Press
Press
SURROUND
TREBLE
To decrease treble
To increase treble
BASS
To decrease bass
To increase bass
BALANCE
To shift balance
toward left
To shift balance
toward right
LOUDNESS
The LOUDNESS
is ON
The LOUDNESS
is OFF
ON
ON
OFF
ON
OFF
B A L A N
E
1 5
C
[ SOUND menu screen ]
S U R R O U N D
B A S S
B A L
N C E
A
L O U D N E S S
SELE T :
C
D
A JUS :
T
RETU N
R : MENU
T R E
F F
O
+
8
1 5
O N
+ 1 0
B L E
MOV I E
• Pressing
NORMAL
while a PICTURE/SOUND selection is displayed, only the selected mode is reset to the standard
(factory-setting) position.
• Pressing
NORMAL
while the PICTURE/SOUND menu screen is displayed will reset all the items of PICTURE/SOUND
menu to the standard (factory-setting) position.
• Pressing
NORMAL
during normal screen will reset all the items of PICTURE menu and SOUND menu to the standard
(factory-setting) position.
C O N T R A S T
B R I G
T I N T
H T N E S
S H A R P N E S S
S
W
SELE T :
C
ENTE :
R
RETU N
R : MENU
H I T E
T E M P
P I C T U R E
N R
C O L
5 0
+ 2 5
2 0
– 2 0
O N
– 1 0
O U R
MOV I E
ENTE :
R
S U R R O U N D
B A S S
B A L
N C E
A
L O U D N E S S
SELE T :
C
RETU N
R : MENU
T R E
F F
O
+
8
1 5
O N
+ 1 0
B L E
MOV I E
A V
M O D E
T V
P A S S W O R D
B L U E
B A C K
M
SELE T :
C
D
A JUS :
T
RETU N
R : MENU
. P .
I N
O F F
O
M
V I E
O F F
0
0
0 0
O F F
O F F
2
3 0
:
O F F
0
0 0
:
O F F
0
0 1
:
O F F
0
0 2
:
O F F
0
0 3
:
O F F
0
0 4
:
O F F
0
0 5
:
Flashing
• When SURROUND is set to “ON ” or “ON ”, BALANCE cannot be selected.
• The SURROUND, TREBLE, BASS, BALANCE and LOUDNESS setting can be set
differently for individual AV mode setting.
29Q-FG1M[EN]5-6.p65
27/12/06, 1:25 PM
5

