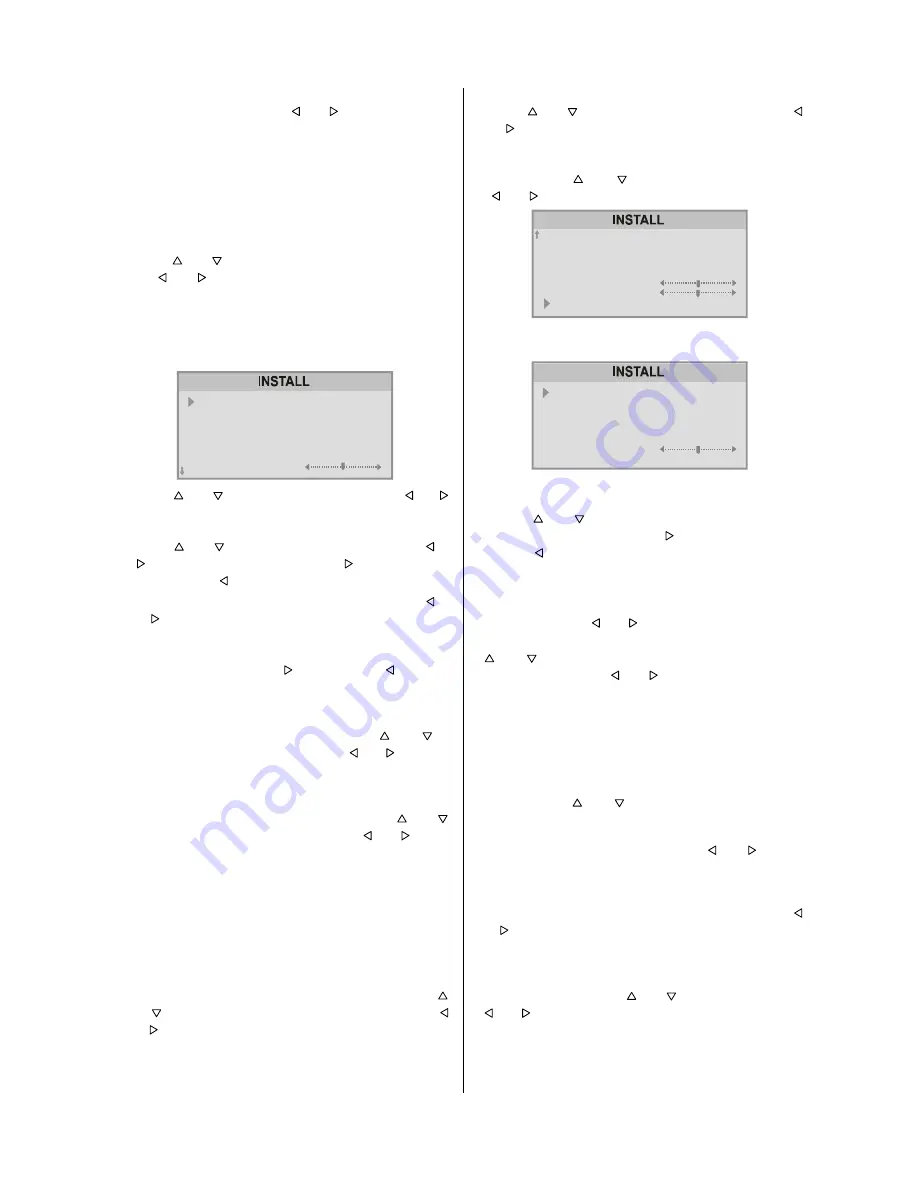
background image

- 13 -

1. PROGRAMME

 is the first selected item as you enter the

INSTALL.

 menu. Press the “ ” or “ ” button to select the

programme number where you want the tuned channel to

be stored. (You may also type the programme number us-

ing the digit buttons)

Note:

•  Do  not  use  the 

PROGRAMME

  item  when  you  want  to

modify the current programme number setting as this may

cause other programmes to be changed that are in the ex-

isting programme number.

2.

 Press “ ” or “ ” button to select Tuning Mode. By press-

ing “ ” or “ ” button , you can select the mode in which

you  want  the  search  to  be  made,  "

Channel  Search

"

mode or "

Frequency Search

" mode.

• When you select "

Channel Search

" ("

Channel

" will be

displayed  in  the  menu.),  the  display  of  the

INSTALL.(Installation) Menu will be as below :

352*5$00(

781,1*02'(

%$1'

&+$11(/

67$1'$5'

&2/2856<67(0

),1(781,1*

3

&+$11(/

6

%*

3$/

3.

Press “ ” or “ ” button to select 

BAND

. Using “ ” or “ ”

button to select the band in which you want to search a

channel.

4.

Press “ ” or “ ” button to select 

SEARCH

. Press “ ” or

“ ” button to start searching. (Press “ ” button to search
forward. Press “ ”  to search backwards.)

• If the found channel is not the desired one, press “ ” or

“ ” button to start searching again.

• To stop searching before a channel is found, press the

reverse direction button. For example, when the TV is
searching forward with “ ” button, press “ ” button to

stop searching.

• If you know the channel number which you want to find,

you can find the channel directly. Follow th

e step 5 to

select the correct standard, then press “ ” or “ ” to
select 

CHANNEL

 again, and press“ ” or “ ” button to

select the channel number, or enter the number with the

digit buttons.

5.

If the sound or picture is abnormal, change the standard

(broadcasting system) of new channel. Press “ ” or “ ”
button to select 

STANDARD

, then press “ ” or “ ” button

to change the correct one.

• The indicated number will be changed when you change

the standard.

B/G : C02-C12, C21-C73 / S01-S41 / S75-S79
D/K : C01-C12, C21-C69 / S01-S19, S22-S41
L

: C05-C73 / S01-S41 / S75-S77

: C01-C04

6.

If the picture is not clear or no colour appears, change the

colour system to display the picture normally. Press “ ”
or “ ” button to select 

COLOUR SYSTEM

, then press “ ”

or “ ” button to choose the correct one.

• In TV mode: 

PAL / SECAM

•  In AV  mode: 

AUTO  /  PAL  /  SECAM  /  NTSC  3.58  /

NTSC 4.43

7.

If  the  channel  reception  is  poor,  fine-tune  the  channel.

Press “ ” or “ ” to select 

FINE TUNING

, then press “ ”

or “ ” button to fine-tune the channel.

8.

After  the  all  settings  are  completed,  store  the  new

channel’s setting to the programme number which you se-

lected.  Press  “ ”  or  “ ”  to  select 

STORE

,  then  press

“ ” or “ ” button to store it.

%$1'

&+$11(/

67$1'$5'

&2/2856<67(0

),1(781,1*

6($5&+

6725(

6

%*

3$/

9.

When you select "Frequency Search" , the display of the

Tuning  menu will be as below :

352*5$00(

781,1*02'(

67$1'$5'

&2/2856<67(0

)5(48(1&<

6($5&+

6725(

3

)5(48(1&<

%*

3$/

• As  "

Frequency    Search

"  is  selected, TV  will  search  ac-

cording to the channel frequencies.

• With the“ ” or “ ” button, select 

Search

. Search can be

made  either  forward,  pressing  “ ”  button  or  backwards,
pressing “ ” button.

•  The  search  will  be  done  with  steps  of  0.25MHz.  in  each

step.

• If the tuned station is not the desired one, you can continue

searching pressing “ ” or “ ” button again.

•  When  the  desired  station  is  tuned,  select  STORE  using

“ ” or “ ” button and store it to the programme number
you selected pressing “ ” or “ ” button or press “OK” but-

ton.

• Now as you had selected the Frequency Search, the tuning

mode of the program is stored as Frequency Search Mode.

Direct Frequency Access

• If you know the channel frequency of the station you want

to  tune,  you  do  not  need  to  make  search;  select  Fre-

quency,  using “ ” or “ ” button in the Frequency Mode

Tuning  Menu. You  can  type  the  first  3  digits  of  the  fre-

quency using the digit buttons, and then you can select the
decimal part of the frequency by using “ ” or “ ” buttons

with 250kHz steps. For example if you want to tune the sta-

tion  at  frequency  224.25  MHz;  first  you  can  directly  type

224. The bar at bottom of the menu will show 224.00 . Then
by increasing or decreasing with 0.25 MHz steps using “ ”
or “ ” buttons, you can select the 224.25MHz .When you

type  and  select  the  frequency,  the  corresponding  station

will be displayed.

• To store the station to the programme number selected, se-

lect STORE option using “ ” or “ ” button and then press
“ ” or “ ” button or press “OK” button.

• Now as you had selected the Frequency Search, the tuning

mode of the program is stored as Frequency Search Mode.

Summary of Contents for 29LF-92EC

Page 1: ......

Page 2: ...play the Time 15 Flash back 15 Teletext 15 To operate Teletext 15 To select a page of Teletext 15 To Select Index Page 15 To Select Teletext with a TV Programme 15 Searching for a page while watching TV 15 To Select Double Height Text 15 To Reveal concealed Information 15 To StopAutomatic Page Change 15 To Select a Subcode Page 16 Fastext 16 To exit Teletext 16 Connecting external equipment 16 Via...

Page 3: ... a bookcase or a built in cabinet Television equipment and cart combination should be moved with care Quick stops excessive force and uneven surfaces may cause the equipment and cart combination to overturn To prevent electrical shock do not subject the AC power cord to damage by bending or twisting it or by placing heavy items on top of it and do not place the AC power cord under the TV set If th...

Page 4: ... and should use a mounting kit approved by the manufacturer Do place the TV set onto an even stand table or track which size is bigger than the TV set If the TV set is put onto a smaller size or uneven stand table or track may cause the TV cabinet distort Do not put or in sert anything between TV set and the stand table or track The tube of your TV has a special coating Do not knock or rub on the ...

Page 5: ...ZHJR 6 Ë1 6 7 9Ë Ï e6 h e e6 Ò70 87 7Ï 1iYRG N SRXåLWt EDUHYQp WHOHYL H 5 1é 7 9Ë 1 35 Ë0 ý 35 9È 29È 35Ë58 ý 3 DUWH WHKQL F SHQWUX WHO HYL RU vQ FXORUL R Q GR V D Q R O Y D V V D H O D D V Q i O D W L W P X W D Wy W P L H O W W K D V Q i O Qi D V t QH V WH O H Y t Ly W 3 U RV LP X Z D QL H S U H F WD ü WH Q S R G U F QL N R E V á X J L SU H G UR S R F F L H P N R U V WD Q L D WH O H Z L R U D RQV...

Page 6: ...riangle is intended to alert the user to the presence of important operat ing and maintenance servicing instructions in the literature accompanying the appliance Stand By Cursor Up Cursor Right OK OK Info Program Menu 0 9 Direct Program Double Digit Wide mode button P CH Program Volume TV Quit Menu 7 EXT button EXT 1 RGB EXT 2 F AV S VHS Yellow Feature Menu Blue Installation Menu Hold Update Index...

Page 7: ...T PANEL Speakers left right Power On Off Volume CH Program Headphone 3 6 mm Ø 6 9 2 9 2 6 5 8 2 6 9 2 9 2 6 5 8 2 S VIDEO VIDEO AUDIO L S G I Audio left AUDIO R D D D Audio right Speaker Covers Remote Control Indicator Sound Indicator Power Indicator ...

Page 8: ...arrow to remove the battery cover 2 Insert two batteries 1 5 V R03 AAA size Be sure to match the battery terminals with the marks inside the compartment 9 5 3 Replace the battery cover Notes Remove batteries if weak or if the unit is not in use for long periods Do not mix old and new batteries Incorrect installation of the batteries may damage the re mote control Switching the TV ON OFF You can op...

Page 9: ...be displayed After A P S is finalized the PRO GRAM menu appears To cancel A P S press the button 79 1 8726725 16 57 7 1 0 You can delete a channel insert a channel into a programme number or re start A P S with the PROGRAM menu For details see PROGRAM Programming menu on page 14 Operating with the onset buttons Volume setting and programme selection can be made using the buttons on the right side ...

Page 10: ... will turn on otherwise will turn off 92 80 1 6281 02 6855281 3 21 9 48 5 0212 2 21 In case of bilingual broadcast Dual Sound you can select original or dubbed language using mode option Wide Surround The wide surround effect depends on whether the feed is MONO or STEREO If the source feed is MONO it produces a Pseudo Stereo effect If the source feed is STEREO it produces a Wide Sur round effect e...

Page 11: ... 3 21 48 5 9 6725 0212 2 21 Auto Store Last volume level is stored automatically Picture Menu To change picture settings To enter PICTURE menu directly press the GREEN button or Press M button now you are in main menu In the main menu select PICTURE using or button then enter the picture menu pressing or button 6281 3 785 785 167 352 5 0 Note When Picture Mode is not MANUAL BRIGHTNESS CONTRAST and...

Page 12: ...n select the width of the picture By pressing or button you may choose one of these op tions AUTO 4 3 or 16 9 Wide mode can be set by wide mode button also 5 71 66 2175 67 2 285 6 531 66 3 785 02 2 285 7 03 02 0 18 1250 872 If wide mode button is pressed once wide mode indi cator appears on the screen If it is pressed one more the wide mode will be changed Each time you press the wide mode button ...

Page 13: ... the TV can be operated only by using the remote control handset 6 3 7 0 5 2 1 8 7 287387 8 5281 2 2 1 6 79 21 Language Menu Language can be selected by pressing or but ton on Language item 6 3 7 0 5 2 1 8 7 287387 8 5281 2 2 1 6 79 21 Setting External Source Output You can use this menu to select the internal or external source that will be output at EXT 2 terminal In the Feature menu select EXT ...

Page 14: ...s or button to select COLOUR SYSTEM then press or button to choose the correct one In TV mode PAL SECAM In AV mode AUTO PAL SECAM NTSC 3 58 NTSC 4 43 7 If the channel reception is poor fine tune the channel Press or to select FINE TUNING then press or button to fine tune the channel 8 After the all settings are completed store the new channel s setting to the programme number which you se lected P...

Page 15: ...give a channel name 2 Press the RED button to enter the NAME mode 3 Press or button to choose the position and press or button to choose each character of channel name 4 Press the RED button to store the channel name To cancel the NAME mode press the BLUE button To delete a channel DELETE 1 Choose the channel you want to delete 2 Press the YELLOW button to enter the DELETE mode 3 Press the YELLOW ...

Page 16: ...Usually the list of contents index is displayed on the screen To select a page of Teletext Press the appropriate digit buttons for the required Teletext page number The selected page number is displayed at the top left corner of the screen The Teletext page counter searches until the selected page number is located so that the desired page is displayed on the screen Press button to move the Telete...

Page 17: ... sockets the TV will be switched to AV mode automatically RGB mode If a piece of equipment outputs RGB signals use the EXT 1 Euro connector as this is RGB ready Via the RCA jacks If you have an equipment such as a Camcorder which has the RCA jacks connect it to the Front AV F AV terminal with the video and audio cables If the equipment has the mono audio jack connect it to the AUDIO L jack Via the...

Page 18: ...ts and RGB inputs are available TV broadcast outputs Video and Audio L R are available EXT 2 EXT 2 terminal Euroconnector 21 pin SCART Video input and Audio L R inputs are available Video and Audio L R outputs are available see Setting External Source Output on page 12 Front AV F AV terminal RCA connectors x 3 and S VIDEO Y C connector Video input and Audio L R inputs are available S VIDEO input i...

Page 19: ... your VCR HULDO FRQQHFWLRQ 79 VHW RQO HULDO 1 2 79 HULDO 1RW VXSSOLHG HULDO HDG 1RW VXSSOLHG 17 7 7 1 7 7 7 HULDO RQQHFWLRQV 79 DQG 9 5 HULDO 1RW VXSSOLHG HULDO HDG 1RW VXSSOLHG 17 7 7 HULDO HDG 1RW VXSSOLHG 6FDUW HDG 1RW VXSSOLHG 2 79 HULDO 1 2 9 5 XGLR 9LGHR 5 287 9 7 50 1 9 HULDO 1 ...

Page 20: ...your DVD Player DECODER and VCR RQQHFWLRQV 79 9 3OD HU 2 5 DQG 9 5 9LGHRUHFRUGHU 9 7 50 1 9 2 79 9 3 5 2 5 6FDUW HDG 1RW VXSSOLHG 6FDUW HDG 1RW VXSSOLHG 9 7 50 1 9 HULDO 1 6FDUW HDG 1RW VXSSOLHG HULDO HDG 1RW VXSSOLHG HULDO 1RW VXSSOLHG HULDO HDG 1RW VXSSOLHG HULDO 1 XGLR 9LGHR 2 9 5 5 287 1 7 7 7 ...

Page 21: ...yer and Digital Set Top Box RQQHFWLRQV 79 9 3OD HU DQG LJLWDO 6HW 7RS R 2 79 17 7 7 9 3 5 6FDUW HDG 1RW VXSSOLHG 9 7 50 1 9 HULDO 1 HULDO 1RW VXSSOLHG 6DWHOOLWH GLVK 1RW VXSSOLHG LVK HDG 1RW VXSSOLHG HULDO HDG 1RW VXSSOLHG 6FDUW HDG 1RW VXSSOLHG HULDO HDG 1RW VXSSOLHG 7 6 7 723 2 5 287 5 1 79 6 57 6 1 17 7 7 ...

Page 22: ...79 9 3OD HU 9 5 DQG LJLWDO 6HW 7RS R 2 79 17 7 7 9 3 5 6FDUW HDG 1RW VXSSOLHG HULDO 1 9 7 50 1 9 HULDO 1RW VXSSOLHG 6DWHOOLWH GLVK 1RW VXSSOLHG LVK HDG 1RW VXSSOLHG HULDO HDG 1RW VXSSOLHG 6FDUW HDG 1RW VXSSOLHG 7 6 7 723 2 2 9 5 HULDO HDG 1RW VXSSOLHG 6FDUW HDG 1RW VXSSOLHG 5 287 HULDO 1 XGLR 9LGHR HULDO HDG 1RW VXSSOLHG 5 287 5 1 79 6 57 6 1 1 7 7 7 ...

Page 23: ...ual of your Video Camera RQQHFWLRQ 79 SRZHU FDEOH WR D a 9 V VWHP 0DLQV 6RFNHW 2XWOHW a 9 2 79 1 7 7 7 URQW FRQQHFWLRQV 79 DQG 9LGHR FDPHUD 6 9LGHR L QSXW 7 HUPLQDO 9LGHR QSXW 7HUPLQDO XGLR QSXW 7 HUPLQDO OHIW XGLR QSXW 7 HUPLQDO ULJKW HKLQG WKH GRRU 5217 9 6 9LGHR OHDG L 1RW VXSSOLHG 9 0 ...

Page 24: ...used 17 Earth for video 4 Common earth for audio 11 Green input 18 Earth for Red Green Blue control 5 Earth for blue 12 Not used 19 Video output 6 Audio left input 13 Earth for red 20 Video input PAL SECAM NTSC 7 Blue input 14 Not used 21 Plug shield 21 pin Audio Video EXT 2 1 Audio right output 8 Audio video control 15 Not used 2 Audio right input 9 Earth 16 Not used 3 Audio left output 10 Not us...

Page 25: ...U UHFHSWLRQ RQ VRPH FKDQQHOV 7U D QHZ FKDQQHO WR FKHFN IRU SRVVLEOH VWDWLRQ WURXEOH HULDO QRW FRQQHFWHG WR WHUPLQDO DW WKH EDFN RI WKH 79 VHW I RXWVLGH DHULDO LV XVHG FKHFN IRU EURNHQ ZLUHV KHFN IRU ORFDO LQWHUIHUHQFH GMXVW 2 285 FRQWURO 7U ILQH WXQLQJ WR FRUUHFW 6RXQG 2 SRRU SLFWXUH KHFN LI WKH ULJKWQHVV RU RQWUDVW VHWWLQJ LQ WKH SLFWXUH VHWWLQJ PRGH PLJKW EH DOO WKH ZD WR WKH PLQXV VLGH 7U D QHZ...

Page 26: ...HLJKW NJ 0 16 216 Cleaning The Screen Your TV is fitted with a True Flat picture tube The sur face of the screen is covered with a foil Under no circum stances may this be damaged To clean Clean the laminated screen with a soft cotton cloth Only non alkaline thinned soapsuds on a basis of water or alkohol be used to moisten the cloth Rub the surface gently with the cloth until the surface is compl...

Page 27: ...R SHARP CORPORATION 50053219 05 04 50053219 ...

Page 28: ......

Page 29: ...nd right speaker covers The upper rear part of the speaker cover indicates L left or R right 2 Insert the attachment pins on the upper and middle rear part of the speaker cover into the attachment holes as shown 3 Use the palm of your hand to gently press the middle of the speaker cover in order to firmly secure the speaker cover The two attachment pins on the rear of the speaker cover firmly secu...

Page 30: ...of the speaker cover and gently pull it off The attachment pins on the lower rear part of the speaker become freed 4 Remove the other speaker cover using the same procedure 1 2 3 Use a soft dusting cloth or soft brush to clean the speaker covers of dust Use of a rough cloth or vacuum cleaner hose may damage the surface of the speaker covers To remove stains moisten a soft cloth with diluted deterg...

Page 31: ......

Page 32: ...4 ...

Page 33: ...5 ...

Page 34: ......

Page 35: ...7 ...

Page 36: ......

Page 37: ......

Page 38: ......

Page 39: ......

Page 40: ......

Page 41: ......

Page 42: ......

Page 43: ...50053624 ...

Reviews: