www.shakmat.com
•
16/19
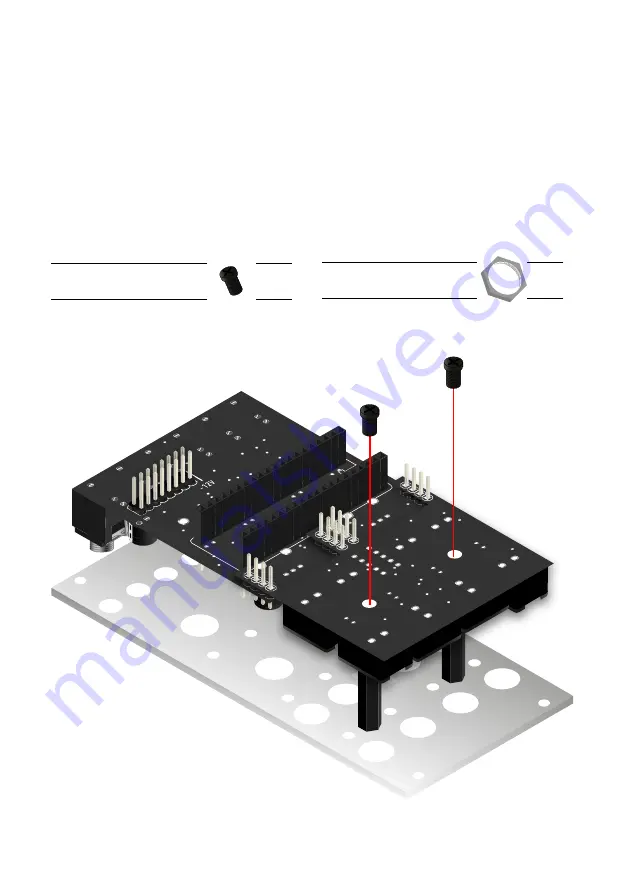
Potentiometer nuts (x4) P1
Nylon screw (x2)
P1
Assemble the PCBs & front panel with the four nuts on the potentiomers
and the two nylon screws through the bottom PCB into the spacers. Once
everything is well secured, push every LED through their hole until they sit
flush with the panel and stick to the tape. Once they are all in place, you
can solder and trim the legs.
Finally, solder only one leg of the 7 segment display and check that it sits
well against the front panel window. Triple check the display alignment
through the front panel window. When all of its legs are soldered, it is
imposible to correct its placement. Once it’s nicely placed, you can solder
the remaining legs of the display and trim them.


