37
CHAPTER 6: Installation
5. Power ON the monitor or KVM switch attached to the Remote Unit’s user
port.
Dual-Access systems:
Power ON any monitor or switch attached to the
Local Unit’s user ports.
6. Make sure that the remote keyboard functions and that you’re getting video
at the remote site. (Be aware that even though equipment attached to the
Local Unit is usually powered and enabled right away, the remote monitor,
keyboard, and mouse might take up to several seconds to be properly
initialized; see
Section 7.3.3
. Note also that the video quality might be poor at
this point if your interconnect cable is longer than 25 m [80 ft.].)
7. Make sure the remote mouse functions. (If your PC normally boots up in
DOS, you will need to run Windows or some application that supports the
mouse.)
8. Make sure that the audio devices attached to any of your Remote Units are
working.
If everything works in your test setup, repeat the procedures in
Section 6.2
and
6.3
for your actual installation. (For information about rackmounting a Remote Unit,
see
Appendix B
.) If everything works in the actual installation, you can proceed to
adjust the remote site’s video (see
Section 6.4
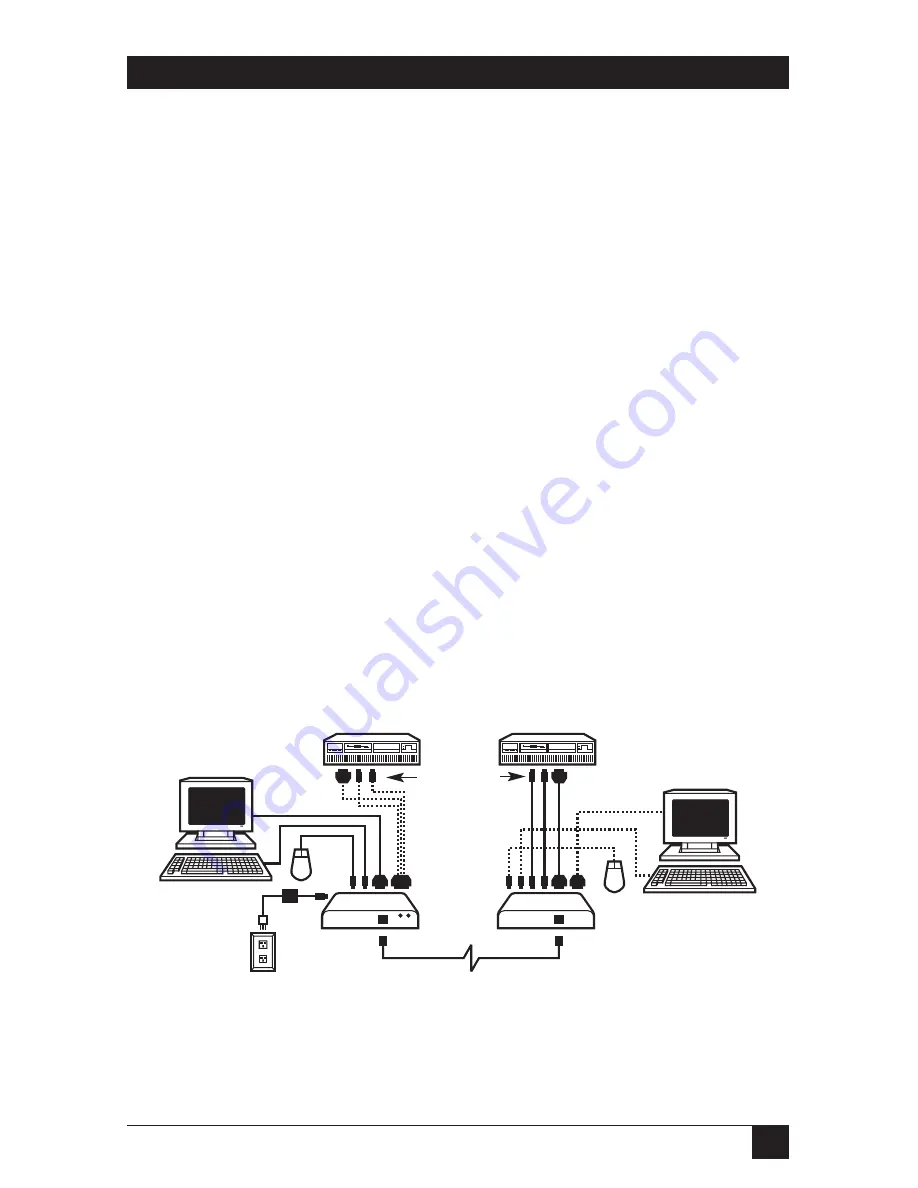
). For pictures of complete
installations, see Figure 6-12 below and Figures 6-13 through 6-15 on the next
page.
Figure 6-12. An Extender-system installation, front view.
Remote monitor,
keyboard, and mouse
Local monitor, keyboard,
and mouse (ACU1009A
and ACU1049A only)
Remote
Unit
Local
Unit
Remote CPU
(ACU1049A only)
Local CPU
Extension
cabling
(included)
CAT5 interconnect cable
Power
supply


