


10
SERVSWITCH
™
BRAND CAT5 KVM EXTENDER
Installing the Extender
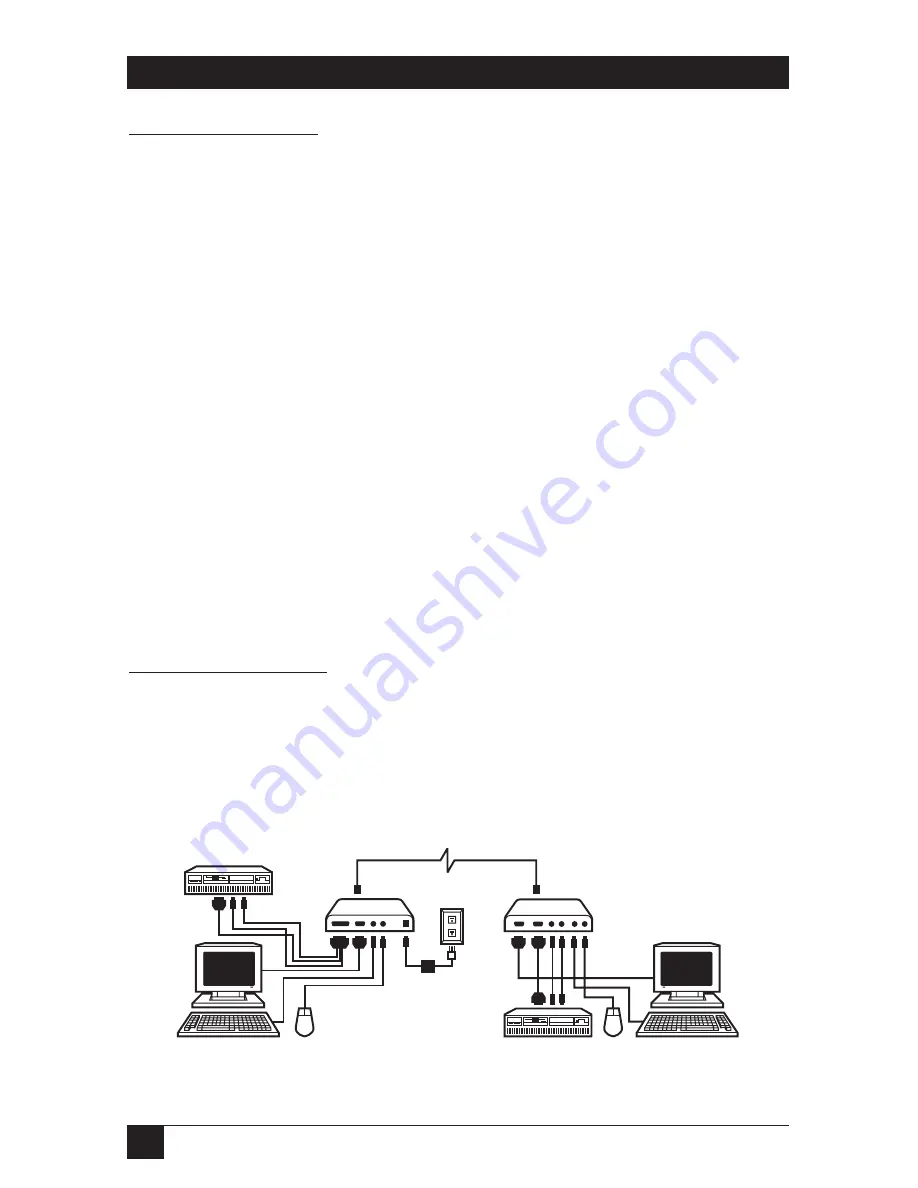
To install your Extender system, refer to the illustration below. (A Switching model
is shown; the Dual-Access model won’t have the remote CPU, and the Single-Access
model won’t have the remote CPU
or
the local user station.) Take these steps:
1. Use the included three-to-three extension cables to attach the CPU to the
Local Unit.
2.
Dual-Access and Switching models:
Plug the local keyboard, monitor, and mouse
directly into the Local Unit.
3. Plug the remote keyboard, mouse, and monitor directly into the Remote
Unit.
4.
Switching models:
Use the included three-to-one extension cable to attach the
CPU to the Remote Unit.
5. Connect the Local and Remote Units with straight-pinned four-pair CAT5
cable.
6. Power the Remote Unit with its included power supply.
For more information about installation, or if you’re attaching any KVM switches
to the Extender, refer to
Chapter 6
.
Operating the Extender
For the most part, your Extender system should operate automatically and
transparently. Some functions, though—including switching between the CPUs
with a Switching Extender—are handled with keyboard commands.
Appendix C
summarizes these commands, while
Section 7.3
describes them in detail.
CAT5 interconnect cable
Local
Unit
Remote
Unit
Power supply
Remote CPU
Local CPU
Local monitor,
keyboard, and mouse
Remote monitor,
keyboard, and mouse


