background image


7.  Operation introduce 

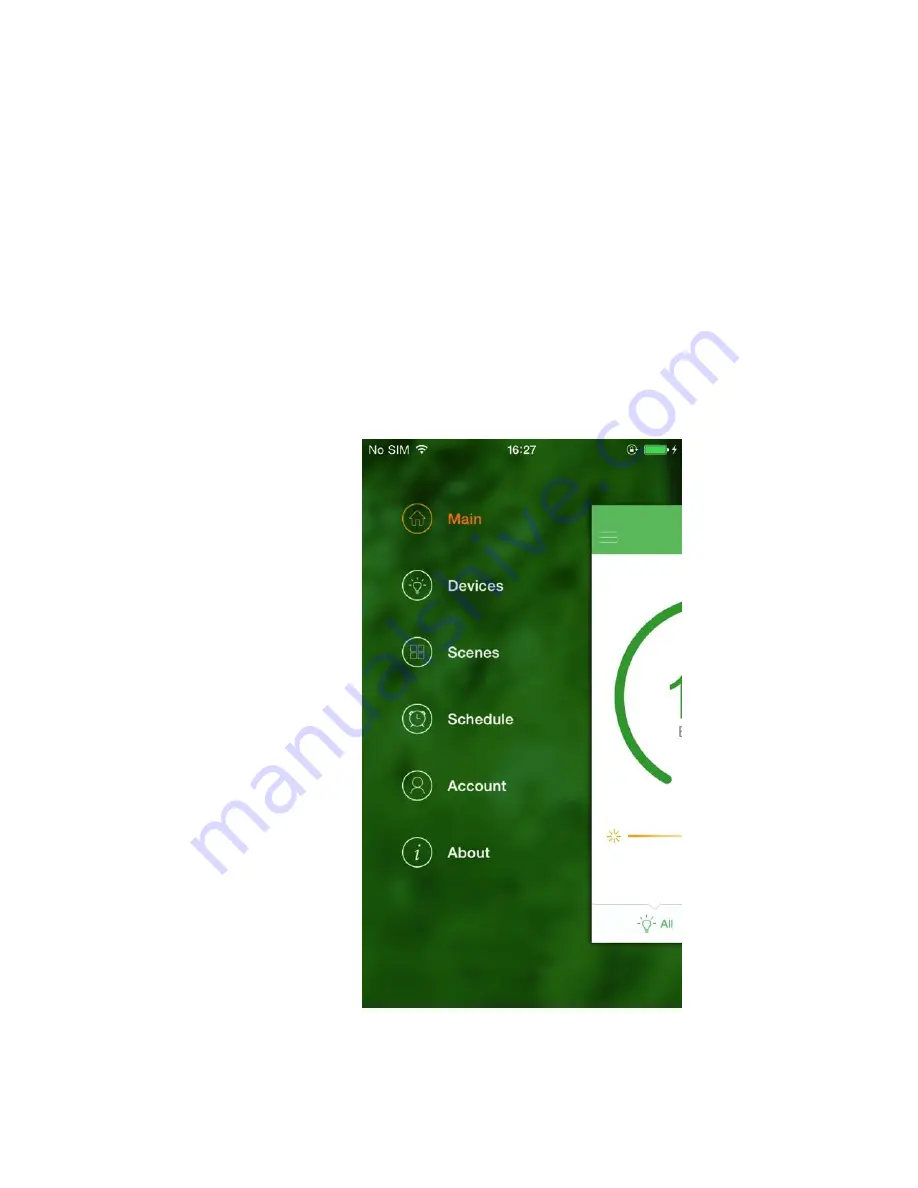
The functions of Element app as below PIC 3.5.1 showed: 

●Main    show yours bulbs . You can control them together with the All 

page or single control with Individuals page.    You can turn on or off your 
bulbs  or  change  the  brightness  and  color  temperature.  (PIC3.5.2  and 
3.5.3) 

●Devices    showed  all  your  devices  including  all  your  hubs  and  its 
bulbs. You remove manage them in here. 

●Scenesyou can add your favorite scenes as the way you use all your 

bulbs. Then you can quickly make them effect by only click one button. 

●Scheduleyou can add an alarm here to make the scene effect at the 

special time you wanted. 

●Account    you can manage your account information. 

●About    show  the  information  about  software  version    and  the 

firmware version of hubs and bulbs.    You can update the firmware here. 


                      PIC3.5.1 

7.1 Main   

“Main” is about light control and so on. It will show all of theelementlight as two 

Summary of Contents for element Z01-hub

Page 1: ...e provided in the package Then provide power to the hub Connect your mobile app to the Wi Fi provided by the same Wi Fi router in Step 1 Download and install Element App on your iOS or Android mobile...

Page 2: ...ement bulb into the socket then turn on the wall switch to power the bulb Open the Element App and follow the in App instructions to create an account add bulbs and configure their settings Login 3 4...

Page 3: ...successfully connected in the App the ethernet cable connecting the hub to the router can be removed The bulbs can now be controlled by the App Note Keep the wall switch on to provide constant power t...

Page 4: ...e Element hub and connect the hub to your home network cable To ensure that the state of thehub is right Please long press the reset button on the hub over 7 seconds Quickly power on and off the bulb1...

Page 5: ...terface click the top right icon click Add a Hub and follow the guidance to connect the hub with your router The setting steps are as below 1 Insure the hub is power on and connect to your router with...

Page 6: ...PIC3 4 1 PIC3 4 2...

Page 7: ...e setting steps are as below 1 Select the hub you added before PIC3 4 6 2 Scan the QR code of every bulb which you want to add as PIC3 4 7 The QR code is on your bulb like the PIC 3 4 8 3 If you done...

Page 8: ...PIC3 4 7 PIC3 4 8 PIC3 4 9 PIC3 4 10...

Page 9: ...and its bulbs You remove manage them in here Scenesyou can add your favorite scenes as the way you use all your bulbs Then you can quickly make them effect by only click one button Scheduleyou can add...

Page 10: ...all your bulbs together in the All page including turn on and off the bulbs or change their brightness or color temperature if you want The button on the top right corner you can click it to show the...

Page 11: ...4 PIC3 5 5 You can control your bulbs one by one in the individuals page Click the right arrow and you will see PIC3 5 6 You can control the bulb and rename the bulb here and see its usage data by sli...

Page 12: ...llow you manage your devices both of hubs and bulbs Click the setting icon and you can rename the SSID of hub You can also delete bulbs here Add new hub or bulbs will be enable when you click the top...

Page 13: ...m effect by only click one button To add a scene click the cross button on the top right and you will see PIC3 6 4 Need 3 steps to add a scene First name it Second select bulbs what you want Third set...

Page 14: ...can turn on or off the schedule to make it work or not When you want to add a new schedule you should click the cross button and create a new one by 4 steps First select a scene you like Second select...

Page 15: ...PIC3 6 5 PIC3 6 6 7 5Account You can change your account password or logout in here PIC3 7 1...

Page 16: ...PIC3 7 1 7 6About About show the information aboutsoftware version and the firmware version of hubs and bulbs You can also update the firmware here PIC3 8 1...

Page 17: ...PIC3 8 1...

Page 18: ...against harmful interference in a residential installation This equipment generate uses and can radiate radio frequency energy and if not installed and used in accordance with the instructions may cau...

Page 19: ...necessary for successful communication Conform ment la r glementation d Industrie Canada le pr sent metteur radio peut fonctionner avec une antenne d un type et d un gain maximal ou inf rieur approuv...

Page 20: ...Radiation Exposure Statement This equipment complies with Industry Canada RSS 102 for radiation exposure limits set forth for an uncontrolled environment This equipment should be installed and operat...

Reviews: