


4
Idler Side Bracket Motor Side bracket
Foot
T-Hook
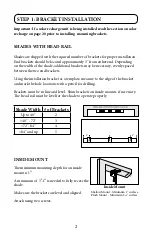
The installation brackets are always mounted so that the
inner surfaces face each other.
Brackets must be in line and level. Shim brackets on inside
mounts if necessary. The head rail must be level for the shade
to operate properly.
SHADES WITH NO HEAD RAIL
Inside Mount
Minimum 1
1
⁄
2
” surface
Outside Mount
Minimum 1
1
⁄
2
” surface
1
1
⁄
2
”
1
1
⁄
2
”
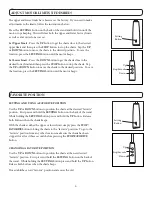
STEP 2: CONNECT WAND
While holding wires in the channel of the wand holder, attach
the wand holder to the end of the motor with the screws
provided, using a #2 phillips head screwdriver. Be sure that the
wires are not twisted or pinched.
Plug the wand wires into the motor wires.
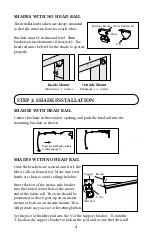
STEP 3: SHADE INSTALLATION
Center the shade in the window opening and
push the head rail into the mounting brackets as
shown.
Push the rail back until it
is fully engaged
SHADES WITH HEAD RAIL
wires
SHADES WITH HEAD RAIL
SHADES WITH NO HEAD RAIL
Plug the control wire into the wand wire . The plugs will only fit
together one way. The wires are bundled at the back of the head
rail.


