background image

Table of Contents

 WHAT SHOULD GO HERE????

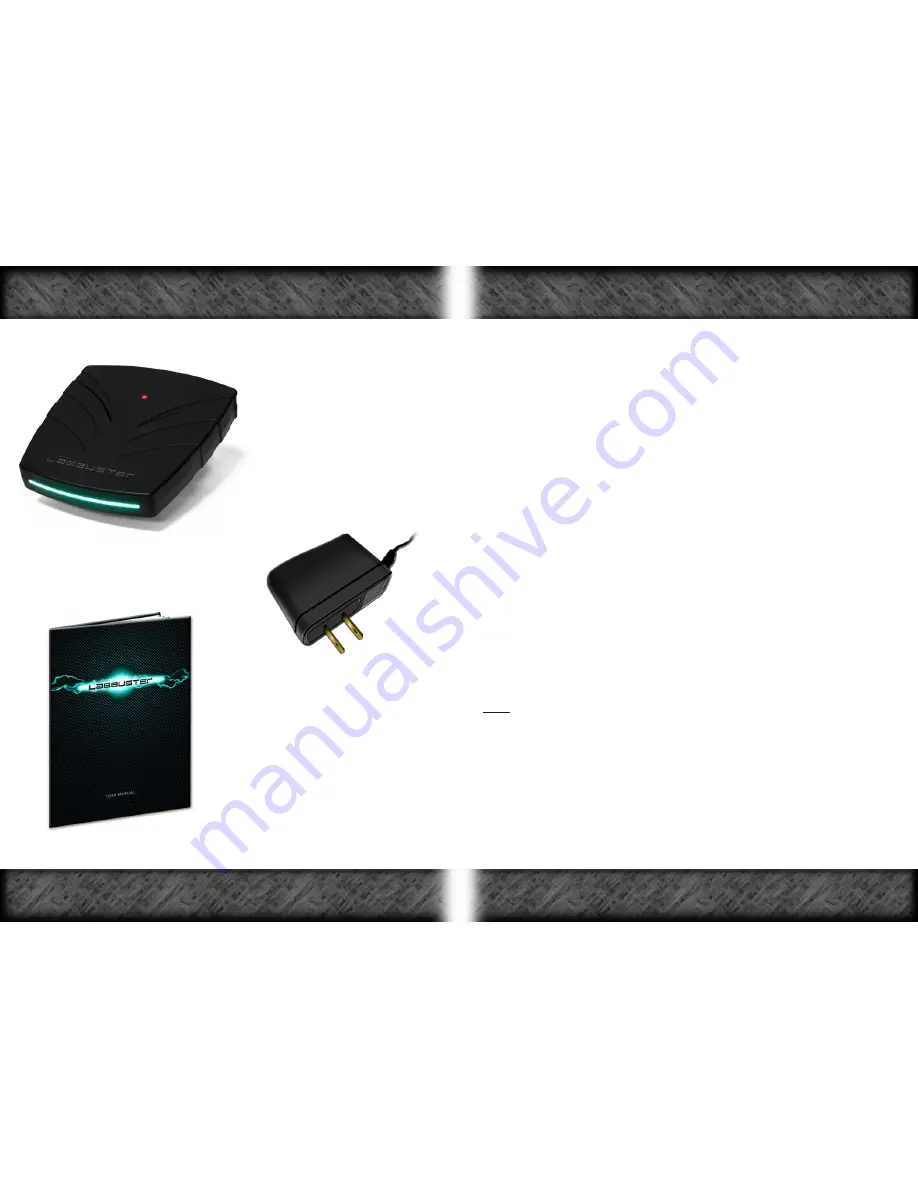
The LagBuster

5 Volt Power Supply

Your Package Includes the Following:

User Manual

Before you continue with the installation process, you will need:

1-  Cable or DSL Internet Connection.

2-  Shielded (STP) Ethernet Cables 

(such as CAT5, CAT6, or CAT7, 

      depending on your network requirements).

3-  Computer with Internet Browsing Capability. 

4-  Broadband Router.

5-  Broadband Modem

Note

:  If you have a combo modem/router, you must also have an 


  additional router. See the support section of the Sejent website at:


http://www.sejent.com/combounit


  On the right side of the page you will find a series of instructions  

  which will guide you through the necessary steps to get your    

  LagBuster to function correctly with your combination unit. 

Included in the Package

Pre-Installation Checklist

iv

Page 1

Summary of Contents for LagBuster

Page 1: ......

Page 2: ...cts toutes les exigences du Règlement sur le matériel brouilleur du Canada Copyright 2011 by Sejent Corporation All Rights Reserved Sejent and LagBuster are trademarks of Sejent Corporation Ninety 90 Day Limited Warranty Sejent Corporation warrants to the original purchaser that this product is free of defects in material and workmanship for a period of ninety 90 days from the first date of online...

Page 3: ...LagBuster Control Panel Accessing the Control Panel With a Direct LagBuster to Computer Conection 18 Accessing the Control Panel With the LagBuster Installed in the Network 19 Navigating the Control Panel 20 Control Panel Login and Password 22 Settings 23 LagBuster Modes 24 Performance Meters 26 Windows 7 Desktop Gadget 28 Manual LagBusting 30 Manual Update 31 Restart LagBuster 32 Restore Factory ...

Page 4: ... requirements 3 Computer with Internet Browsing Capability 4 Broadband Router 5 Broadband Modem Note If you have a combo modem router you must also have an additional router See the support section of the Sejent website at http www sejent com combounit On the right side of the page you will find a series of instructions which will guide you through the necessary steps to get your LagBuster to func...

Page 5: ... accordingly See Intelligent LED Bar Settings on Pg 16 Reset Button Used to restore the LagBuster to its factory default condition See Restore LagBuster to Factory Default Condition on Pg 33 Power Supply Input Plug in the factory supplied power adapter to power on your LagBuster Two interchangeable Ethernet ports The router and modem can be connected to either Ethernet port when setting up your La...

Page 6: ...tion Instructions 1 Place your LagBuster in a well ventilated moisture free and dust free environment 2 Power off your router and Internet modem If you have more than one router installed in your network power off the router that is directly connected to the modem 3 Locate the Wide Area Network WAN Ethernet port on your router See Figure 4 The LagBuster MUST be connected to the WAN port Back of a ...

Page 7: ... in the following sequence 1 Power on LagBuster by plugging the factory supplied power adapter into an electrical outlet with the correct AC voltage 2 Wait for the LagBuster to display the Direct Connect light pattern Direct Connect light pattern 3 Power on the Modem 4 Wait 15 seconds 5 Power on the Router 6 Power on your PC 7 Wait for the LagBuster to initialize You will see each LED on the Intel...

Page 8: ...orm you if a new update is available It is highly recommended that you update your LagBuster at this time to ensure that you maximize the LagBuster s game support If you choose not to update skip to step 19 17 To update your LagBuster press the button 18 When the update has finished installing the LagBuster will restart and initialize For more info see Step 7 of Connecting Your LagBuster on Pg 7 1...

Page 9: ...and Sony Playstation 3 are registered trademarks of their respective owners in the United States and or other countries Your LagBuster should be updated regularly to maximize game support The instructions below explain how to update your LagBuster To Update Your LagBuster 1 Access the LagBuster Control Panel by typing http cp lagbuster com into your web browser and press Enter See Accessing the Co...

Page 10: ... opponent s connection is lagging Using a LagBuster will ensure that the lag is never due to your network Lag will be completely eliminated if all players in the match are using a LagBuster This should affect Sports Fighting and Real Time Strategy online games 5 Your LagBuster will now automatically check the Sejent website for any available updates If an update is found the following message will...

Page 11: ...the router or modem is not properly connected to the LagBuster Direct Connect Ready The LagBuster is properly installed and ready to eliminate Lag but has NOT detected a game or game system on the network Ready LagBusting The LagBuster is connected to the network and has detected that a game system has been powered on or a game has been started The LagBuster will now begin doing its job ensuring t...

Page 12: ... right will cause the Intelligent LED Bar to switch from Bright Room Mode to Dark Room Mode at a higher light level To edit the Intelligent LED Bar settings 1 Access the LagBuster Control Panel by typing http cp lagbuster com into your web browser and press Enter or Return key See Accessing the Control Panel on Pg 18 2 Click the button on the Main Menu 3 Click the button on the Category Submenu Se...

Page 13: ... the Power Supply Input the Intelligent LED Bar will display the Initialization light pattern while the LagBuster initializes 7 When the LagBuster has finished initialization the Intelligent LED Bar will display the Direct Connect light pattern Direct Connect light pattern 8 Using the computer that is directly connected to the LagBuster with an Ethernet cable 9 Open your preferred Internet browser...

Page 14: ...te between the pages The highlighted submenu button corresponds to the page that is being viewed in the Page Content window Page Content This feature displays the pages that are used to execute different functions associated with your LagBuster Page Instructions Each page contains an explanation of the content it displays and or instructions on how to use the functions associated with it Logout Bu...

Page 15: ...ssword to access the Control Panel To Access the Control Panel Settings Page 1 Click the button on the Main Menu 2 Click the button on the Category Submenu From the Settings page you can Restore all user entered settings Click the button to restore all user entered settings that you have changed via the Control Panel to their default values No Updates will be lost and you will NOT have to reactiva...

Page 16: ...e functional LagBusting Off light pattern Sleeping When the LagBuster is sleeping it is not managing or monitoring your network It is as if the LagBuster was not installed The Performance Meters and Windows 7 Gadget will not function Sleeping light pattern To Change the Mode Your LagBuster is Currently In 1 Click the button on the Main Menu 2 Click the button on the Category Submenu 3 Click your d...

Page 17: ...width specifically for game traffic The Reserved Bandwidth Meter displays the amount of bandwidth that is reserved for games relative to the total bandwidth of your network The pointer indicates the percentage of the reserved bandwidth that is currently being used by your online video game As long as the pointer remains between 0 and 100 you will not experience lag LagBusting On Off Button Turning...

Page 18: ...lick the icon and drag it onto your desk top Figure 10 Windows 7 LagBuster Gadget at a Glance The green fill represents the bandwidth that is currently being reserved for online games This pointer indicates the total amount of bandwidth that you are currently using for both game and non game traffic This number is the current upstream bandwidth of your Internet connection in kilobits per second If...

Page 19: ...ly Update Your LagBuster 1 Visit the website below for information on manual update files http www sejent com lagbuster update 2 Click the button of the Main Menu 3 Click the button of the Category Submenu 4 Click the button locate the update file that you downloaded in Step 1 and click OK 5 Once you have selected the update file click the button You will see a message informing you that your LagB...

Page 20: ... to the Default Condition with the Control Panel Also see Pg 34 Restore LagBuster to Factory Default Condition 1 Click the button on the Main Menu 2 Click the button on the Category Submenu 3 Click the button 4 You will be redirected to a page that asks if you are sure that you want to continue 5 If you are sure that you would like to restore the LagBuster click Yes 6 The Intelligent LED Bar will ...

Page 21: ... 11 Depress Reset Button with Non Conductive Object 3 While keeping the Reset Button depressed restore power to the LagBuster The entire Intelligent LED Bar will blink slowly LagBuster is Powered On Hold the Reset Button Figure 12 Firmly for Approx 5 Sec 4 Continue depressing the Reset Button until the entire Intelligent LED Bar begins blinking very rapidly this should take approximately 5 seconds...

Page 22: ...rase information needed to solve your problem When you click the button the control panel will display information about your LagBuster that the support team may need you to provide them with When you click the button two new categories Save Log and Clear Log will appear in the Help Category Submenu Sejent Technical Support may require you to use one or both of these pages in order to identify the...

Page 23: ......

Reviews: