


Setting the Time
SELECT
CHANGE
SET
SELECT
CHANGE
SET
SELECT
CHANGE
SET
SELECT
CHANGE
SET
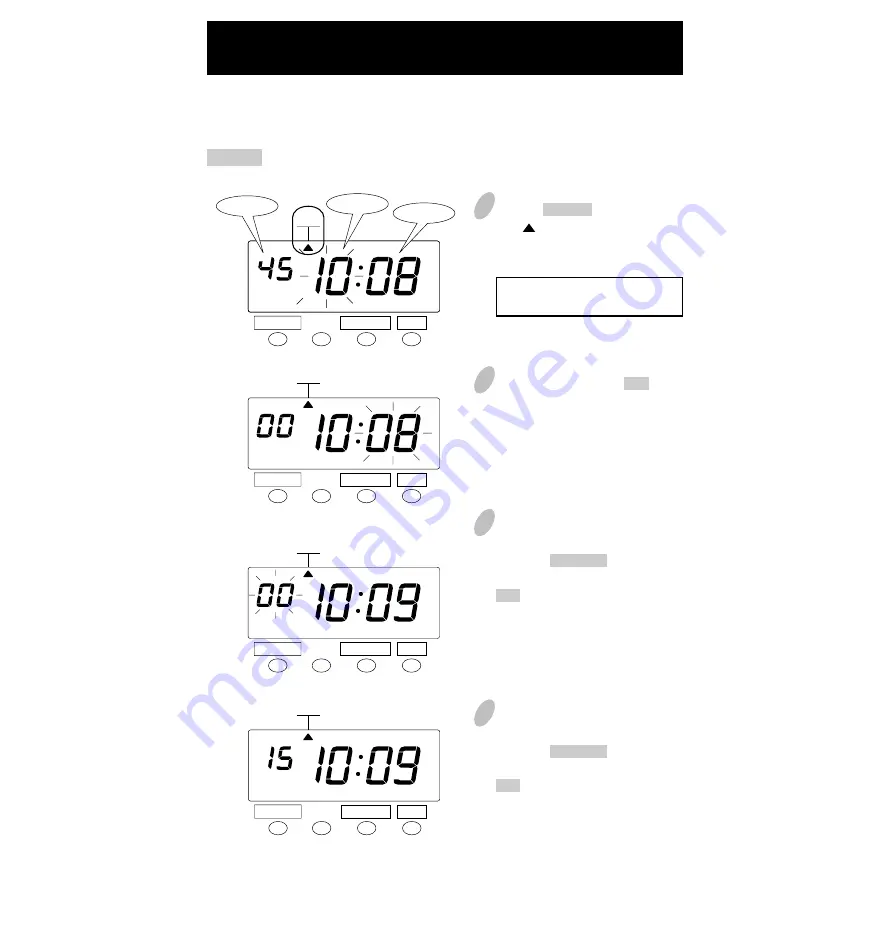
1
Push the SELECT button to position
the " " mark at the upper side of
the display next to the second item
from left.
The flashing number can be
changed.
2
In the example, push the SET button
because the hour is not to be
changed; now the hour of 10 o'clock
has been set.
At that moment, the flashing of the
display changes from "Hour" to
"Minute".
3
Changing the "Minute" (for example,
from 8 minutes to 9 minutes).
Push the CHANGE button to set
"Minute" at "09" and then push the
SET button. Now the minutes of 9
have been set.
At that moment, the flashing of the
display will change from "Minute"
to "Second".
4
Changing the "Second" (for example,
to 15 seconds).
Push the CHANGE button to set
"Second" at "15" and then push the
SET button. Now the Seconds of
15 have been set.
At that moment, "Second" on the
display will change from flashing to
steady, indicating that you have
exited the Setting mode.
TIME
TIME
TIME
TIME
To change the time
Example
To change the time from 10:08:45 to 10:09:15.
Minute
Second
Hour
13
Summary of Contents for QR-350
Page 1: ...QUARTZ TIME RECORDER OPERATION MANUAL...
Page 37: ...Weekly Card Bi Weekly Card 34...
Page 38: ...MEMO 35...


