35
13.7 Brake Motor Installation & Maintenance
Installation
It is the responsibility of the machine installer to ensure that:
•
The brake functions correctly after final installation;
•
Earthing has been carried out according to local regulations before connection to the mains;
•
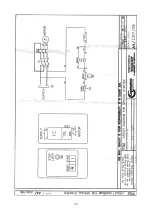
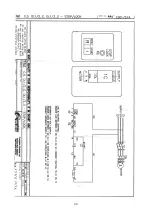
The supply of motor, rectifier/brake, and auxiliary equipments (if any) has been made using
cables of suitable section so as to avoid overheating and/or too high voltage drop; and
•
In case of inverter supply the wiring instructions of the inverter manufacturer have been
correctly followed for the motor and a separate supply (directly from the mains) has been
provided for the rectifier/brake.
Note:
due to poor supply characteristics we do not recommend use with phase converters.
Maintenance
Brake reliability & lifetime is dependent upon good periodic maintenance. All maintenance
work on brake motors should be carried out by qualified personnel, always with the machine out
of operation, disconnected and secured against starting. Low-torque DC brake motors (with
electromagnetic braking in case of supply failure) have a fixed braking torque; it is not possible
to adjust the stopping times of these motors.
I
I
f
f
a
a
b
b
r
r
a
a
k
k
e
e
m
m
o
o
t
t
o
o
r
r
i
i
s
s
r
r
u
u
n
n
n
n
i
i
n
n
g
g
e
e
x
x
c
c
e
e
s
s
s
s
i
i
v
v
e
e
l
l
y
y
h
h
o
o
t
t
i
i
t
t
i
i
s
s
l
l
i
i
k
k
e
e
l
l
y
y
t
t
o
o
b
b
e
e
c
c
a
a
u
u
s
s
e
e
d
d
b
b
y
y
t
t
h
h
e
e
b
b
r
r
a
a
k
k
e
e
n
n
o
o
t
t
r
r
e
e
l
l
e
e
a
a
s
s
i
i
n
n
g
g
.
.
T
T
h
h
i
i
s
s
i
i
s
s
p
p
r
r
o
o
b
b
a
a
b
b
l
l
y
y
a
a
s
s
a
a
r
r
e
e
s
s
u
u
l
l
t
t
o
o
f
f
o
o
n
n
e
e
o
o
f
f
t
t
h
h
e
e
f
f
a
a
c
c
t
t
o
o
r
r
s
s
b
b
e
e
l
l
o
o
w
w
:
:
•
Brake air-gap setting incorrect
•
Poor rectifier supply connection
•
Use with phase converter
•
Dust, wood chipping etc. locking the mechanism
•
Blown or damaged rectifier
•
Worn or damaged parts
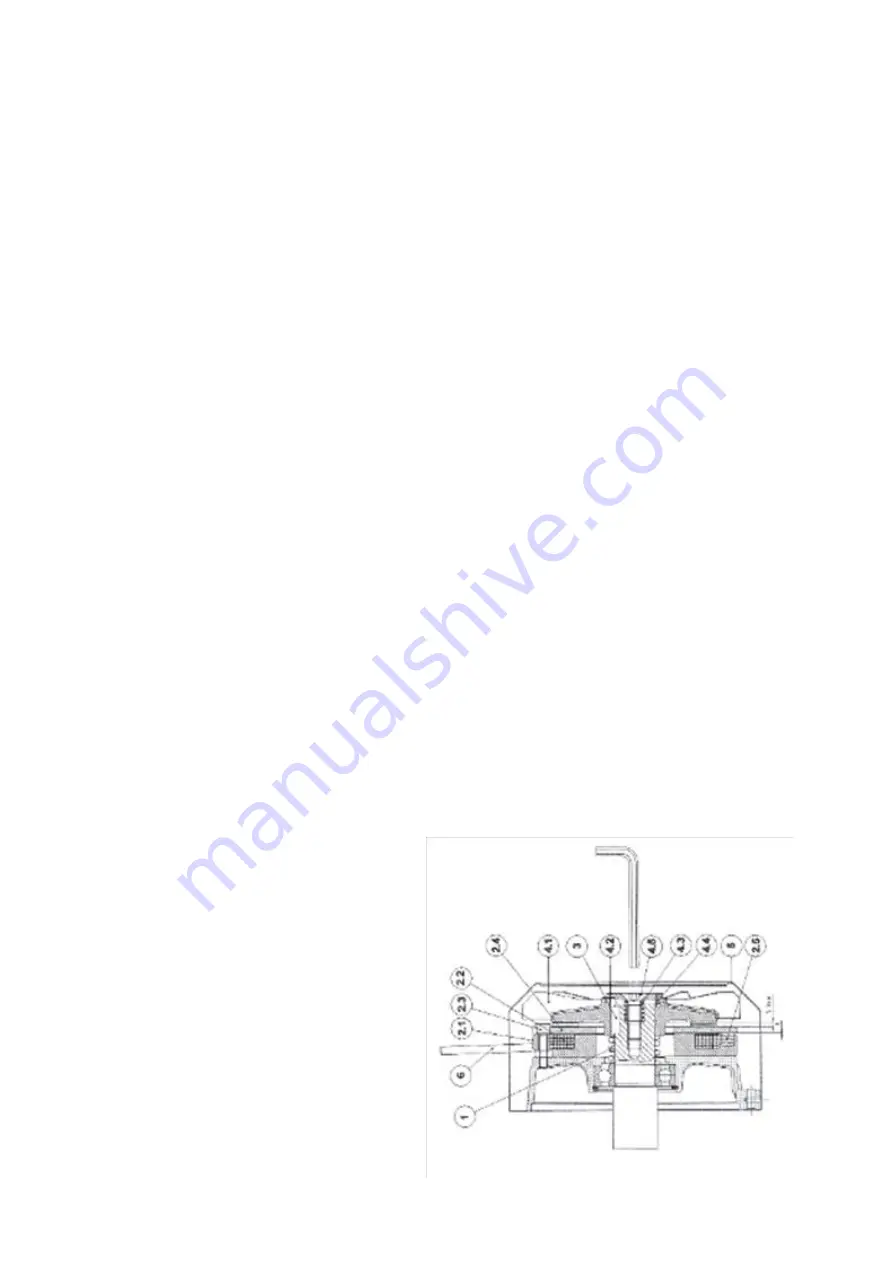
Air-gap Adjustment
1.
Tighten down the hexagon head bolt in the centre of the fan cover completely (without
forcing) then unscrew by one third of a turn (with the exception of the TE/TESH motors
which need adjusting by one half of a turn). For a more accurate setting remove the fan
cover & tighten down the hexagon head bolt, again without forcing, then unscrew until the
air-gap (between 2.1 & 2.3) is between 0.3mm & 0.5mm.
2.
We recommend the occasional use of an air jet to eliminate dust or other particles that may
have settled on the braking surface.
3.
After several air-gap adjustments verify that the thickness of the friction surface is no less
than 1mm, if it is then replace the fan with an original manufacturer’s part.
Parts List:
1 Main contrast spring
2.1 Magnet casing
2.2 Brake coil
2.3 Fastening screw
2.4 Mobile anchor / friction surface
2.5 Braking spring
3 Key
4.1 Fan
4.2 Washer with spigot
4.3 Auxiliary contrast spring
4.4 Elastic pin
4.5 Screw TSPEI UNI 5933
5 Fan cover
Summary of Contents for PT255
Page 36: ...36 14 0 PT255 Planer Thicknesser Parts Diagram ...
Page 39: ...39 ...
Page 40: ...40 ...


