background image


SecurteX MDVR Manual 


43 


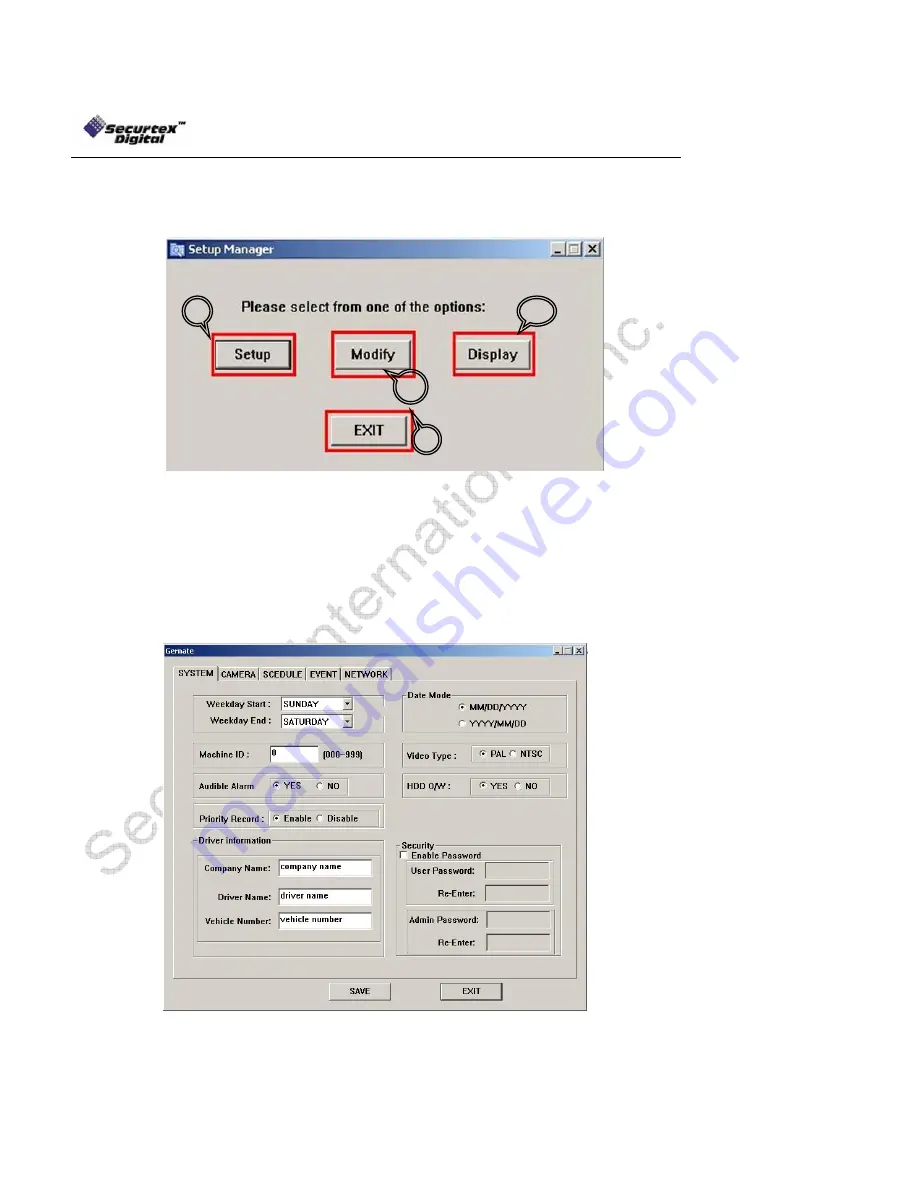
Setup Manager

 (Optional) 


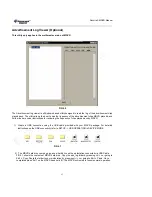
This utility is designed to change the MDVR setup without using the IR Hand held via USB Drive. 


Fig 5.0 

The Setup Manager is a Windows based utility designed to program the MDVR from the PC without using 
handheld IR via USB Drive. Follow the here under instructions for MDVR settings using a USB Drive. 
 

1)  Setup -> Allows user to go in the setup and create a new setup (binary) file to be uploaded to the 

MDVR via USB Drive 

2)  Modify -> Allows user to change an existence setup (binary) file   
3)  Display -> Allows user to view an existence setup (binary) file 
4)  Exit -> Exits the application 

 
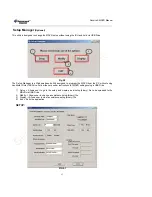
SETUP:


FIG 5.1 

4

Summary of Contents for MDVR

Page 1: ... User Manual Mobile Digital Video Recorder With Streaming Advertising Output User s Manual Copyright 1999 2006 SecurteX International Inc All Rights Reserved Firmware Version V6C A 01 031PRO Release Date 05 13 2006 ...

Page 2: ...his product Information and product specifications are subject to change without notice SecurteX Contacts Please promptly report corrections required in this document comments or requests for information to your SecurteX Digital dealer reseller or contact SecurteX Digital directly at SecurteX International Inc Telephone 937 312 1414 982 Senate Drive FAX 937 312 1418 Centerville OH 45459 Toll Free ...

Page 3: ...ation Figure 11 Input Bridal Video Audio IN 12 GPS Antenna 12 MDVR VISUAL ORIENTATION 13 Front Panel Layout Recording Module 13 Handheld Remote Control Functions 14 Handheld IR Controller Key Functions 15 Numeric Keypad 15 Setup Menu Navigation 15 Other Key Functions 15 Pan Tilt Zoom Function Controls 16 SYSTEM START UP SHUT DOWN 17 System Start Up 17 System Login for Setup Functions 17 Control of...

Page 4: ...etup 29 USB Operation 30 Driver Info 31 Camera Menu 32 Recording Schedule 33 Sensor Menu 34 System Information 35 SYSTEM FIRMWARE UPGRADE PROCEDURE 36 Hard Disk upgrade Instructions 36 USB Drive upgrade Instructions 36 HARD DISK FILE STRUCTURE 37 GPS OPERATION OPTIONAL 38 ADVERTISEMENT SEQUENCE GENERATOR OPTIONAL 39 ADVERTISEMENT LOG VIEWER OPTIONAL 41 SETUP MANAGER OPTIONAL 43 ...

Page 5: ...ly criteria to playback the events associated video only Automatic timer to resume the live display if the unit is idle for user defined timings MPEG 4 video compression for high quality low storage recording and playback User selectable settings for quality and audio record enable disable for each video channel 12v power supply for multiple devices such as cameras sensors relays and any other acc...

Page 6: ...ch the MDVR ground cable to the vehicle correctly to complete the power circuit g Install the MDVR in a dry location shielded from direct contact with excessive humidity and moisture rain or other sources of liquid spills Do not install on a recessed surface where liquids may accumulate or under surfaces where liquids may drip h Do not handle the MDVR with wet hands while standing in water or whil...

Page 7: ...e cutters and wire connectors Voltmeter MDVR Product Views Front View Rear View without connections Assembled Chassis Details Height 4 9 cm 1 93 inch Width 17 9 cm 7 04 inch Depth 24 5 cm 9 64 inch Weight 3 25 lb Recording Module Removable Component Height 4 6 cm 1 81 inch Width 17 9 cm 7 04 inch Depth 17 6 cm 6 92 inch Module Removal Clearance 16 5 cm 6 49 inch Installation Clearance except base ...

Page 8: ...SecurteX MDVR Manual 7 MDVR Dimensions ...

Page 9: ...uid spills Temp Do not install where unit temperature will exceed F140 F 60 C fall below 20 F 28 C or store the unit where temperatures rise above 175 F 80 C Avoid direct exposure to sunlight Ventilation Provide sufficient ventilation with a minimum of 6 inches cooling clearance to ensure proper operating temperature for the unit Vibration If necessary provide additional shock mounting to prevent ...

Page 10: ...lectrical ground point in the vehicle Make all connections to the rear of the mounting assembly Place the mounting assembly and permanently attach to the supporting structure using screws Slide the recording module on to the mounting assembly to ensure proper clearance Connect the provided bridals to your MDVR Connect power source and turn the vehicle ignition to test the unit Observe completion o...

Page 11: ...he ground to negative battery terminal There are two OUTPUT wires that can supply a number of dependant devices such as A monitor or cameras this power output provides a 12volt 500ma power source that can have a delayed shutdown that is controlled by the MDVR This will allow cameras to stay on after vehicle is turned off until the MDVR shutdown timer turns off the power feed Yellow 12volt 500ma po...

Page 12: ...SecurteX MDVR Manual 11 MDVR Installation Figure ...

Page 13: ...speed after negotiating with the satellite It takes approximately 3 5 minutes after boot up to start the negotiation process with the satellite to receive the signals When the negotiation is completed a graphical icon at the live display shows the availability of GPS If the negotiation fails an X is marked on the graphical icon showing the failure of satellite communication Connect the GPS antenna...

Page 14: ...nal sensor trigger hard disk failure and video loss POWER Input power status LED ON confirms that unit is powered ERR Error status with USB connection LED blinks while USB connection problem occur ACC USB connection status LED blinking indicates data transfer using USB port CF USB Drive status LED ON indicates that USB Drive is inserted and the data is accessible 2 IR Receiver Lens Please ensure t...

Page 15: ...1 output or a regular monitor VGA Numeric Input Keys Use the numbers to input values in the system setup screen or switch through the channels in live and playback Plus and Minus is used to increase setup values one by one Navagation Arrows Use the ARROW keys to move between selections input fields and icons Press ENTER to select and EXIT to return Next and previous is also used to increase or dec...

Page 16: ...use LOGIN LOCK or SETUP key to enter the user setup POWER The Power button can reset the DVR in to sleep mode unit will stop recording while in the sleep mode VGA Switch the output mode to VGA VIDEO Switch back from VGA to composite output RECORD STOP Used to start or stop the recording manually The recording schedule has to be disabled for the manual recording to work Swapping between multi chann...

Page 17: ...aying back Select the desired file and start to play Press GOTO button and input the desired time Select START to jump to the specific time NEXT Increase volume while playback if audio is recorded or multimedia playback PREV Decrease volume while playback if audio is recorded or multimedia playback REW Rewinds the video while playback X2 and X 4 modes available FWD Fast forward the video while pla...

Page 18: ...ress the VIDEO button on the IR to switch to composite monitor output Please see a list of factory default settings under System Default Settings explanation page System Login for Setup Functions The unit have password authorization enabled in order to enter setup The IR will not response to any commands until SETUP or LOGIN key is pressed for validating the user authority of the MDVR To enter a p...

Page 19: ... sales associate There is no hardware update required for the multimedia features Multimedia version In the multimedia version MDVR has the capability of performing Digital Video Recording along with the advertisement movies and music without interrupting the basic purpose of the surveillance system With the multimedia version the User Interface will be same as Fig 2 0 MDVR system layout Press SET...

Page 20: ...vertising menu Delete the file Select the file to delete and press the right direction key The screen will show a confirmation dialogue as below Select NO and press ENTER to cancel the delete operation Select YES and press ENTER to delete the file you have selected Note that once the file is deleted it cannot be recovered Press EXIT to return to the main menu Peps Coke Nike Displays the advertisin...

Page 21: ...me the playback Press EXIT return to the music menu Delete the file Select the file to delete and press the right direction key Select NO and press ENTER to cancel delete operation Select YES and press ENTER to delete the file you have selected Note that once the file is deleted it cannot be recovered Press EXIT to return to the main menu Music Music file name Size 5 735KB Displays the music file ...

Page 22: ... is deleted it cannot be recovered Press EXIT to return to the main menu NOTE The movies and advertisement contents require the DivX codec formatted files Please confirm that the uploaded media files are in DivX codec for the correct operation Details of supported file formats are listed below Folder Name Contents Description Remark Ads List the contents of the advertisement files Supported format...

Page 23: ... last 2 digits of the year are changeable Ex 03 for year 2003 Month Range is 01 12 for the corresponding month number Day Range 01 31 for the corresponding day of the recording Hour Range 00 23 for the appropriate hour to begin the search Minutes Range 00 59 to narrow the search Press Setup on the hand held IR remote to get the calendar The yellow color indicates the days of recording The blue col...

Page 24: ...er can also switch channels of video by pressing the desired number of channel on the handheld IR numeric Keypad User can start to download the video on a USB Drive while viewing the playback Follow the here under procedure to perform the operation Stop the recording of the DVR by going in the setup Schedule Insert the FAT 32 formatted USB Drive for the CF formatting instructions please review the...

Page 25: ...12 05 FDOOR METER SPEED REAR PANIC DDOOR Page Down Page Down Page Down Page Up Page Up Page Up Fig 2 1 While the video is playing back pressing Enter on the IR will show the associated text on the channel and pressing Enter again will hide the text giving a clear picture to view The text on the video shows the following fields Driver ID Vehicle ID Camera label GPS coordinates if available Date Tim...

Page 26: ...gh the options Date DD MM YYYY Enter with number keys Time HH MM SS Enter with number keys Date Mode US or Int l Press ENTER to switch between the date patterns Weekend Start Day Name Press ENTER to advance days Weekend End Day Name Press ENTER to advance days Record File Size Press ENTER to scroll through the settings The record file size is used to break down the recording clips in to smaller ti...

Page 27: ...ENTER to enable or disable Priority Record Priority Recording records one frame every two seconds when no external sensor is sensed by the unit When a sensor triggers through a sensor input the unit automatically starts to record up to the user selected frames second on all cameras User can select between the timings before and after the event for high frame rate recording Use the Numeric key pad ...

Page 28: ...gs using the Setting HDD Format to resume recording Scroll to APPLY and press ENTER to save the new settings g HDD Format There are two options to chose from Format HDD Formats the unit Hard Disk Drive Format USB Drive Formats the USB thumb drive WARNING Selecting START on this setting will erase all recorded video on the unit or the data on USB drive Press ARROW keys to either choose START reform...

Page 29: ... rights and a User with only playback rights can be created b Press ENTER to switch between YES and NO c Press the down ARROW key to highlight the User password entry line Enter the desired password and confirm The password must be EIGHT NUMBERS long Use the NUMERIC keypad on the handheld to input the values d Press the down ARROW key to highlight the administrator password entry line Enter the de...

Page 30: ...W YES Network IP Address 192 168 0 100 Subnet Mask 255 255 255 0 Gateway 192 168 0 1 Security Yes Driver Info Company Name XYZ Vehicle Number 123 Driver Name ABC Camera Camera 1 Label No Label Quality 1 Audio No Camera 2 Label No Label Quality 1 Audio No Camera 3 Label No Label Quality 1 Audio No Camera 4 Label No Label Quality 1 Audio No Camera Num 04 Rate FPS 30 Resolution CIF Time Insert ON Out...

Page 31: ...ile description of the MDVR hard drive layout please look at the chapter labeled as Hard Disk File Structure towards the end of the manual HOST MODE Using the ENTER Key on the handheld IR select the HOST MODE The HOST MODE allows an external USB jump drive to be connected Once the connection is established all the contents of the jump drive is automatically uploaded to the MDVR ads folder For a co...

Page 32: ... to select the option for modification Press ENTER at the highlighted line The screen will pop up a text entry keyboard Use Arrows to choose characters press ENTER to type Press APPLY and EXIT to return to the previous menu Press EXIT to return to the SETUP list Press the RIGHT ARROW key to change control to the CAMERA tab Press ENTER to open the Camera configuration screen ...

Page 33: ...s selected channels 1 2 and 3 will be enabled If 04 is selected channels 1 2 3 and 4 will be enabled Recording Rate Press ENTER to choose between 2 4 8 15 or 30 frames second for NTSC 1 3 6 12 or 25 frames second for PAL Resolution Select between CIF and HD1 Time Insert Press ENTER to switch between ON and OFF to embed time date in the video Output Mode The MDVR is capable of displaying multimedia...

Page 34: ...RIGHT ARROW key to enter values using the NUMERIC keypad into any time field Schedule 1 is the first of two possible ON OFF cycles that apply to any day in the period chosen under Date Schedule 2 is the second cycle for any day in the period There is no need to overlap times of Schedule 1 and Schedule 2 Ending at 23 59 of one day and beginning with 00 00 of the next day will provide continuous rec...

Page 35: ...at 1 frame per 2 seconds even when the sensor triggers The sensor entry will be made in the option without jumping to the high frame recording Low Speed Limit If the vehicle exceeds the low speed limit MDVR will start an audible alarm until the vehicle slows down the limit High Speed Limit If the vehicle exceeds the high speed limit MDVR will trigger the alarm signal ALM LED turn on until the Admi...

Page 36: ...r the log information of the DVR Clear Event Log Ads Log select this option and press Enter the DVR will prompt a confirmation message Select YES and press Enter This will clear the log file from the unit Select NO to cancel to clear the log file All Logs select this option to clear both Event Log and Advert Log file simultaneously WARNING The log entries in the EVENT are also a part of the log fi...

Page 37: ...ve upgrade Instructions USB Thumb Drive can also be used to update the firmware in the unit Please follow the instructions to update the flash using the USB drive a Insert a USB drive into the USB slot of your Windows PC Drive letter appears b Using Windows Explorer format the USB drive as FAT32 format All the data will be permanently erased from the USB drive c Copy the new firmware romfs dvr fil...

Page 38: ...l the advertisement playback history by MDVR Use log viewer application to open this file provided by SecurteX Movie Contains movie files Supported format MPEG4 MPEG2 MPEG1 File extension VOB MPG AVI DAT Music Contains music files Supported format WAV MP3 WMA Record Contains DVR recordings Requires client software to playback video from PC All the record file are watermarked for authenticity Time ...

Page 39: ...g station 2 Once connected properly and placed outside the vehicle facing towards the sky you will find the GPS icon display on the surveillance screen as shown 3 The GPS data will appear on the screen as N for longitude W for latitude Vehicle Seed 4 The values of GPS are embedded on the video and could be retrieved by using the video playback function and pressing Enter key on the hand held while...

Page 40: ...nd select the desired file To select multiple files hold down the CTRL key on your keyboard and select desired files The application only accepts AVI MPG VOB DAT file formats 2 Once the files are added to the Advertisement List select the first file to be played back in the advertisement sequence and use 2 button to move the file in the Playback Sequence The advertisement clips will be played in t...

Page 41: ...ave it to the thumb drive along with the required advertisement contents Establish a USB connection in Host Mode with your MDVR Follow the instructions under SETUP USB OPERATION for more details on establishing the USB connection in Host Mode The files would automatically be copied upon successful connection with thumb drive Once the data is copied indicated by the status bar exit the USB MODE scr...

Page 42: ...uency of clips played back by MDVR 1 Create a USB connection using the USB cable provided with your MDVR package For detailed instructions on the USB connectivity refer to SETUP USB OPERATION in DEVICE MODE FIG 4 1 2 The MDVR hard drive comes up as a new hard drive on the workstation connected via USB Cable FIG 4 1 shows the contents of MDVR hard drive Copy the ads_log folder by pressing ctrl c or...

Page 43: ...sired advertisement clip to perform the analysis the files would have the extension of raw To select multiple files hold on the ctrl key and left click on the files Once the files are selected click on Open FIG 4 3 4 Click on the desired files to see their frequency of play back The application displays year month day hour and minutes when the advertisement clips were played back by MDVR A sample ...

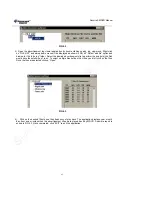
Page 44: ...e MDVR from the PC without using handheld IR via USB Drive Follow the here under instructions for MDVR settings using a USB Drive 1 Setup Allows user to go in the setup and create a new setup binary file to be uploaded to the MDVR via USB Drive 2 Modify Allows user to change an existence setup binary file 3 Display Allows user to view an existence setup binary file 4 Exit Exits the application SET...

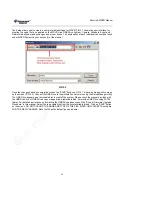
Page 45: ... will come up on the screen FIG 5 2 Connect the USB Drive to the workstation which is running the Setup Manager utility The USB Drive appears as a removable disk in most of the system Please check the manual provided with the USB Drive if your USB Drive does not appear as a removable disk Format the USB Drive using FAT32 format For detailed instructions on formatting the USB Drive please consult t...

Page 46: ...any changes desired When the changes are completed save the setup bin file on the USB Drive and apply the new settings on the MDVR DISPLAY The display feature allows the user to see the contents of the setup bin file It does not allow the user to make changes or create a new setup bin file EXIT The exit option allows the user to exit the application A confirmation message will be displayed Click Y...

Page 47: ...SecurteX MDVR Manual 46 SecurteX Digital 982 Senate Drive Dayton OH 45459 Phone 937 312 1414 Fax 937 312 1418 http www securtex com ...

Reviews: