15
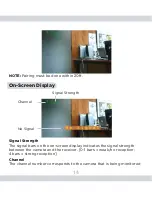
or recorded. You can toggle between channels by simply pressing the
“CH” button located on the receiver.
No Signal
A “NO SIGNAL” notification will be displayed (followed by a melody)
whenever the user toggles to a channel with no camera matched to it or
if the camera and receiver are not successfully matched.
NOTE:
The “Channel” and “Signal Strength” icons will turn orange during
the no signal warning.
Operation
Adding and Pairing camera to the receiver
To match multiple cameras to your receiver (4 max), simply switch
the receiver to a channel not being used (no signal), and press both
code-matching buttons on the camera and the receiver simultaneously
(within 20ft recommended). The camera image will immediately
be displayed on the screen after successfully being matched to the
receiver. A “NO SIGNAL” notification will be displayed, followed by a
melody if you switch the receiver to a channel that does not have a
camera matched to it.
NOTE:
A “NO SIGNAL” notification will be displayed, followed by a
melodyBe sure to pair the add-on cameras with 20 feet of the receiver.
A simple transmission test to ensure both cameras and receiver are
functioning before applications.
Switching between channels/cameras
You can switch between cameras by manually pressing on the “CH”
button located on the receiver. A “NO SIGNAL” notification will be
displayed, followed by a melody if you switch the receiver to a channel
that does not have a camera matched to it.
NOTE:
Channel can be changed by manually pressing on the “CH”
button; auto channel switching is not supported.

