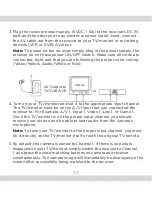
AV Output to
TV/DVR/VCR
Input
or
13
3. Plug the receiver power supply (5VDC, 1.5A) to the receiver’s DC IN
port and the other end to an electrical power outlet. Next, connect
the AV cable out from the receiver to your TV/monitor or recording
devices (VCR or DVR) AV input.
Note:
To power on the receiver, simply plug in the power supply, the
receiver do not have power ON/OFF switch. Make sure all cords are
connected, tight and that you are following the proper color coding
(Video/Yellow, Audio/White or Red)
4. Turn on your TV/monitor and set it to the appropriate input channel.
The TV/monitor must be on the A/V Input that you connected the
receiver to. For Example; A/V 1, Input 1, Video 1, Line 1, or Game 1.
Once the TV/monitor is on the proper input channel, you should
receive your picture and be able to hear audio from the camera’s
microphone.
Note:
To tune your TV/monitor to the proper input channel, you must
do it directly on the TV/monitor itself or with the original TV remote.
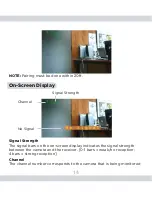
5. By default, the camera is paired to Channel 1. If there is no picture
displayed on your TV/monitor, simply switch the receiver to Channel
1, and press the code-matching buttons on camera and receiver
simultaneously. The camera image will immediately be displayed on the
screen after successfully being matched to the receiver.


