33
www.securemme.it
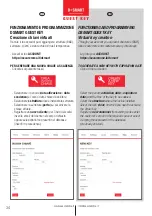
IMPOSTAZIONE ACCOUNT
GESTIONE TRAMITE ACCOUNT
Per creare il tuo account registrati sul sito
Securemme/Dsmart (https://securemme.it/dsmart/)
compila i dati richiesti e crea il tuo account seguendo la
procedura guidata attivando la tua area riservata.
1.
Clicca sul pulsante rosso
D-SMART
Make your lock
motorized.
2.
D-smart Guest key, clicca sul pulsante rosso
ACCEDI
AL SOFTWARE.
3.
Clicca sul pulsante rosso
CREA ACCOUNT.
Una volta inseriti i dati richiesti, puoi procedere con la
programmazione desiderata. Le credenziali indicate
andranno inserite nell app per l’ abbinamento porta.
CONFIGURAZIONE E ABBINAMENTO SMART LOCK
CON DSMART GUEST KEY
Se non hai ancora scaricato l’ applicazione, scarica l’app
Dsmart 2.0 presente negli store Ios e Android. Accendi
il bluetooth dello smartphone e apri l’app Dsmart 2.0.
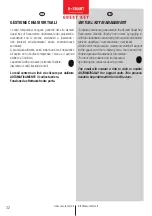
Entra nella tua app Dsmart 2.0, clicca su in opzioni
disponibili ( ), clicca impostazioni seleziona registra
dispositivo e inserisci le tue credenziali (quelle inserite
nel sito).
Seleziona chiavi temporanee e procedi a configurare.
(Vedi pag. 17-18)
IT
EN
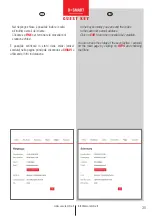
ACCOUNT SETTING
MANAGEMENT VIA ACCOUNT
To create your account, register on the Website
Securemme/Dsmart (https://securemme.it/dsmart/)
fill in the required data and create your account following
the guided procedure by activating your private area.
1.
Click on the red
D-SMART
Make your lock button
motorized.
2.
D-smart Guest key, click on the red
SIGN IN
button
TO THE SOFTWARE.
3.
Click on the red button:
CREATE ACCOUNT.
Once you have entered the required data, you can proceed
with the desired programming. You will have to insert
the given credentials in the app for the pairing of the
lock.
SMART LOCK CONFIGURATION AND PAIRING WITH
DSMART GUEST KEY
If you haven’t downloaded the application yet, download
the app Dsmart 2.0 that you can find in Ios and Android
stores. Activate the bluetooth of your smartphone and
open the Dsmart 2.0 app. 3.9 Enter general settings,
select register device and enter your credentials (the
same you used to log into the website).
3.10 Select temporary keys and proceed to configure.
(See page 18)


