


On-Screen Display Manual
5
SECO-LARM
U.S.A., Inc.
Special Menu Diagram:
SPECIAL MENU
DEFAULT
SETTINGS
SETTING OPTIONS
1)
CAMERA TITLE
OFF
ON / OFF
2)
DIGITAL–EFFECT
OFF
FREEZE / MIRROR / D-ZOOM / GAMMA / NEG. IMAGE
3)
MOTION
ON
AREA SELEC: AREA 1~4
AREA DISPLAY: ON / OFF
LEFT / RIGHT: 0~100 Level Adjustable
WIDTH: 0~100 Level Adjustable
TOP / BOTTOM: 0~100 Level Adjustable
HEIGHT: 0~100 Level Adjustable
SENSITIVITY: 0~40 Level Adjustable
MOTION VIEW: ON/OFF
RETURN
4)
PRIVACY
ON
AREA SELECT: AREA 1~8
AREA DISPLAY: ON / OFF
LEFT / RIGHT: 0~100 Level Adjustable
WIDTH: 0~100 Level Adjustable
TOP / BOTTOM: 0~100 Level Adjustable
HEIGHT: 0~100 Level Adjustable
SENSITIVITY: 0~40 Level Adjustable
COLOR: Select between 15 colors.
RETURN
5)
RETURN
Save the SPECIAL menu and exit
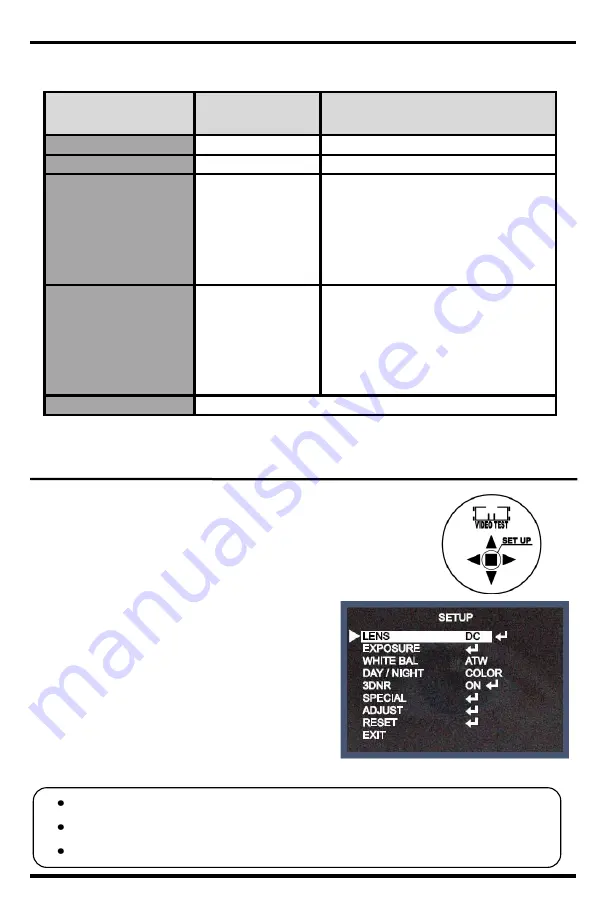
Menu Setup:
Menu items can be selected by using the OSD (On Screen Display)
buttons on the camera.
1.
Press the SET UP button.
The SETUP menu will be displayed on the
monitor.
2.
Move to and select the required function using
the UP and DOWN buttons.
3.
Change the menu settings using the LEFT
and RIGHT buttons.
Available values are displayed by pressing
the LEFT and RIGHT buttons.
4.
After choosing the setting, move the arrow
indicator to EXIT and press the SET UP
button to exit.
Note:
Move to available options by moving the
arrow to the desired feature.
A submenu is available where the option reads
.
The submenu is not available where the option reads - - - -.


