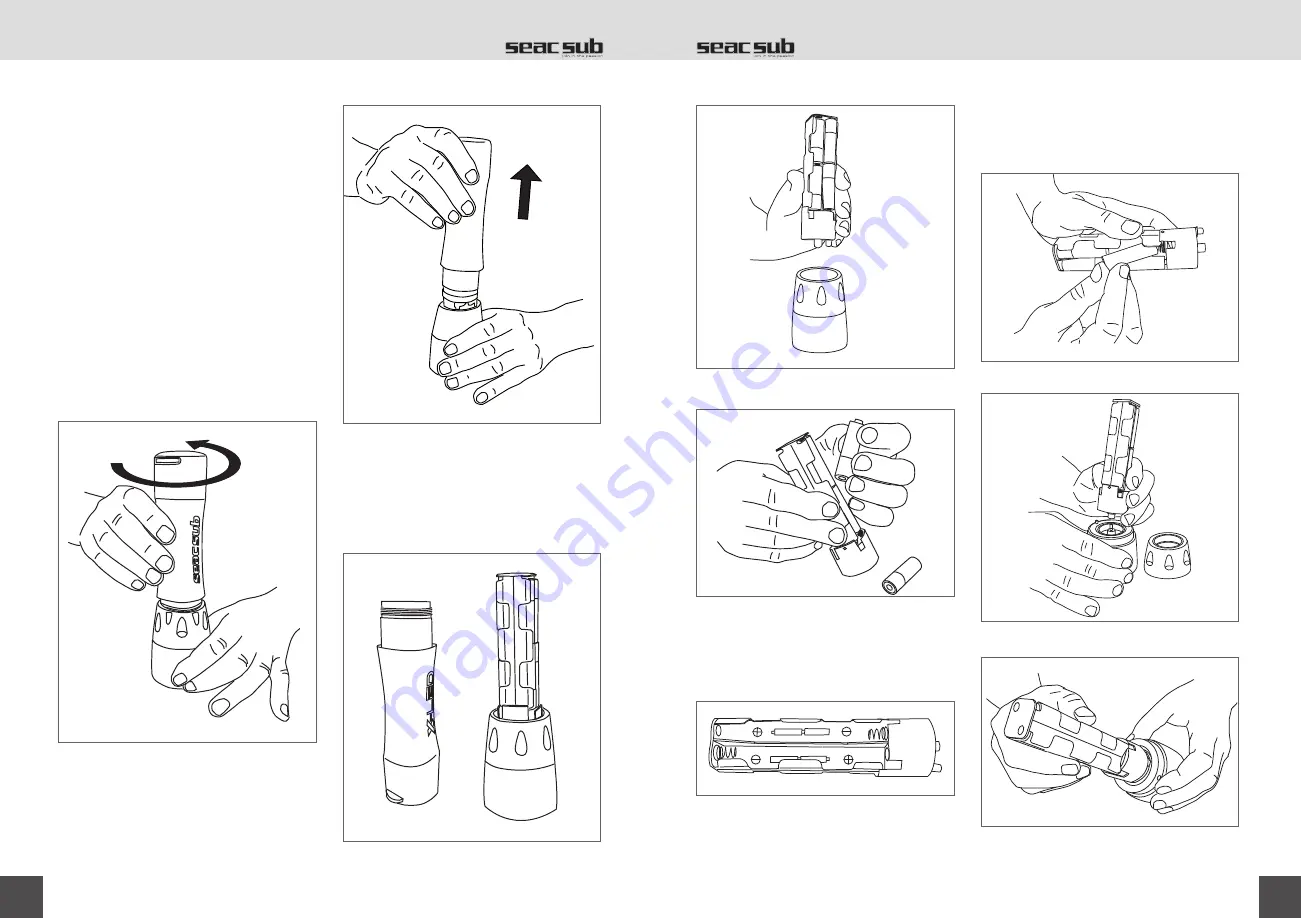
Drawing 4 - Removal of the battery casing
Drawing 5 - Replacement of dead batteries
Insert the new batteries following the indica-
tions for polarity on the casing (drawing 6).
Drawing 6 - Diagram of polarity markings on battery
casing
Once the insertion is complete (drawing 7), in-
sert the head of the battery casing into the
space in the head of the torch. (drawings 8-9)
Drawing 7 - Correct insertion of new batteries
Drawing 8 - Correct insertion of the battery casing
Drawing 9 - Insertion of the battery casing in the
reflector-glass group (torch head)
ENGLISH
17
Use with rechargeable batteries
It is possible to use readily available, 1.2V
rechargeable batteries with their own battery
charger. In this case, follow the recharging in-
structions carefully. Using rechargeable batter-
ies does not guarantee the autonomy and light
power declared in the technical specification.
Battery replacement
Battery replacement for the X-LED Torch re-
quires a simple procedure of disassembly and
reassembly.
Here are step-by-step instructions:
Holding the head of the torch in your left hand
and the body in your right hand, unscrew the
torch casing counter-clockwise (drawing 1-2).
Drawing 1 - Opening of the torch by unscrewing
counter-clockwise
Drawing 2 - Unscrew
Once unscrewed, from the head (drawing 3),
remove the battery casing (drawing 4) and be-
gin to remove the batteries to be replace
(drawing 5).
Drawing 3 - Diagram of open torch
ENGLISH
16


