21
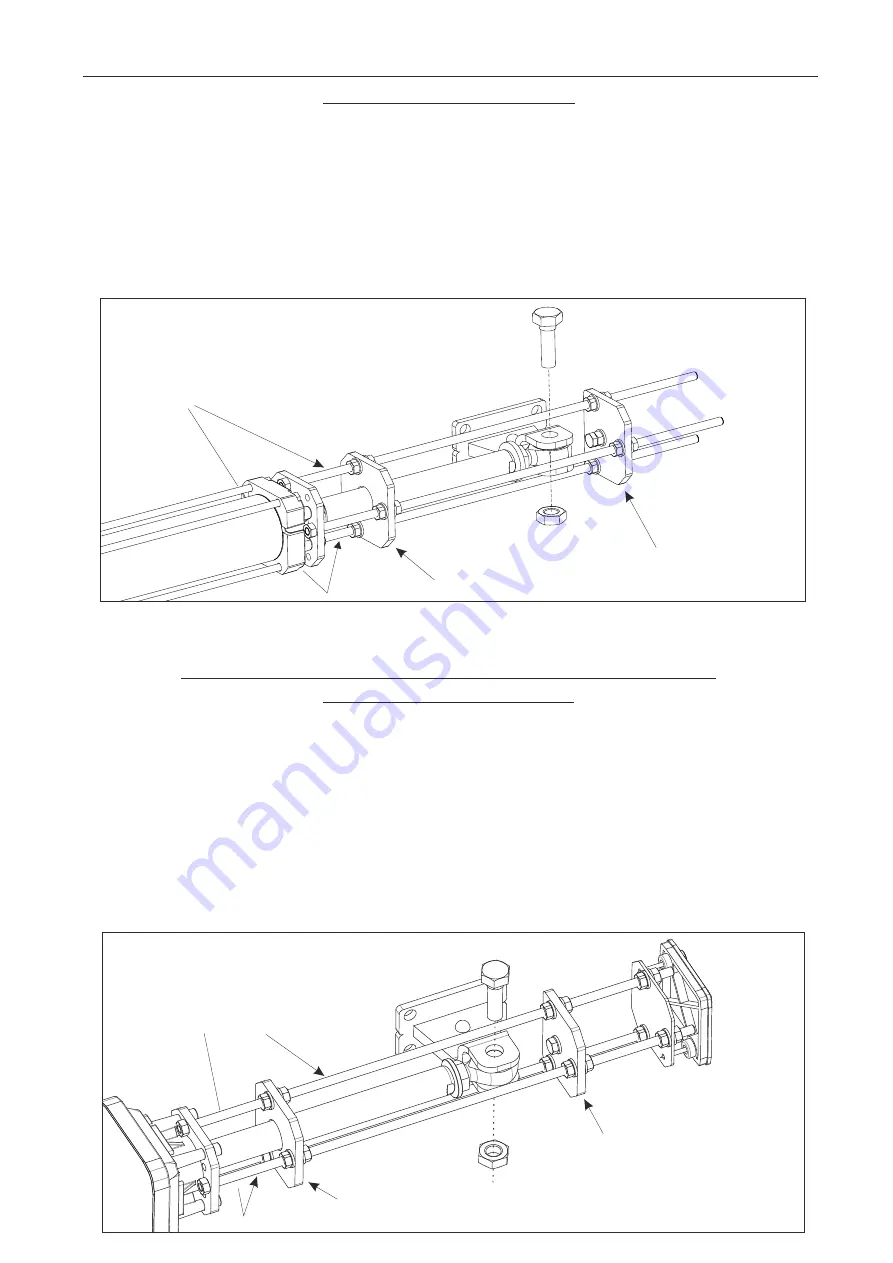
Disc 1
Disc 2
Rods parallel to the gate
INSTALLATION OF THE FULL TANK POSITIVE STOPS
(Accessories on request)
- Release the unit (as in Fig. 56 to 61)
- Make the shaft come out for ¾ of its stroke.
- Put the positive stops into the front flange of the unit with the two tie rods (of the three present on the stops)
which are parallel to the gate (Fig.32).
- Fix the positive stops with the provided screws.
- Insert the ball joint after having installed the stops.
- At this point couple the shaft to the front bracket.
- To adjust the positive stops in opening act on disk 1 and in closing act on disk 2.
Attention: The mounting of the mechanical positive stops does not cause the reduction of the shaft
stroke.
1) Release the unit (as in Fig. 56 to 61)
2) Let the rod come out about 3/4 of its run
3) Put the limit switch stops on the front flange of the unit with the two rods (of the three which are
present on the stop) which are in parallel to the gate (Fig. 31)
4) Fix the stop with the two included screws .
At this point hook the rod on the front fixation
5) To adjust the stop in opening act on disc, and in closing on disc 2.
Attention : the mounting of the mechanical stop does not cause the reduction of the stroke
HALF TANK 270-390 KIT MECHANICAL STOPS
(optional)
Rods in parallel to the gate
Disc 2
Disc 1
Fig. 31
Fig. 32
INSTALLATION OF THE HALF TANK MECHANICAL LIMIT SWITCH STOPS
(Accessories on request)
FULL TANK 270-390 KIT MECHANICAL STOPS
(optional)


