12
13
7.
The default pressure (130 mbar) will appear on the display.
8.
Press the AUTO CYCLE button. After a few seconds, the inflator will start inflating, and it will
automatically stop once the target pressure is reached.
7.
HOW TO INFLATE (GE 900)
1.
Connect the inflator to the power supply using the provided cable. GE 900 is equipped with a plug
for direct connection to 230 V (or 120 V, depending on the model).
2.
Connect the air hose to the outlet port (
Fig. 1, Item 2
).
3.
Connect the other end of the hose to the inflation valve of the inflatable unit.
It is important to
choose the right fitting for the valve and to check that no air leaks are detected.
Make sure that
there are no kinks, obstructions or leaks in the air path.
4
.
To start inflating, toggle the power switch to the ON position (
Fig. 1, Item 1
).
5.
Once the pressure of the inflatable item reaches the appropriate level, switch off the inflator.
Note: the inflator does not stop automatically
8.
HOW TO INFLATE (GE 900 ARS)
1.
Connect the inflator to the power supply using the
provided cable. GE 900 ARS is equipped with a plug for direct
connection to 230 V (or 120 V, depending on the model).
2.
Connect the air hose to the outlet port of the
inflator(
Fig. 2, Item 2
).
3.
Connect the other end of the hose to the inflation valve
of the inflatable unit.
It is important to choose the right
fitting for the valve and to check that
no air leaks are present.
Make sure that there are no kinks, obstructions or leaks in the air path.
4.
Connect one valve of the inflatable item to the connector of the inflator pressure pneumatic control
system (
Fig. 2, Item 6
) using a PU (or PA) hose with a diameter of 6 mm (maximum length 5 m).
Note: The pressure control hose and the 6 mm valve adaptor are not included!
5.
To switch the inflator on, toggle the power switch to the ON position (
Fig. 2, Item 1
).
6.
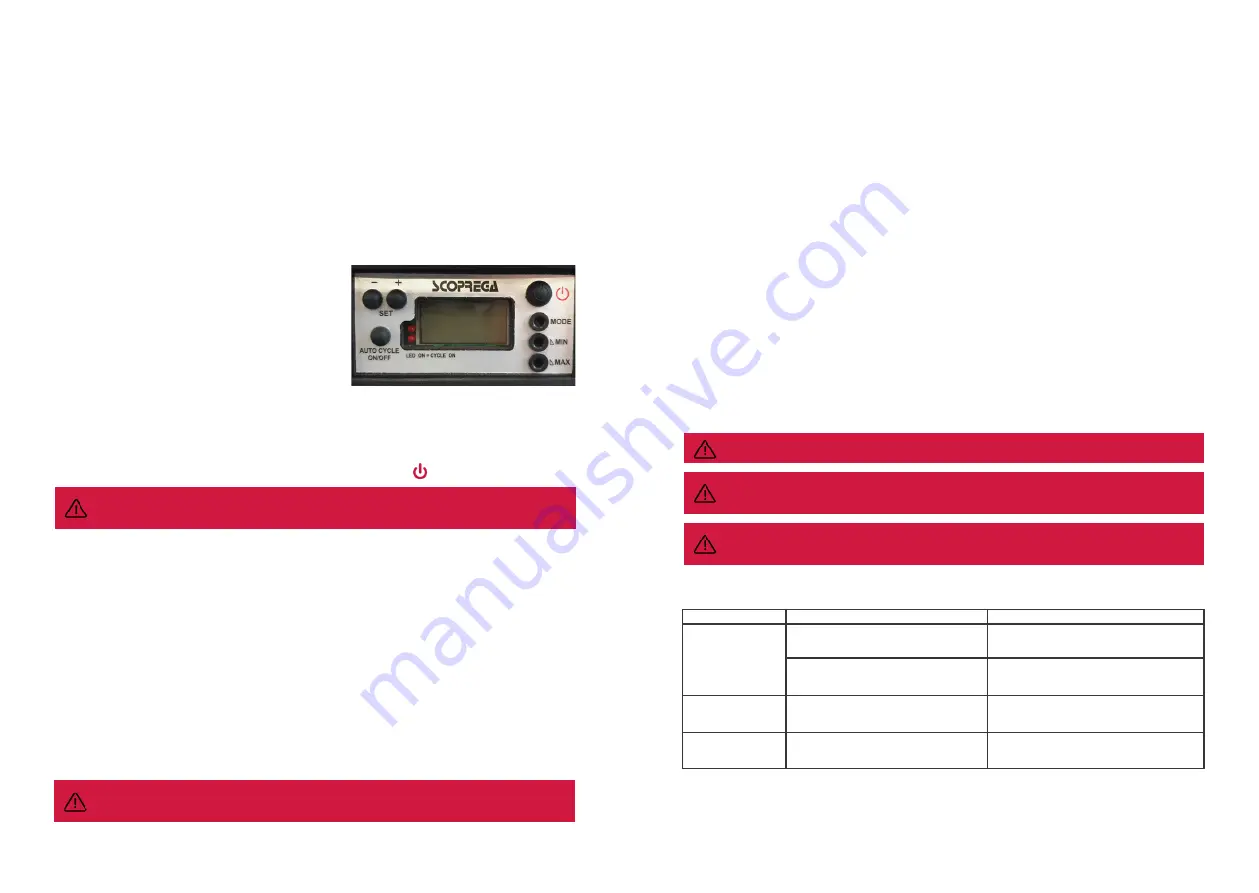
Press the ON-OFF button on the display (in the upper right corner).
WARNING: CHECK THAT THE PRESSURE CONTROL HOSE IS ALWAYS CONNECTED TO THE INFLATOR
AND TO THE INFLATABLE ITEM
1.
Connect the power cable to the socket.
2.
Toggle the start switch to the ON position.
3.
Press MODE to select the unit of measurement (mbar, psi, kPa, bar): press the MODE button
multiple times, until you find the desired unit.
4.
In order to modify the inflation pressure, use the SET+/SET- buttons: after pressing one of them for
2 seconds, the display starts blinking. Afterwards, press the SET+/SET- buttons to modify the pressure.
After 5 seconds, the display stops blinking and the new pressure is memorized.
Note: the maximum
pressure for GE 900 ARS is 200 mbar.
9.
HOW TO MODIFY THE PRESSURE (GE 900 ARS)
TAKE INTO ACCOUNT THE MAXIMUM AND SUITABLE INFLATION PRESSURE OF THE INFLATABLE UNIT.
WARNING, IN THE EVENT OF OVERHEATING DUE TO AN EXTENDED USE, THE INFLATOR WILL STOP
AUTOMATICALLY TO AVOID DAMAGE TO ITS COMPONENTS.
TAKE INTO ACCOUNT THE MAXIMUM AND SUITABLE INFLATION PRESSURE OF THE INFLATABLE UNIT.
THE INFLATOR CAN BE DAMAGED BY SAND, DUST OR WATER GETTING INSIDE THE INLET PORT. THIS
WILL CAUSE OVERHEATING AND DAMAGE TO THE INTERNAL COMPONENTS. SHOULD THIS BE THE CASE,
IMMEDIATELY SWITCH THE INFLATOR OFF.
11.
TROUBLESHOOTING
PROBLEM
POSSIBLE CAUSE
POSSIBLE SOLUTION
The inflator does
not start
The inflator does
not inflate/deflate
Cable not connected properly.
Hose wrong connection.
Damaged cable.
Connect the cable.
Connect the air hose to the
correct port.
Contact a SCOPREGA service
centre.
Possible electronic fault.
Contact a SCOPREGA service
centre.
Low pressure
The recommended accessories when using the inflator are the original SCOPREGA ones.
The use of any accessory not recommended for this inflator can be dangerous.
1.
Connect the hose to the suction port (
Fig. 1 and 2, Item 3
).
2.
Connect the hose to the inflatable unit valve.
It is important to choose the right fitting for the
valve and to check that no air leaks are detected.
Make sure that there are no kinks, obstructions
or leaks in the air path.
3.
To switch the inflator on, toggle the power switch to the ON position (
Fig. 1 and 2, Item 1
).
4. GE 900 ARS ONLY: to start deflating, press the ON-OFF button on the display
5. Once deflation has been completed, in order to turn the inflator off, toggle the power switch to the
OFF position.
Note: The inflator does not stop automatically.
10.
HOW TO DEFLATE (GE 900 and GE 900 ARS)
12.
ACCESSORIES
5.
To select the MIN-MAX pressure range, use a thin and rigid tool, with a diameter of maximum 2 mm,
keeping one of the buttons pressed for 3 seconds. Once the display shows the pressure values, use the
SET+/SET- buttons to set the pressure minimum tolerance value (below which the filling gets activated)
and the maximum value (above which the emptying gets activated) between which the inflatable
item pressure is to be kept (the range may vary from 30 to 70 mbar for both minimum and maximum
values). The value gets memorized by the inflator after 5 seconds of blinking.
Example: if you wish to set a nominal pressure of 180 mbar and the value of minimum tolerance is set
to 50 mbar, when the pressure of the inflatable item goes below 130 mbar, GE 900 ARS gets activated
and brings the nominal pressure of the inflatable item to 180 mbar.
6.
Once the setup is completed, press the AUTO CYCLE button. The inflator will activate after a few
seconds, and will automatically stop once the set pressure is reached.
Summary of Contents for GE 900
Page 17: ...32 ...


