background image


5


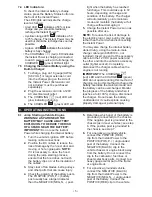
7.4  LED Indicators:

To check the internal battery’s charge 

status, press the Battery Status button on 

the front of the Instant Power.

The LED lights will indicate the charge 

level as follows:

• A red LED 

 indicates a 50% or less 

charge and you should immediately 

recharge the Instant Power™.

• A yellow/orange LED 

 indicates a 50 

to 75% charge. The Instant Power may be 

used but should be recharged as soon as 

possible.

• A green LED 

 indicates the internal 

battery is fully charged.

• The CHARGING 

 (red) LED indicates 

the Instant Power is charging (connected 

to an AC power source.) At full charge, the 

CHARGED 

 (green) LED will light.

7.5  Charging the Internal Battery using the 

Built-In Charger:

1. 

To charge, plug an 18 gauge (AWG) 

[0.82 mm

2

] or larger extension cord 

into the charger plug on the side of 

the Instant Power. (Extension cord 

not included; must be purchased 

separately.)

2. 

Plug the extension cord into a 120V 

AC electrical wall outlet. 

3. 

The CHARGING 

 (red) LED will 

glow indicating charging.

4. 

The CHARGED 

 (green) LED will 

light when the battery has reached 

full charge. This could take up to 72 

hours, depending on the age and 

condition of the battery. The charger 

will automatically go into maintain 

mode and maintain the battery at full 

charge without damaging it.

5. 

Charge the Instant Power as soon as 

possible after use.

NOTE:

 To reduce the risk of damage to 

the electric plug or cord, pull by the plug 

rather than the cord when disconnecting 

the Instant Power.

You may also charge the internal battery 

while driving, using the male-to-male 

charger cable (p/n 94500109 – not 

included). Insert one end of the accessory 

cable into the 12V DC power outlet and 

the other end into the vehicle’s accessory 

outlet (lighter socket). Completely 

disconnect the charger cable when the 

engine is not running. 

IMPORTANT!

 The CHARGING 


(red) LED and the CHARGE 

 (green) 

LED do not operate during this method of 

charging. Using this method to charge the 

battery overrides the maintain mode and 

the battery can be overcharged. Monitor 

the progress of the battery and when it 

reaches a full (100%) charge, disconnect 

the charger. Do not leave the battery 

unattended or it could explode causing 

property damage or personal injury. 

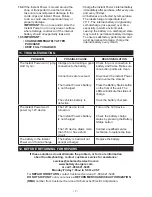
8.  OPERATING INSTRUCTIONS

8.1  Jump Starting a Vehicle Engine

WARNING! A SPARK NEAR THE 

BATTERY MAY CAUSE A BATTERY 

EXPLOSION. TO REDUCE THE RISK 

OF A SPARK NEAR THE BATTERY:

IMPORTANT: 

Do not use the Instant 

Power while charging the internal battery.

1. 

Turn the vehicle’s ignition OFF before 

making cable connections.

2. 

Position the DC cables to reduce the 

risk of damage by the hood, door and 

moving or hot engine parts. 

NOTE:


If it is necessary to close the hood 

during the jump starting process, 

ensure that the hood does not touch 

the battery clips or cut the insulation of 

the cables.

3. 

Stay clear of fan blades, belts, pulleys 

and other parts that can cause injury.

4. 

Check the polarity of the battery posts. 

The POSITIVE (POS, P, +) battery 

post usually has a larger diameter 

than the NEGATIVE (NEG, N, -) post.

5. 

Determine which post of the battery is 

grounded (connected) to the chassis. 

If the negative post is grounded to the 

chassis (as in most vehicles), see step 

6. If the positive post is grounded to 

the chassis, see step 7.

6. 

For a negative-grounded vehicle, 

connect the POSITIVE (RED) 

clip from the Instant Power to the 

POSITIVE (POS, P, +) ungrounded 

post of the battery. Connect the 

NEGATIVE (BLACK) clip to the 

vehicle chassis or engine block away 

from the battery. Do not connect the 

clip to the carburetor, fuel lines or 

sheet-metal body parts. Connect to a 

heavy gauge metal part of the frame 

or engine block.

7. 

For a positive-grounded vehicle, 

connect the NEGATIVE (BLACK) 

clip from the Instant Power to the 

NEGATIVE (NEG, N, -) ungrounded 

post of the battery. Connect the 

POSITIVE (RED) clip to the vehicle 

Summary of Contents for INSTANT POWER IP-75C

Page 1: ...Power safely and effectively Please read and follow these instructions and precautions carefully POR FAVOR GUARDE ESTE MANUAL DEL PROPIETARIO Y LEER ANTES DE CADA USO En este manual se explica c mo ut...

Page 2: ...WARNING Possible explosion hazard Contact with battery acid may cause severe burns and blindness Keep out of reach of children ADVERTENCIA Posible Riesgo de una explosi n El contacto con una bater a...

Page 3: ...any equipment you intend to use in the vicinity of the battery Review the cautionary markings on these products and on the engine 1 12 This Instant Power employs parts such as circuit breakers that te...

Page 4: ...rsuant to Canadian Regulations use of an adapter plug is not allowed in Canada Use of an adapter plug in the United States is not recommended and should not be used 5 INSTALLATION INSTRUCTIONS 5 1 Rem...

Page 5: ...ANT The CHARGING red LED and the CHARGE green LED do not operate during this method of charging Using this method to charge the battery overrides the maintain mode and the battery can be overcharged M...

Page 6: ...f required 4 If the 12V DC device draws more than 15A or has a short circuit the internal fuse of the Instant Power will blow and disconnect the power to the device If this occurs the fuse must be rep...

Page 7: ...ections are reversed The Instant Power s battery is not charged The vehicle s battery is defective Check for poor connection to battery and frame Make sure connection points are clean Disconnect the I...

Page 8: ...and approved for use with this product This Limited Warranty is void if the product is misused subjected to careless handling repaired or modified by anyone other than Manufacturer or if this unit is...

Page 9: ...CCIONES CADA VEZ QUE UTILIZA EL INSTANT POWER 1 11 Para reducir el riesgo de explosi n de una bater a siga estas instrucciones y aquellas publicadas por el fabricante de la bater a y por el fabricante...

Page 10: ...r a eliminar la corrosi n producida por aire No toque ojos nariz o boca 3 3 Determine el voltaje de la bater a consultando el manual del usuario del veh culo y aseg rese de que la tensi n de salida de...

Page 11: ...ue la bater a interna est totalmente cargada Una luz LED roja CARGANDO indica que el Instant Power est cargando conectado a una fuente de poder de CA A carga completa la luz LED verde CARGADA se encen...

Page 12: ...la bater a Conecte el gancho POSITIVO ROJO al chasis del veh culo o al bloque motor alejado de la bater a No conecte al carburador l neas de combustible o cuerpos met licos Conecte a una pieza met lic...

Page 13: ...de pl stico de las pinzas de la bater a 9 4 Para realizar mantenimiento no es necesario abrir la unidad ya que no existen piezas a las cuales puede realizarle mantenimiento el usuario Cualquier otro...

Page 14: ...a bater a de la fuente de poder no est cargada El aparato de 12V absorbe m s de 15A o tiene un corto circuito Encienda el aparato de 12V Verifique la condici n de carga de la bater a girando el interr...

Page 15: ...da ser nula si el producto se utiliza en forma err nea se trata de manera inadecuada es reparado o modificado por personas que nos sean el Fabricante o si esta unidad es revendida a trav s de un vende...

Page 16: ...celles publi es par le fabricant de la batterie et du fabricant de tout autre appareil que vous pensez utiliser au voisinage de la batterie Examinez les avertissements inscrits sur ces produits et su...

Page 17: ...ouchez pas les yeux le nez ou la bouche 3 3 D terminez la tension de la batterie en vous r f rant au guide d utilisation de votre v hicule et assurez vous que le tension de sortie correspond la tensio...

Page 18: ...ternatif Quand la charge compl te le voyant rouge EN COURS DE CHARGE s allume 7 5 Charge de la batterie interne l aide du chargeur int gr 1 Pour charger brancher un 18 calibre AWG 0 82 mm2 ou la plus...

Page 19: ...ssis du v hicule ou au bloc moteur l cart de la batterie Ne pas connecter la pince au carburateur la canalisation d essence ou des pi ces en t le Connectez une grosse pi ce de m tal de la carrosserie...

Page 20: ...s les c bles et le bo tier du Instant Power 9 3 Garantissez que toutes les composantes de Instant Power sont dans l endroit et dans la bonne condition de travail en incluant les bottes de plastique su...

Page 21: ...bouton d tat de la batterie Contactez un technicien qualifi pour remplacer le fusible La batterie interne ne garde pas la charge La batterie est d fectueuse n accepte pas de charge Remplacer la batter...

Page 22: ...ou modifi par une personne autre que le fabricant ou si cet appareil est revendu par un d taillant non autoris Le fabricant ne fait aucune autre garantie y compris mais sans limiter garantie expresse...

Page 23: ...___________________ Esta es la nica garant a limitada expresa y el productor no autoriza ni otorga a alguien a realizar alguna otra obligaci n No existe ninguna otra garant a m s que la descrita en el...

Page 24: ...RIGINAL puisqu il sera requis pour une ventuelle r clamation au titre de la garantie Cette garantie n est pas transf rable Envoyer la carte de garantie seulement NE PAS ENVOYER L UNIT CETTE ADRESSE PO...

Reviews: