VARISTAR LHX 20
Maintenance and Repair
Cooling module 60714-050
www.schroff.biz
29
R2.1, May 10, 2012
7.4.4 Replacing the electric control valve actuator
Attention!
Before replacing the control valve actuator the cooling module
must
be
isolated from the mains voltage.
Switching off with the standby button is
not
sufficient, since the actuator
remains live and may be damaged during removal or fitting.
For fitting, the actuator must be in the 0 position.
During commissioning and on every time power is applied to the actuator, the
actuator performs a self-calibration routine (valve stroke 0 - valve stroke max.-
valve stroke 0). No manual interventions are permitted during calibration.
If the actuator is operated without the valve, its correct functioning cannot be
guaranteed.
After three calibration attempts the valve stem remains extended. Before
mounting the actuator on the control valve the power must be disconnected and
the valve stem brought to the 0 position by hand.Once the actuator has been
correctly fitted to the control valve and the power reconnected, the self-calibra-
tion cycle is repeated.
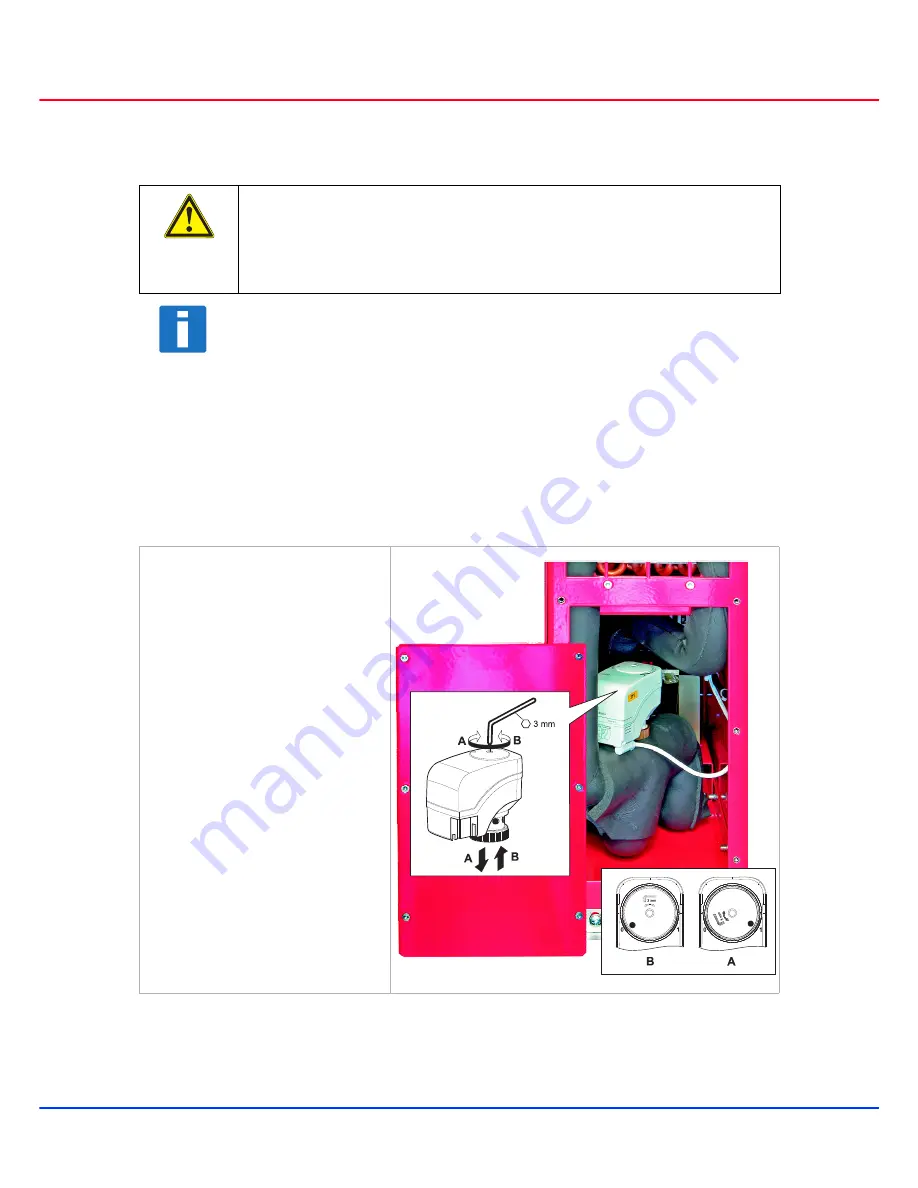
1 Isolate cooling module from
mains supply.
2 Open the rear of the cabinet.
3 Remove cover plate from the
lower part of the cooling module.
4 Undo retainer nut on actuator
and remove actuator.
5 Disconnect electrical connector.
6 Fit new unit following the above
steps in reverse.
Note:
Actuator must be in
position "0"; see notes on the
actuator.
Summary of Contents for 60714-050
Page 51: ......


